How to Setup and Work With Checklists
Checklists allow you to create an inspection sheet/checklist for vehicle diagnosis, service, troubleshooting, and so on. A vehicle inspection is an example of a checklist.
In this article
- Structure of a Checklist
- Checklist Templates
- Checklist Template Item Groups
- Checklist Items
- Setup to Create a Checklist automatically
Structure of a Checklist
The following is the structure of a checklist:

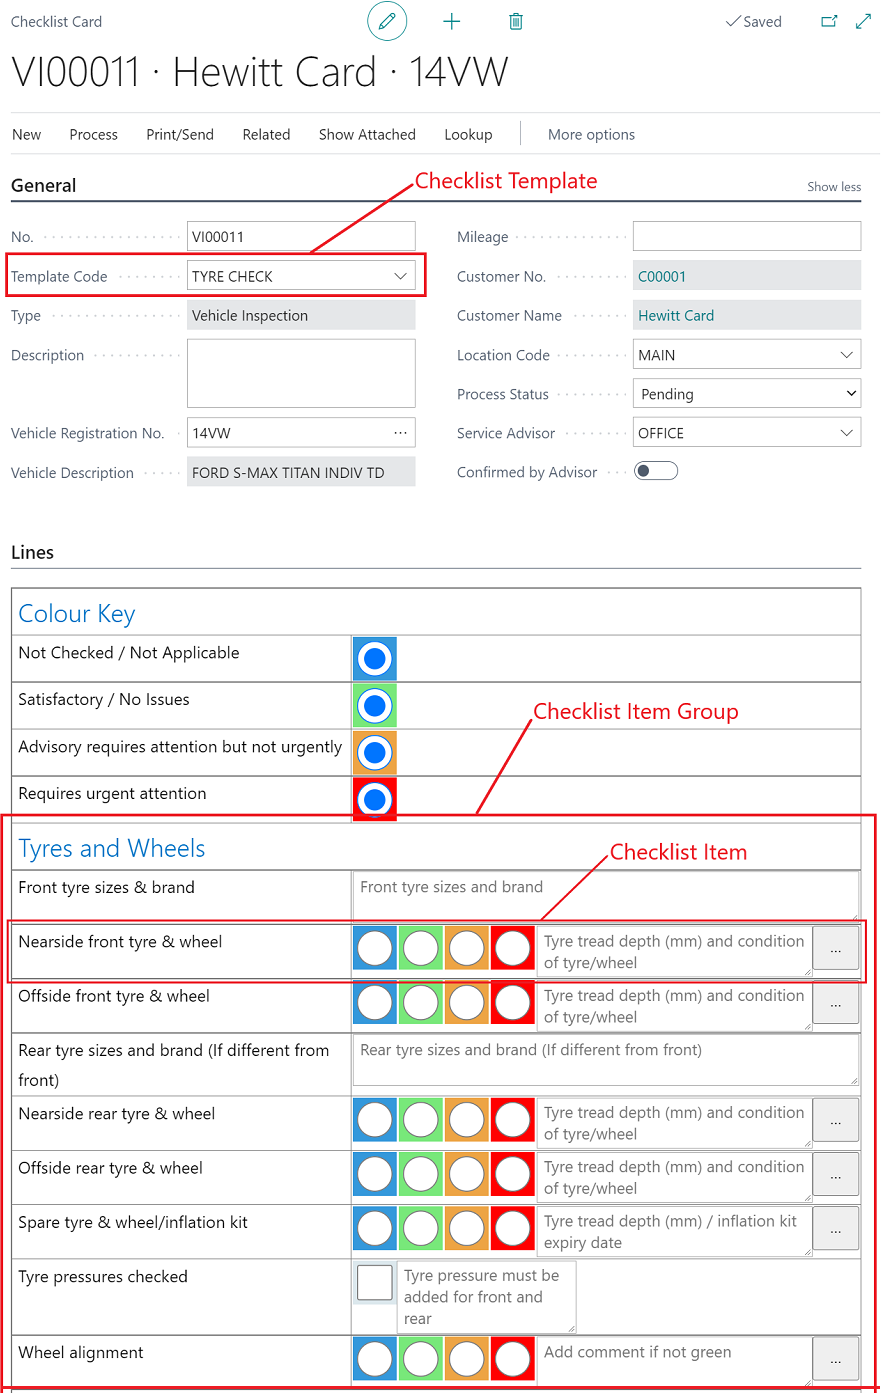
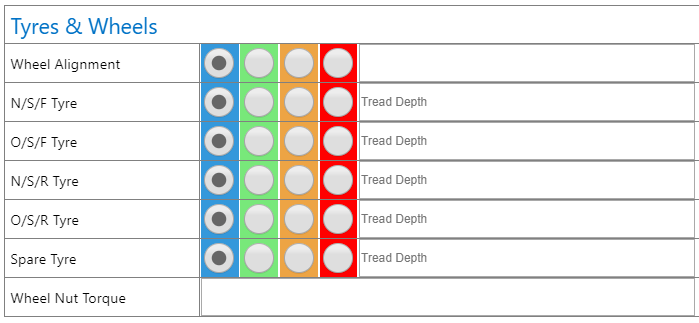
Here’s an example of how a checklist looks when it’s fully set up:
Checklist Templates
A Checklist Template is considered the header of the Checklist. To view and create new Checklist Templates in your system:
- Enter Checklist Templates in the
 icon, and select the related link.
 - Select New from the menu bar, to create a new Checklist Template.
- The following is what you can setup in the Checklist Templates page:
- Code - To identify the template in the system.
- Description - To describe the template.
- Type - It can be either Vehicle Inspection or Quality Control.
- Tech Signature Prompt checkbox - When enabled, it prompts the technician to to sign off the checklist when done.
- Approver Signature Prompt checkbox - When enabled, it prompts the person confirming the checklist to sign off the checklist.
- Show Faults and Actions checkbox - When enabled, it shows the Faults and Actions fasttab in the checklist.
-
Printout Type - It can be either Standard or Two Columns.
NoteThe checklist template description will be the description of your checklist that you select from when deciding which checklist to complete as a technician. - Each Checklist Template must have at least one Checklist Template Item Group.
Checklist Template Item Groups
Checklist Template Item Groups are the groups of the list of questions in a checklist. They are grouped according to their purpose in a checklist, for example questions in a checklist concerning the tyres are grouped together, and so on.
- To create a new Checklist Template Item Group, select the Checklist Template you have created, and choose Linked Item Groups from the menu bar.
-
From the Checklist Template Item Groups page, click on the Group Code column, and choose Select from full list.
-
From the Select - Checklist Item Groups page, select New from the menu bar, to create a new Checklist Item Group; add the Code and Description for the checklist item group.
 NoteChecklist Template Item Groups can be linked to multiple Checklist Template, for example a Tyre Checkist Item Group could belong in the Full Service Checklist Template and the Interim Service Checklist Template.
Checklist Items
Checklist Items are where you enter your checklist questions; a checklist item for example could be about tyres and could consist of a traffic light system and check boxes like the example below.
-
To create new Checklist Items for the Checklist Template Item Group that you have created, select the ellipsis (…) at the menu bar, and then Items.
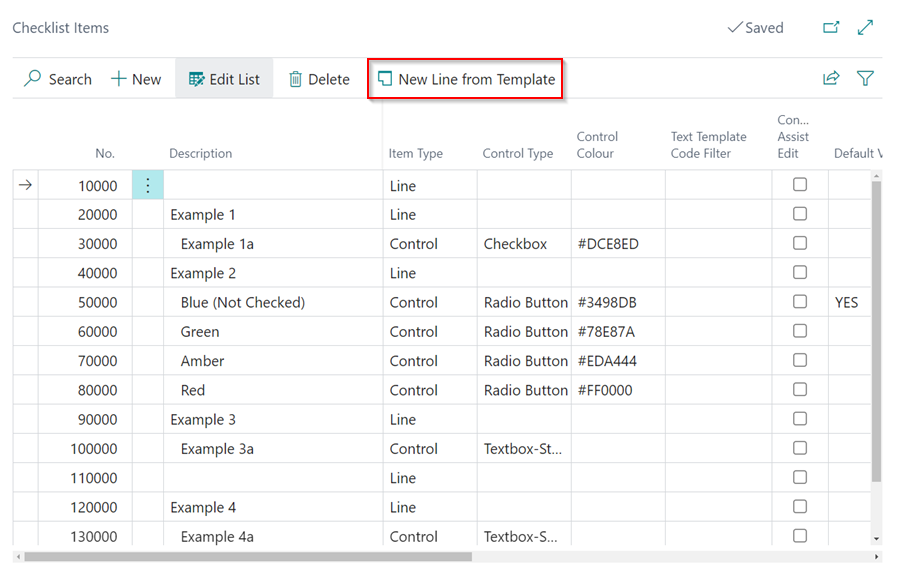
- The following is what needs to be setup in the Checklist Items page:
- No. - Each line must have a number, this is the order in which the questions will appear.
- Description - The caption is what will appear on the line of the questions.
- Item Type - Choose from either Line (a title) or Control (an entry).
- Control Type - Select from what type of entry you want.
- Radio Button
- Textbox-Small
- Textbox-Large
- Checkbox
- Default Value - You can populate a field with a default value to determine which radio button is pre-ticked.
- Attention If Has Value Ticking this box will allow the Advisor to see from the list of checklists if any particular checklist requires attention. Any entry on a line with this ticked will flag a checklist.
-
To add Checklist Items lines, use the available template from the menu bar by selecting New Line From Template. Add the templates according to the question or information required:
- This provides you with the following templates:
-
Checkbox

-
Radio Buttons: B.G.A.R

-
Textbox

-
-
After adding the Checklist Items ensure you link it to the Checklist Item Group, by clicking the OK button in the Select - Checklist Item Groups page.
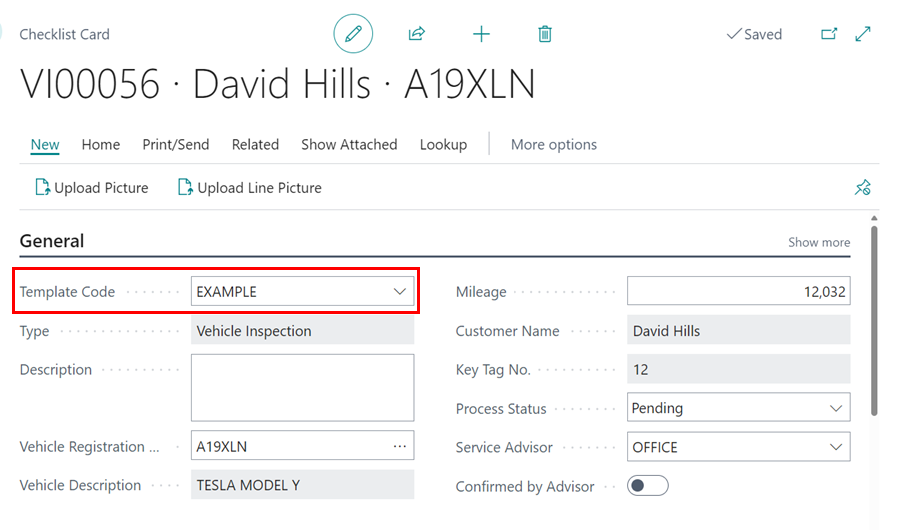
-
The Checklist Template is now ready to use. Create a new Checklist and select the Checklist Template you have created as the Template Code.
Setup to Create a Checklist Automatically
Checklists can be set to be created automatically in response to a specific system trigger, as follows:
-
In the top-right corner, choose the
icon, enter Checklist Template Selection, and select the related link.
- In the Trigger column, choose either On Jobsheet Creation, which means the Checklist will be created when a new Jobsheet is created, or On Allocation Completion, which means the Checklist will be created when an allocation is marked as complete.
- Then, on the other columns, define the criteria for creating the Checklist. Select the Customer Category Code to create a checklist for if the customer falls into this category.
-
Select the Service Type that the document has for the Checklist to be created, followed by the Checklist Template Code that the Checklist created will have.
- This now allows you to automatically create Checklists based on the criteria you’ve specified.
See also
Video: How to create Checklist Templates in Garage Hive
How to perform a Vehicle Inspection
How to use VHCs