How to Create a Vendor Card in Garage Hive
In Garage Hive, a Vendor card is used to store all the relevant information about a vendor or supplier. This includes their name, address, phone number, email address, payment and invoicing details, and any other relevant information. You can easily create a Vendor card from the Role Centre or the Home Screen.
Creating a Vendor Card From the Role Centre
-
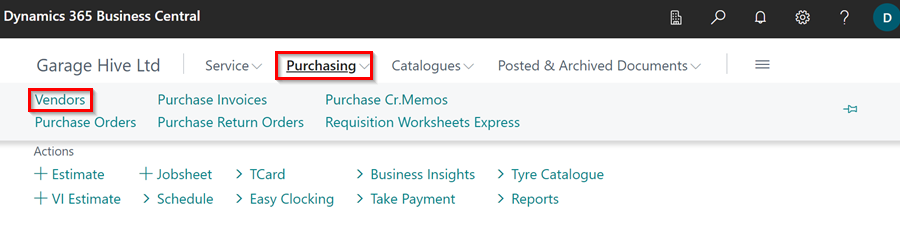
From the Role Centre, select Purchasing, followed by Vendors.
-
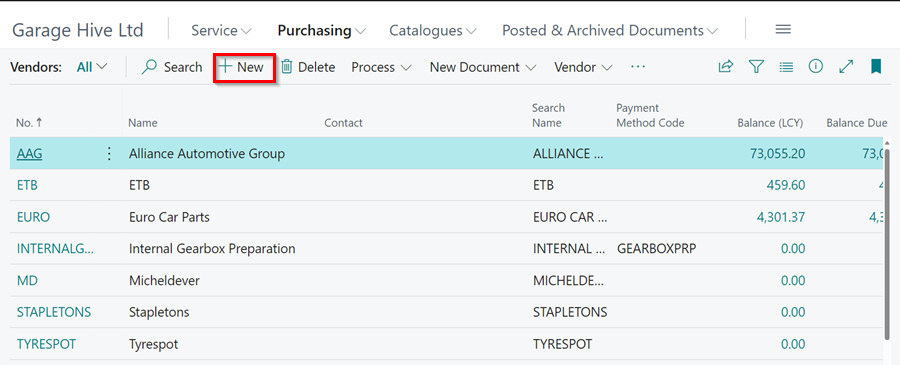
Click on New in the vendor list that opens.
-
A new Vendor card will now be created, and you can start adding details about the Vendor.
Vendor Card Details Sections
The Vendor card is divided into several sub-categories, as listed below:
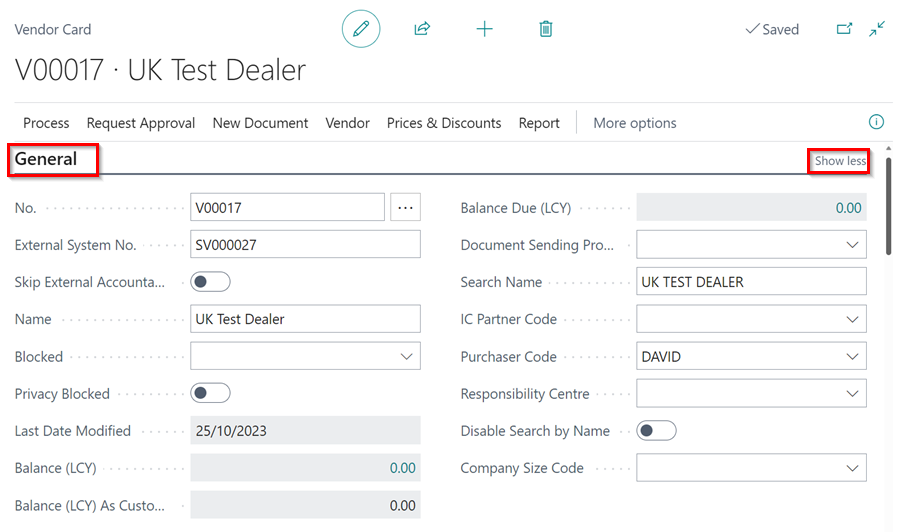
1. General Information
In the General section, you can add or view general Vendor details, such as the Name, assigned No. in the system, External System No., Balance Due(LCY), whether they are Blocked or not, among other general information about the Vendor. Click on Show More/less in the top right of the General section, to reveal more fields or hide some of the fields.
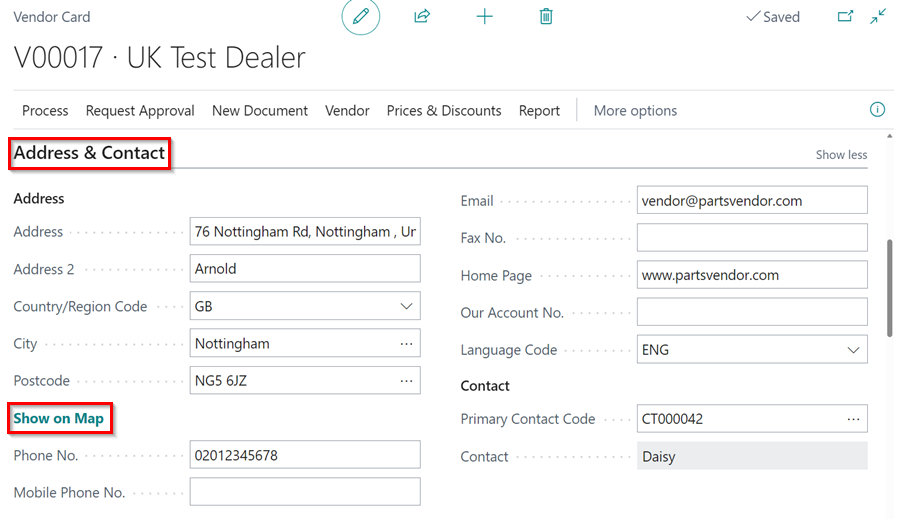
2. Address & Contact
The Vendor’s address and contact details are contained in this section. After entering the address details, you can select Show on Map to view the exact location on maps.
3. Invoicing
In the Invoicing section, the posting details of the Vendor are added here.
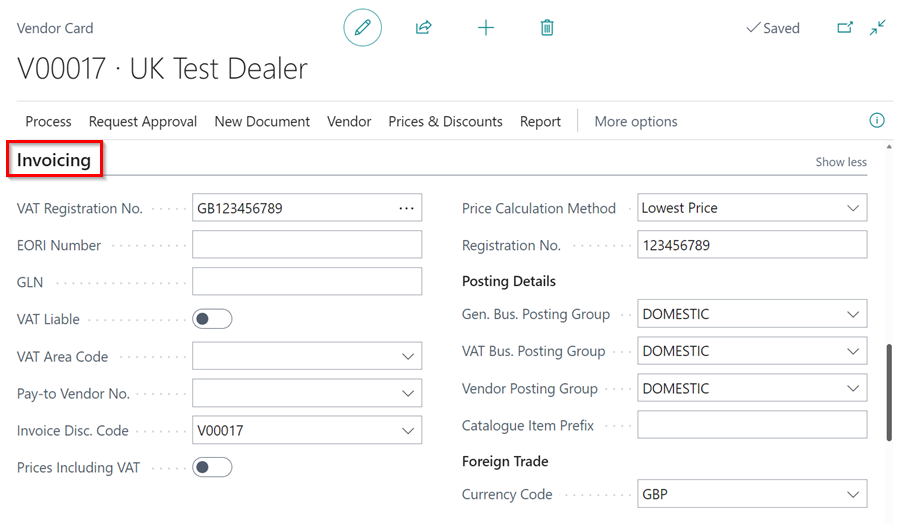
- VAT Registration No. - Fill in the Vendor’s VAT Registration Number.
- Prices Including VAT - If this is selected any purchase orders for this Vendor will always calculate prices including VAT.
- Gen. Bus. Posting Group - These are pre-defined fields to select from.
- VAT Bus. Posting Group - These are pre-defined fields to select from. Please note that the majority of the time this should be set up as DOMESTIC.
- Vendor Posting Group - These are pre-defined fields to select from. Please note that the majority of the time this should be set up as DOMESTIC.
- Nonstock Item Prefix - If you enter a prefix here for a non-stock item from this vendor, it will appear before the part number when it is brought into stock.
4. Payments
In the Payments section, we have the application method, payment terms, payment method, and other related information about the vendor’s payment.
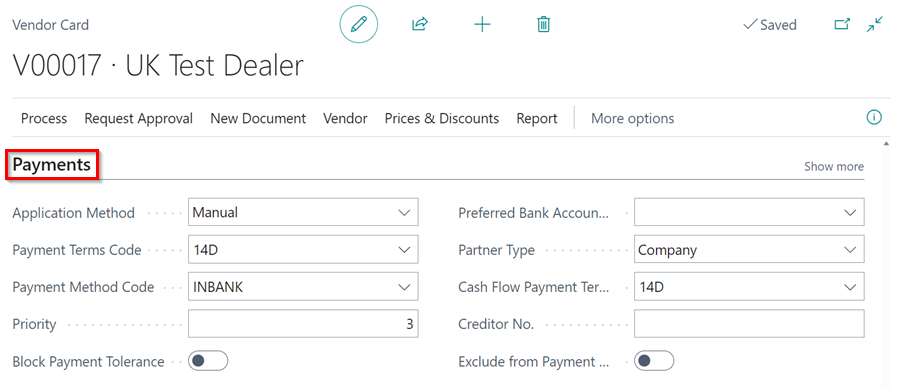
- Application Method - Specifies how to apply payments to entries for this Vendor.
- Payment Terms Code - Specifies a formula that calculates the payment due date.
- Payment Method Code - Specifies how to make a payment, such as with bank transfers, cash or cheque.
- Priority - Specifies the importance of the vendor when suggesting payments using the Suggest Payments function.
- Block Payment Tolerance - Specifies if the vendor allows payment tolerance.
- Preferred Bank Account - Specifies the vendor bank account that will be used by default on the payment journal lines for export to a payment bank file.
- Partner Type - Specifies if a Vendor is a person or company.
- Cash Flow Payment Terms - Specifies a payment term that will be used for calculating cash flow.