Setting Up Online Documents
To enable the online documents in your system, you must first contact the Garage Hive Support team so that the service can be enabled. In this article, we’ll go over the steps to take after the service has been activated in your system.
In this article
Online documents set up
If your system already has the service activated, the following steps will help you to fully configure the online documents:
-
in the top-right corner, choose the
 icon, enter Online Documents Setup and select the related link.
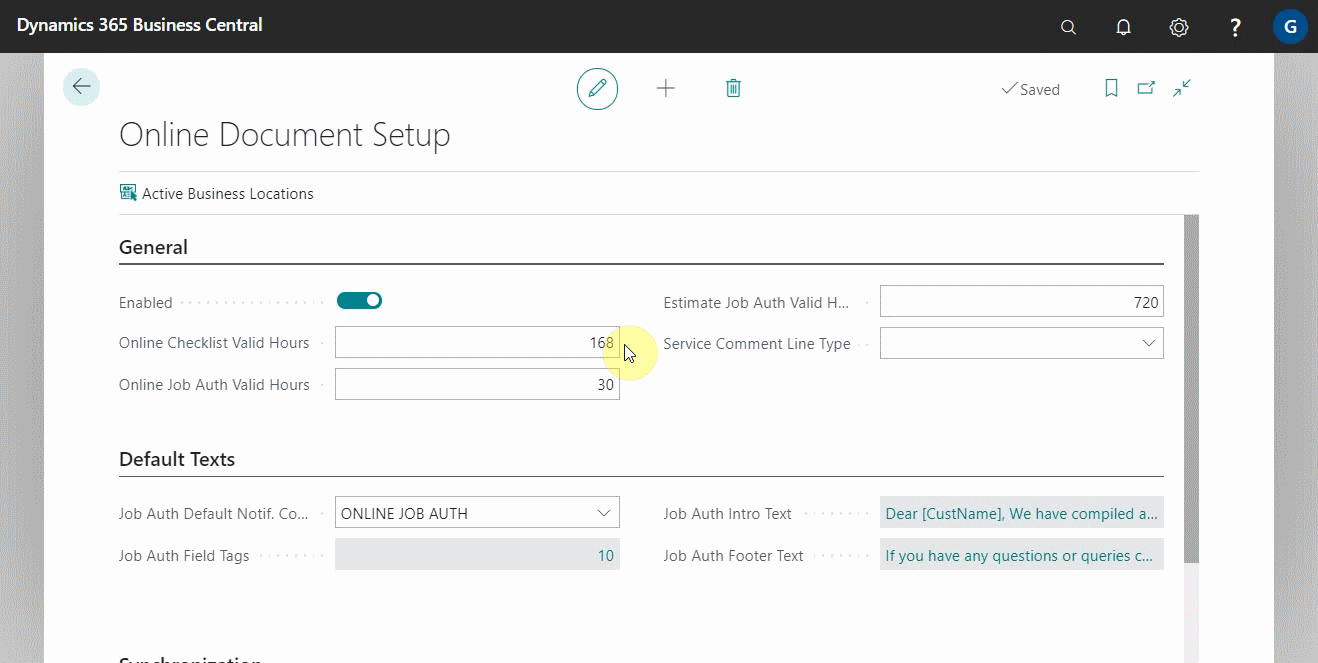
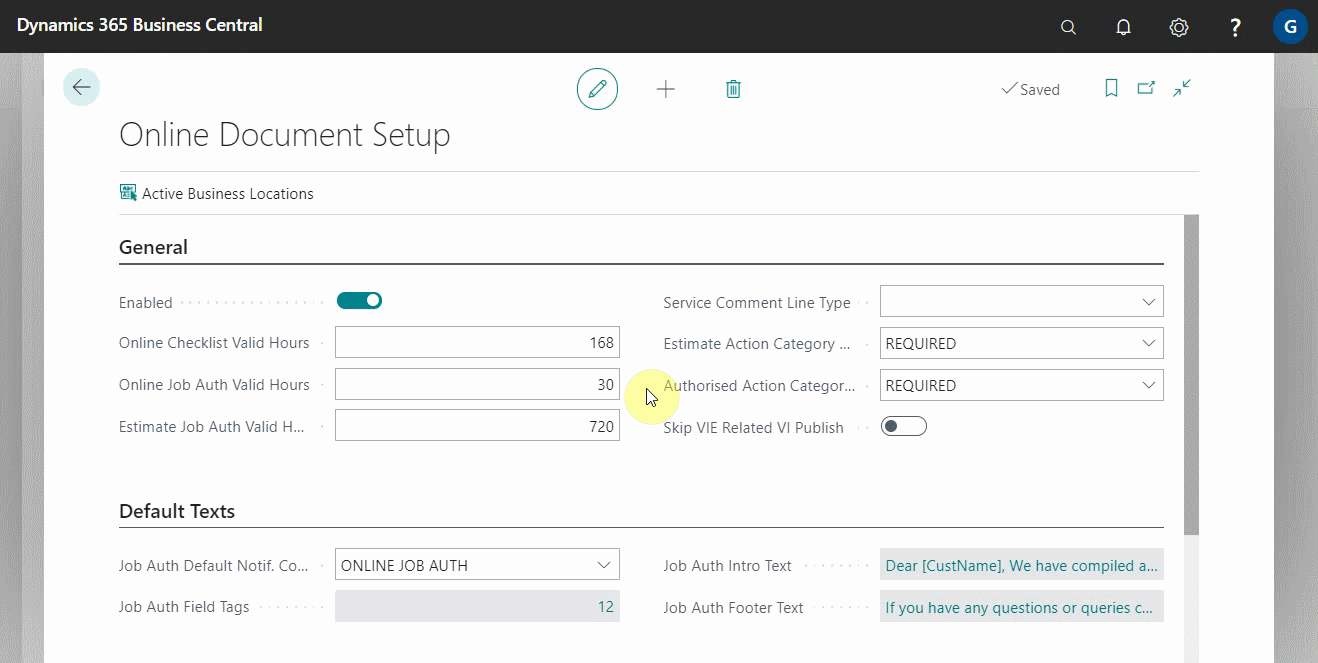
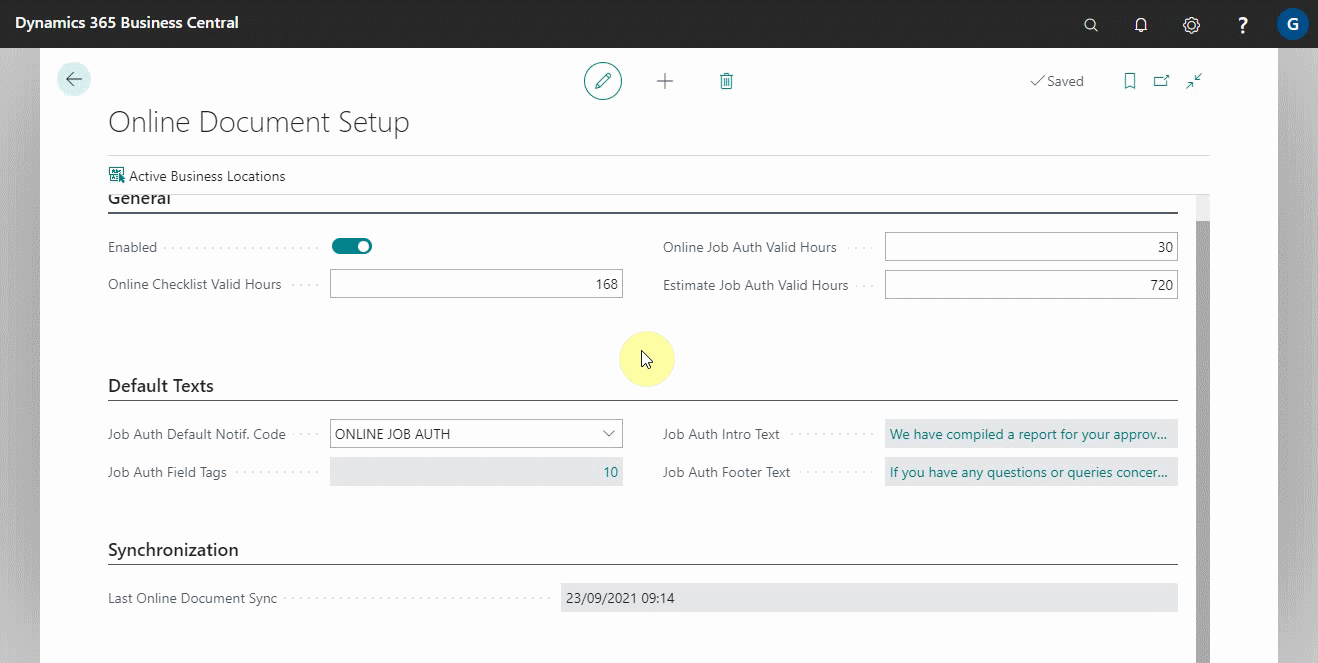
- Make sure the Enabled slider is turned on.
- Set the Valid Hours for online documents, which is the number of hours the previewed or published online document lasts before expiring.
-
Set the Service Comment Line Type field to Online Doc. This field specifies the internal notification that the online document will use; for example, when a customer approves the document, the system indicates the communication as a comment from the selected Code in the field.
-
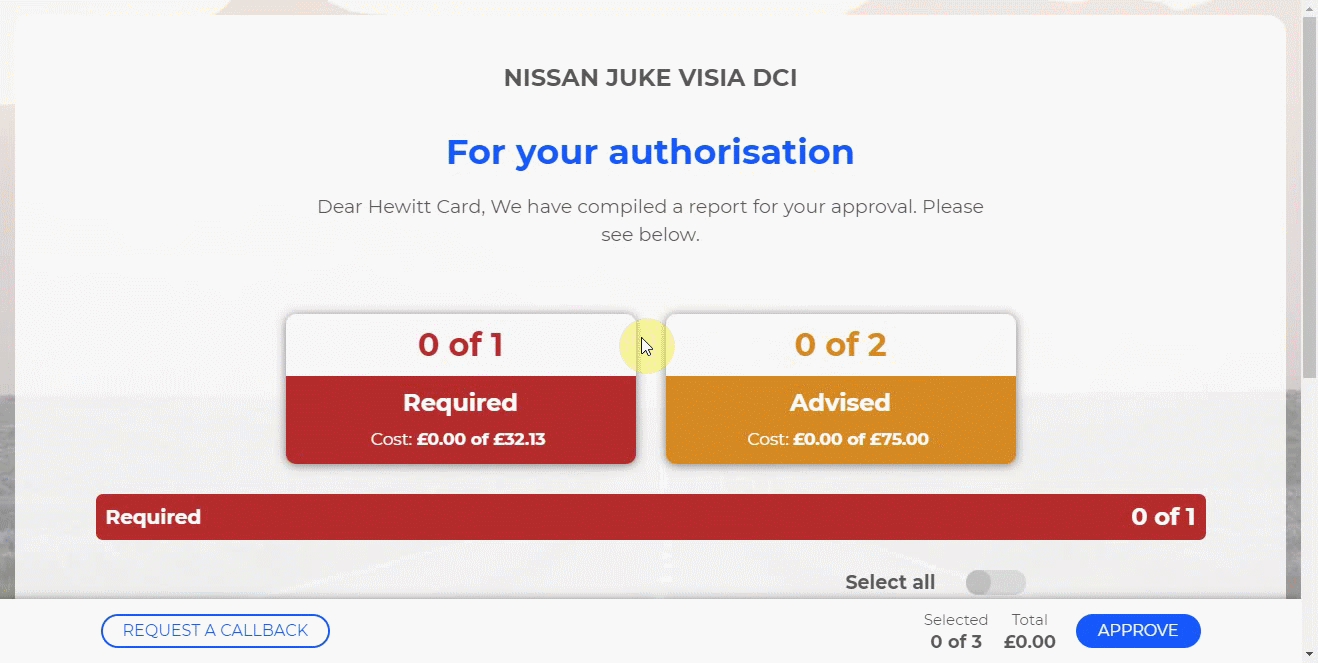
To avoid having a VI Download PDF option when publishing the Vehicle Inspection Estimate, as shown below…
Enable the Skip VIE Related VI Publish slider.
-
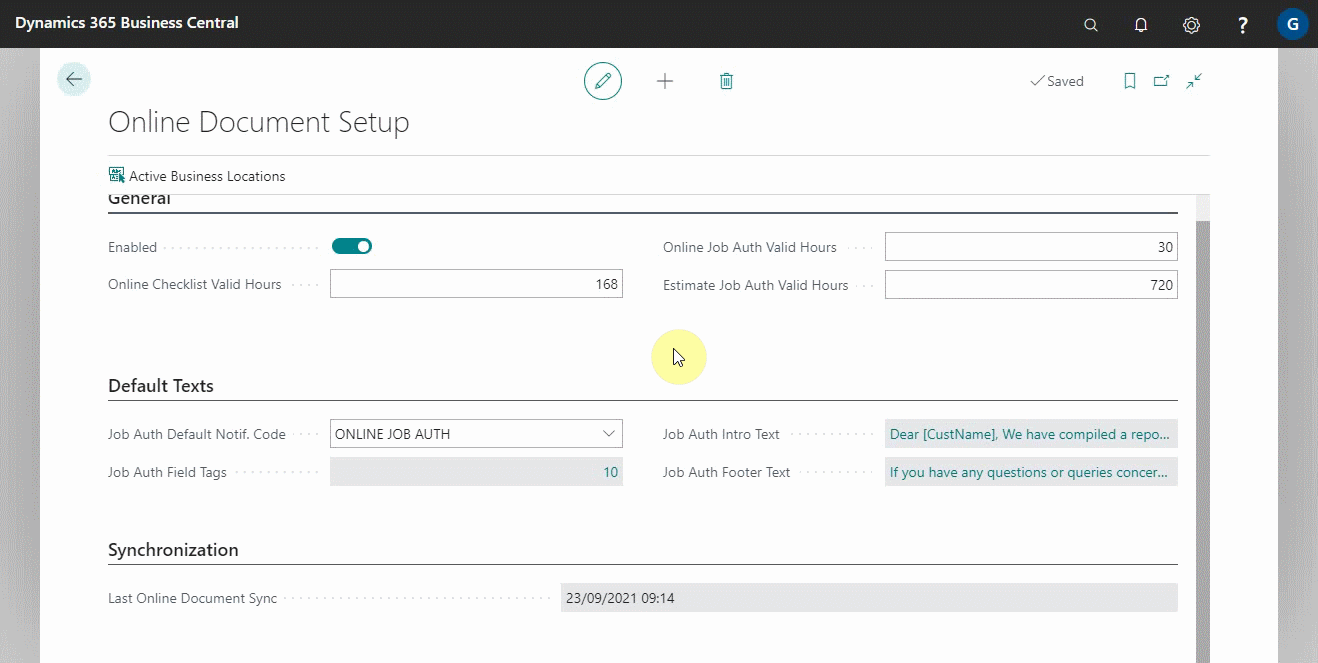
Add an introduction text in the field Job Auth Intro Text from the FastTab titled Default Texts. This is the text that appears at the top of the online document that has been previewed or published. You can use the Field Tags to automatically insert a particular field in the text.
-
Add the footer text in the next field, Job Auth Footer Text. This is the text that appears after the report in the online document.
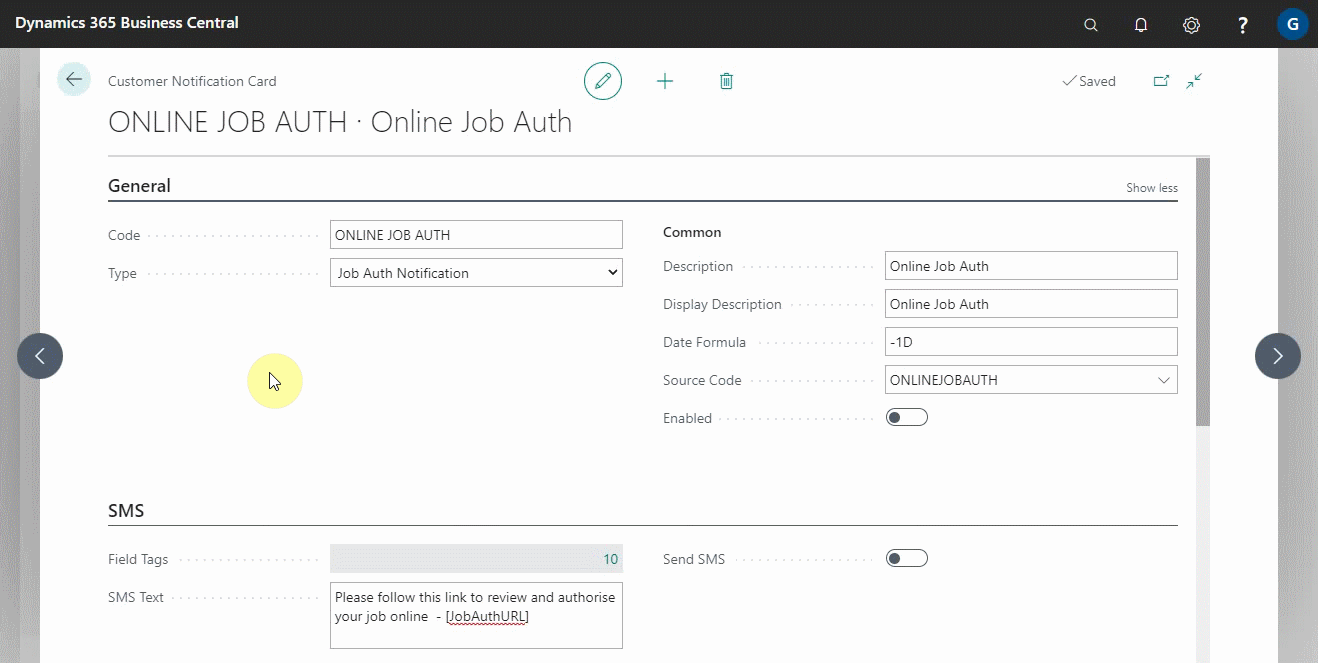
Customer notification set up
The customer notification setup allows you to specify how the customer will receive the online documents link, when and after how long, and the message body. The following are the steps to take for the setup:
- From the icon, at the top-right corner, search for Customer Notifications and select it from the search results.
-
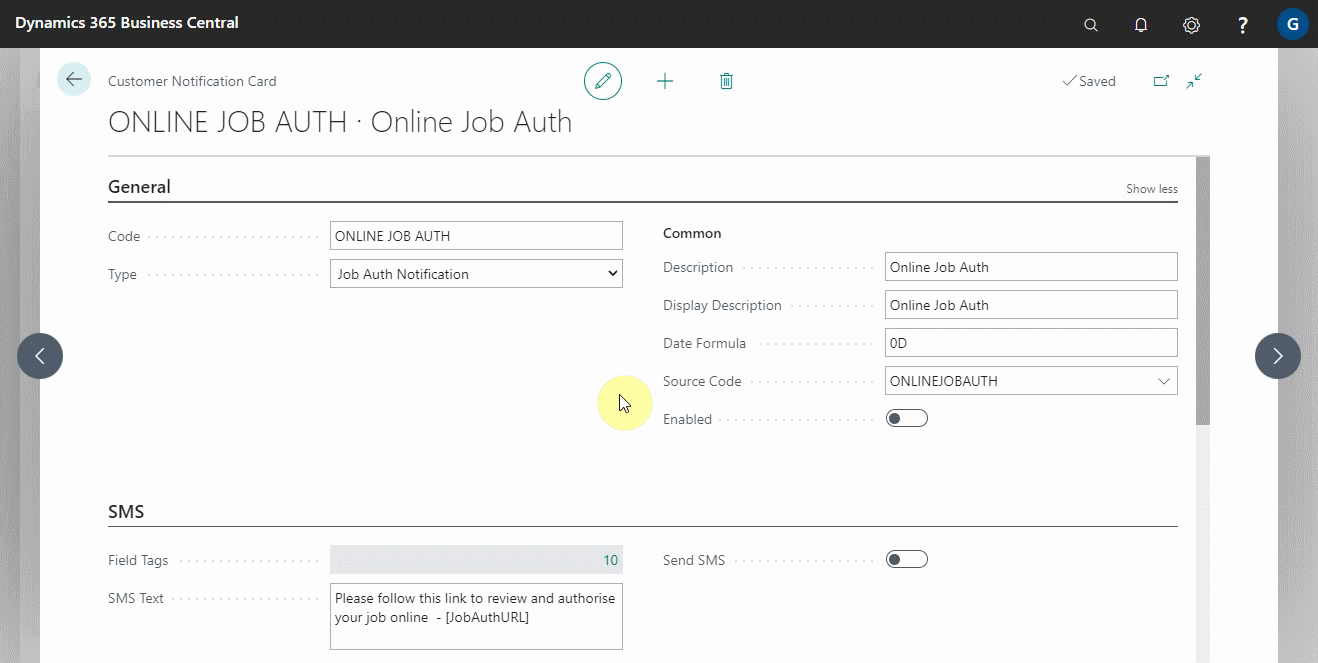
From the window that opens, choose Online Job Auth.
-
Under the General section, you can set the Date Formula to -1D (-1 Day) to ensure that the system sends the link to the customer immediately.
-
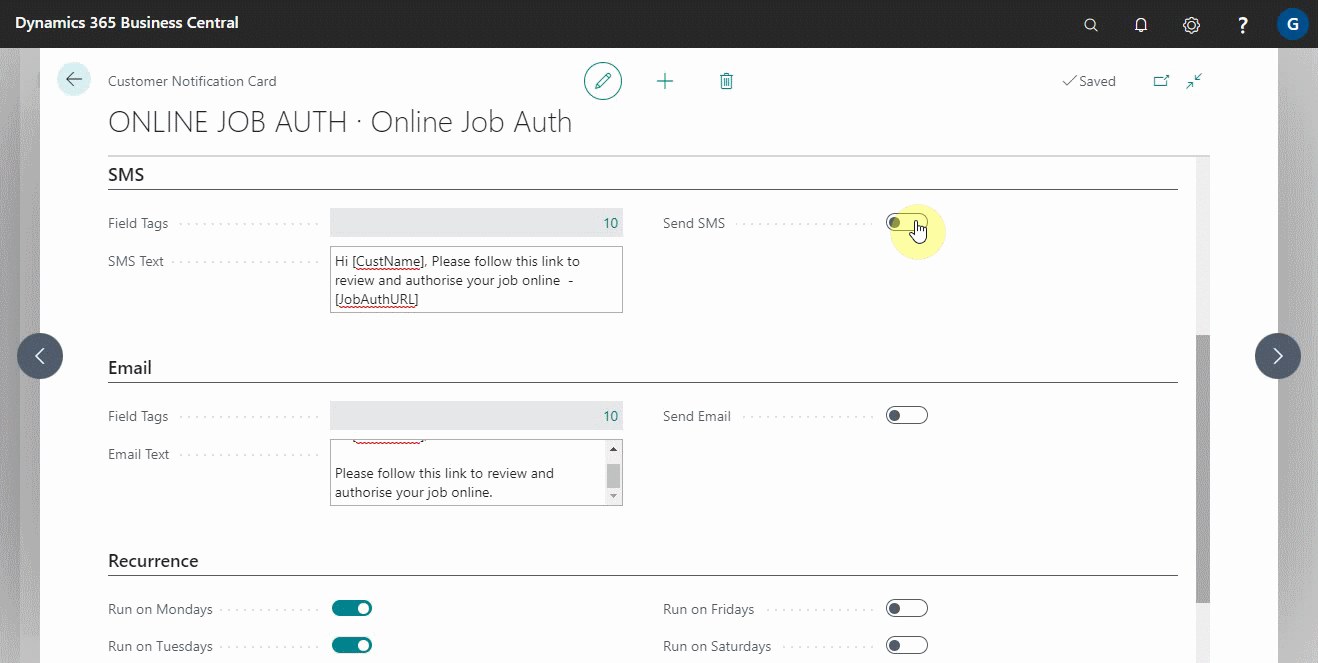
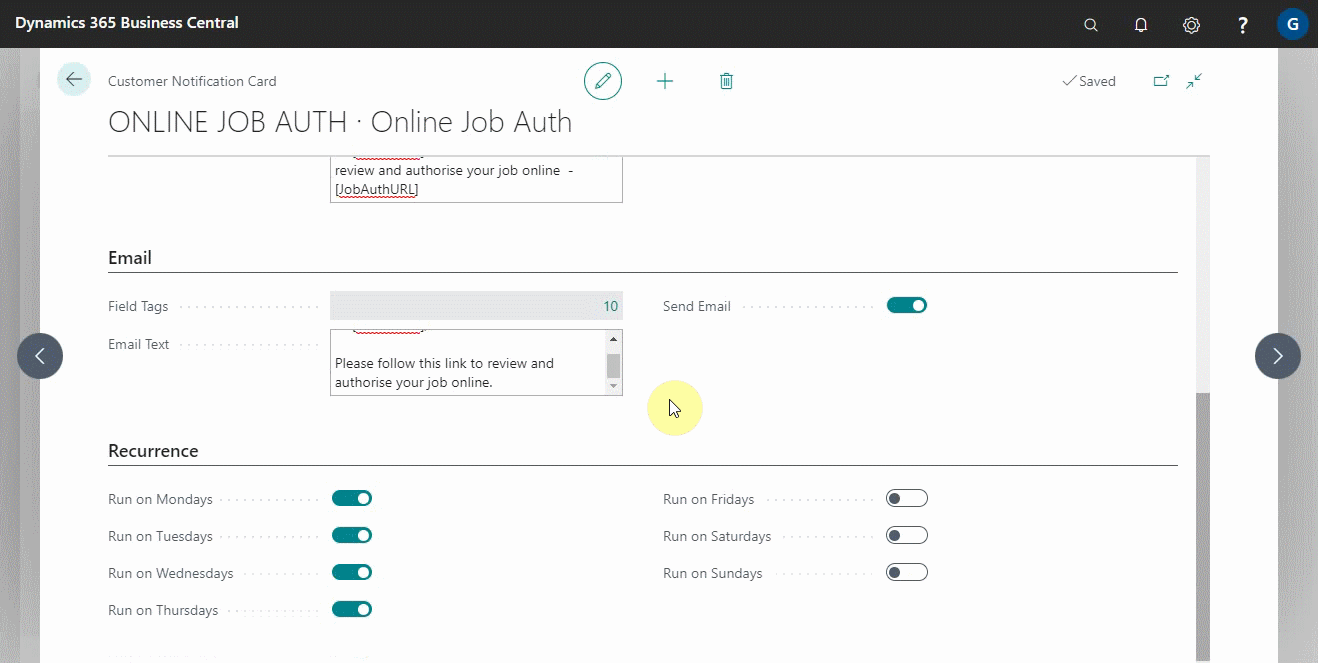
Add the message body to both the SMS and the Email sections, using the provided field tags to add a specific field in the message body.
-
Select the slider next to the Send SMS and Send Email fields to enable sending SMS and Email. A pop-up window will appear, allowing you to select a default document to preview the messages.
-
Under the Recurrence section, select the days on which you want the system to send the notification, and enable the customer notification under the General section.
After you have completed this setup, you are now ready to use the online document feature.
See Also
Introduction to Online Documents
Grouping document lines
Working with group items actions
Previewing and publishing online documents
Adding and Managing Media in Garage Hive
Using online documents in estimates, checklists and vehicle inspection estimates
What Happens When a Customer Acts on a Sent Online Document?