Previewing and Publishing Online Documents
Previewing an online document is done when the document to be previewed has been edited and you want to confirm how it will look when sent to the customer, whereas publishing is done when the document is finished and ready to send to the customer.
In this article
- How to Preview an Online Document
- How to Publish an Online Document
- Set the Online Document to Require Authorisation by Default
How to Preview an Online Document
To preview an online document from a Jobsheet:
- Scroll down to the Group Items section (where you have already created the groups, read Grouping document lines).
-
Depending on the level of urgency and the nature of the job, add an Action Category to each group. You have the option of customising the action categories or using the pre-defined action categories.
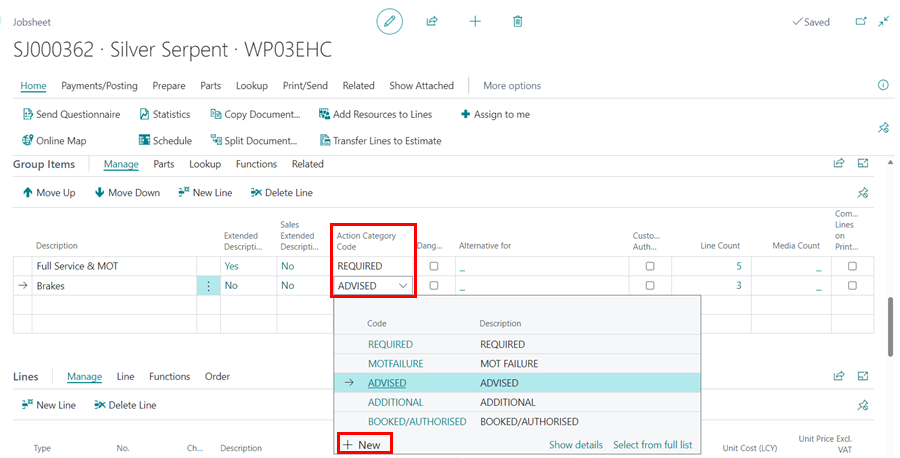 NoteTo ensure that action categories are displayed as a group online, each of them must have a Type.
 -
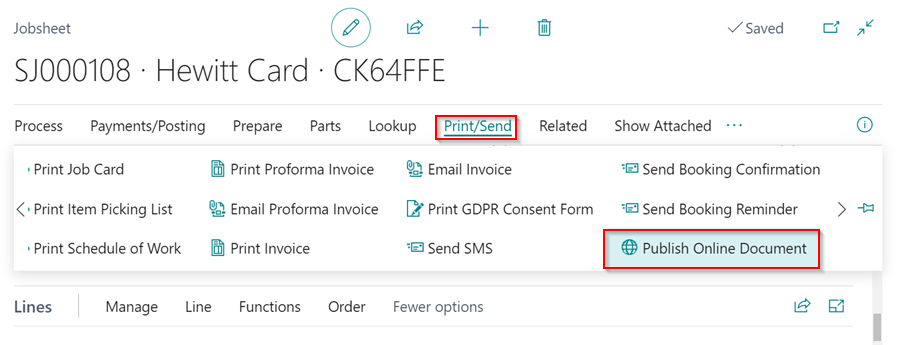
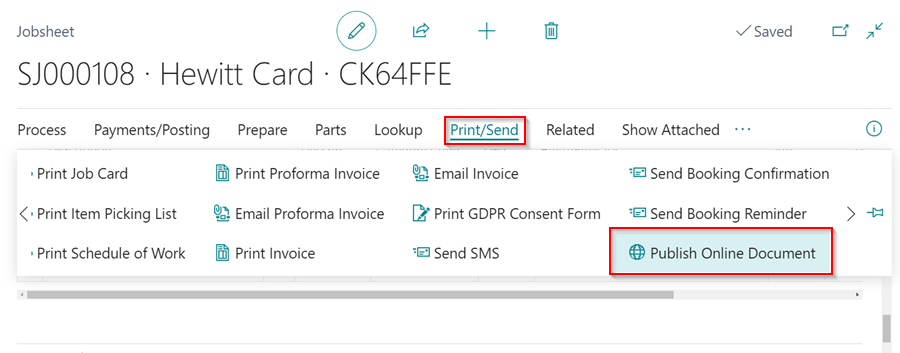
To preview the online document, select Print/Send from the document menu bar, then Publish Online Document.
-
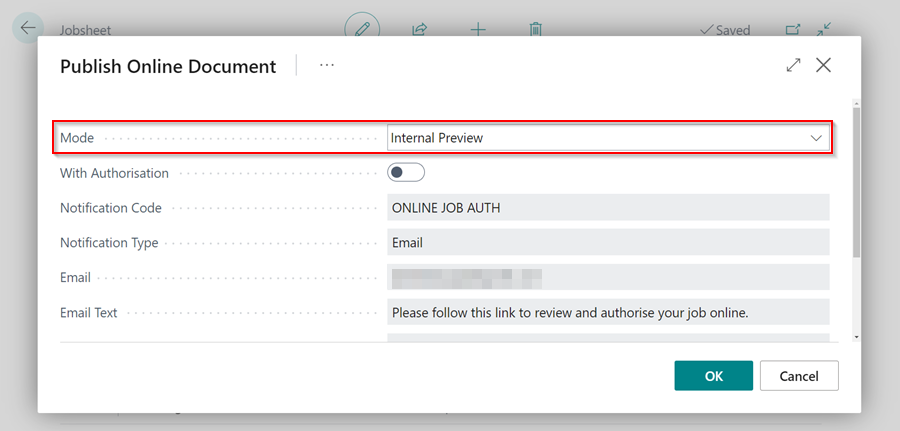
Select Internal Preview as the Mode. You can click OK because Internal Preview is always the default mode.
-
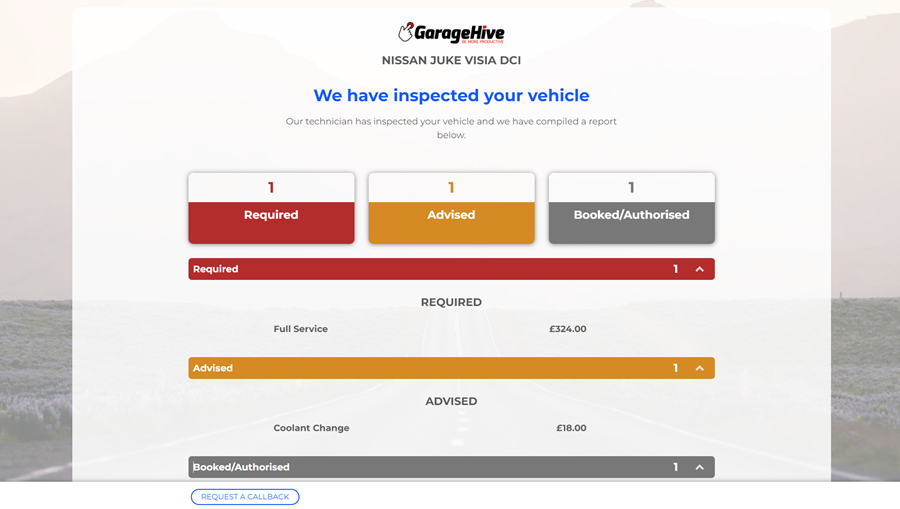
The document will be previewed without the option for the customer to authorise online. This option is primarily used to inform the customer about the work to be done.
-
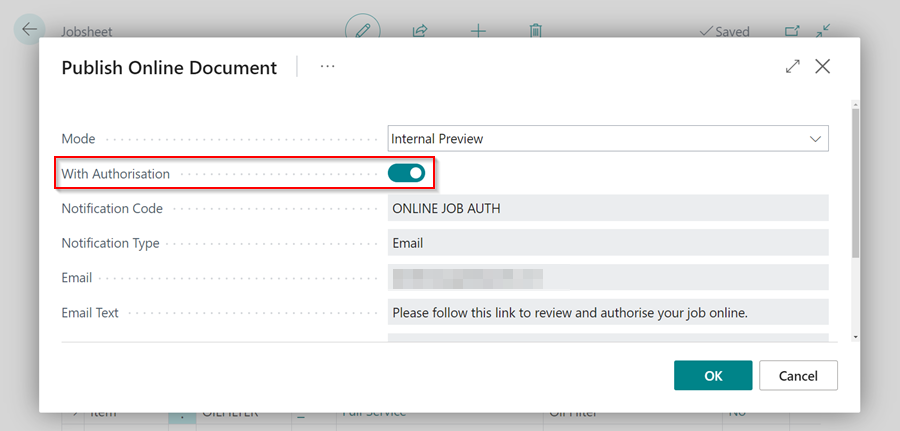
To preview the document with the option for the customer to authorise online, select the With Authorisation slider on the Publish Online Document page, then click OK.
-
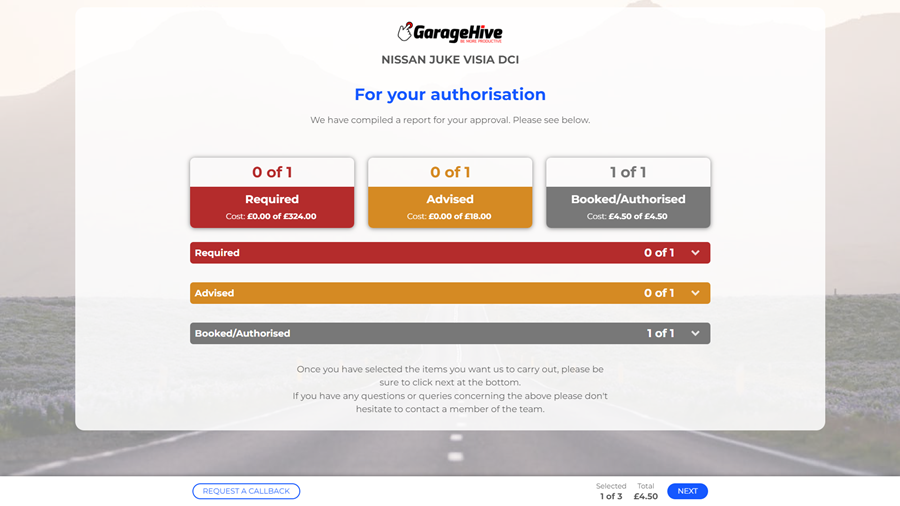
The document will be previewed with the option(s) for the customer to authorise the work online.
-
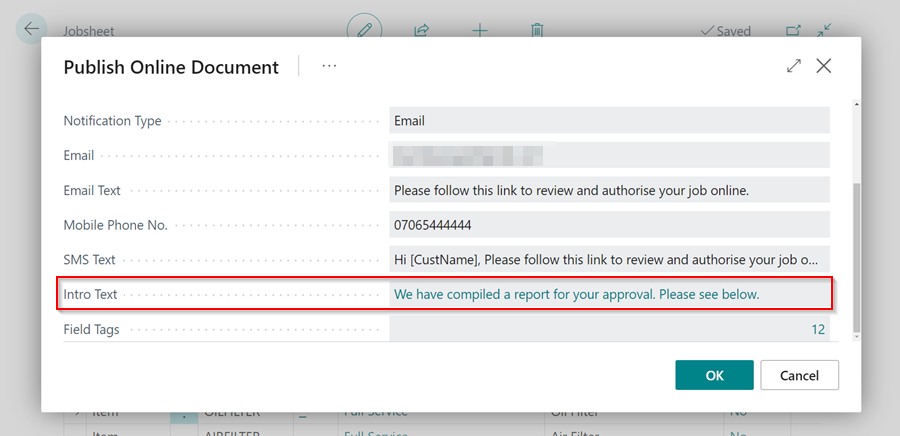
On the current document, you can edit the intro to be specific to the customer, but the intro text will revert to the default text when the document is published. Click on the Intro Text field from the Publish Online Document page to edit the intro text.
How to Publish an Online Document
After you have finished preparing the document and are ready to send it to the customer, you can now publish it. To make the document available to the customer, follow these steps:
-
From the document menu bar, select Print/Send, and then Publish Online Document.
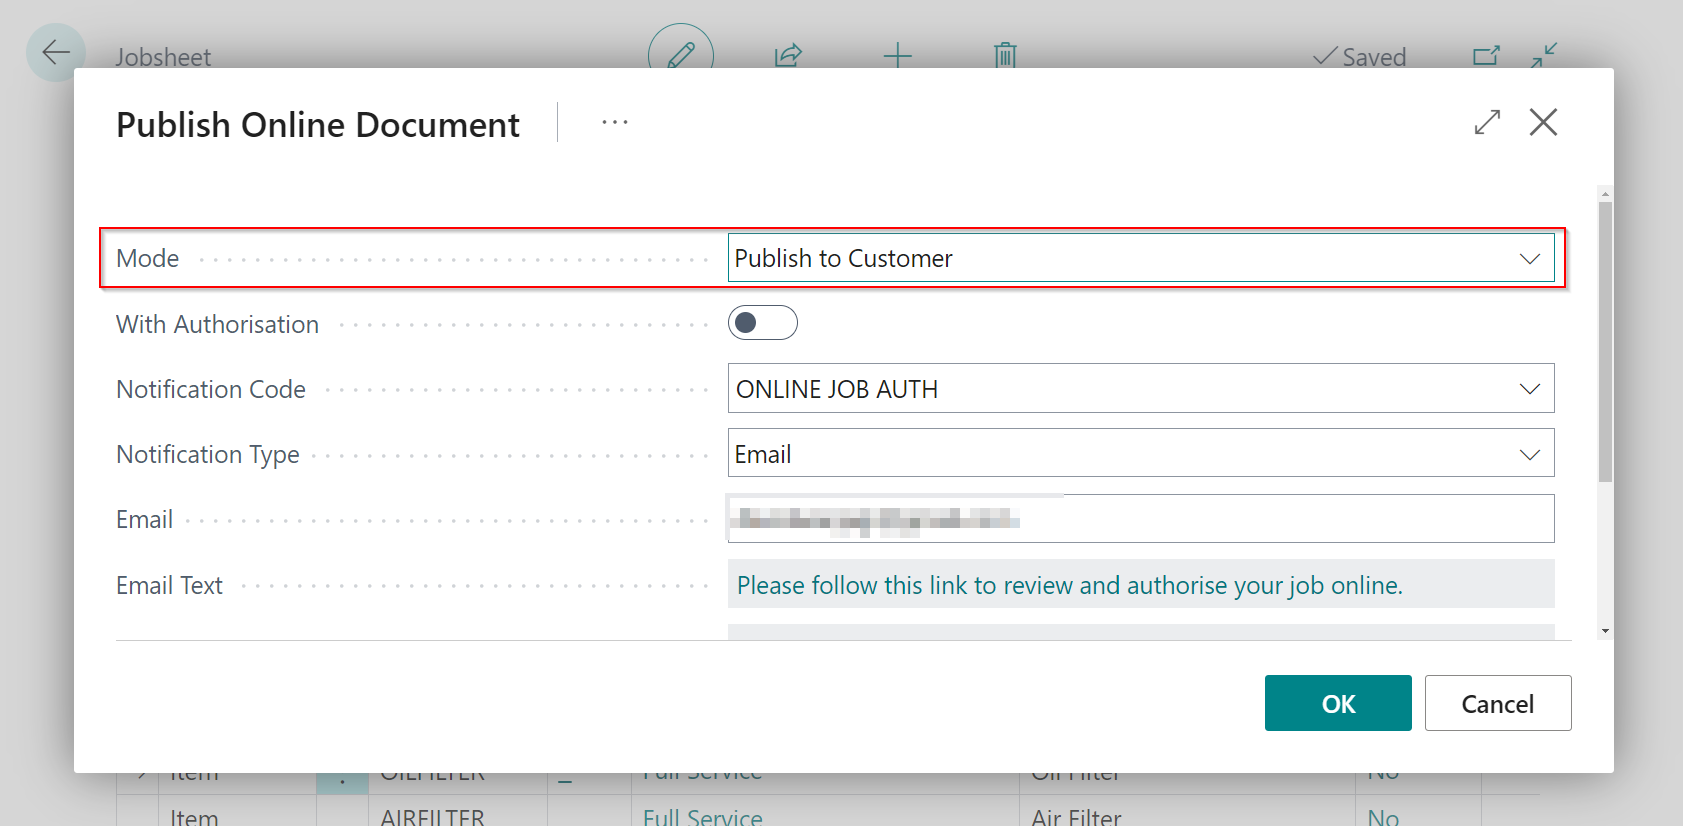
- Select the Mode to be Publish to Customer and specify the method for sending the online document. It could be via SMS, email, or both.
-
You can also personalise the text used for the SMS, Email, or online document introduction, or use previously saved text messages. Click OK to send the online document to the customer without giving the customer the option to authorise the work to be done online.
-
If the contact information is new, you get an option to update the information.

-
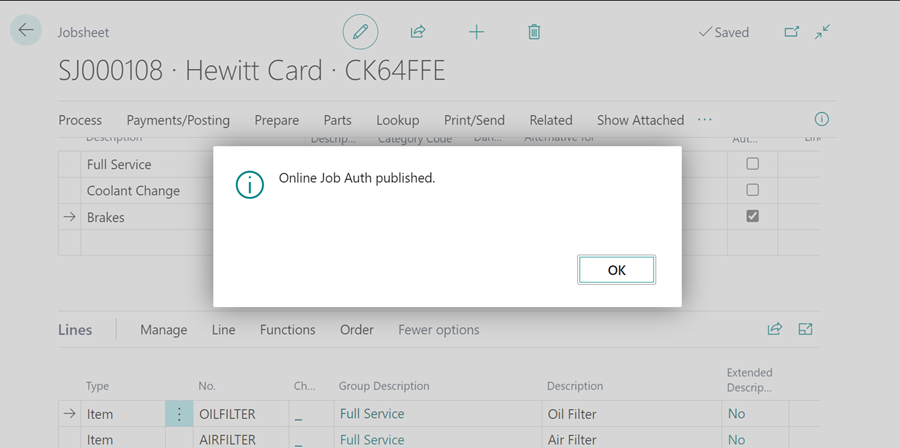
The document will be published and sent to the customer for viewing, with the option Request a Call Back for any questions related to the document.
-
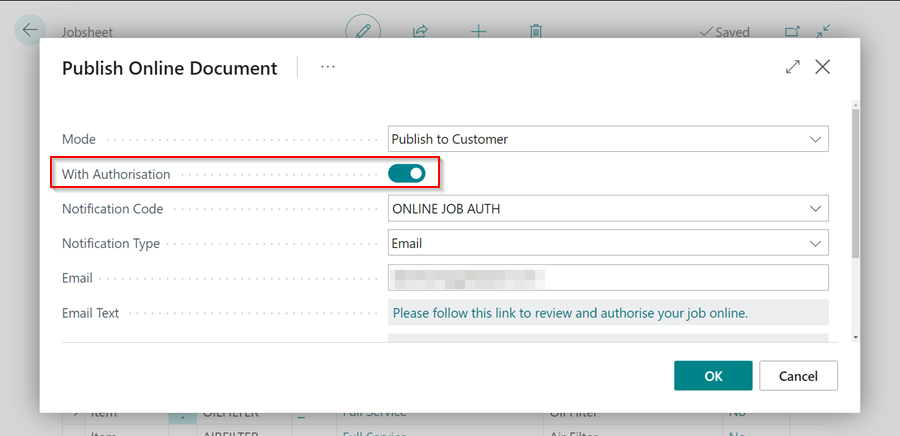
To publish the document with the option for the customer to authorise the work to be done online, select the With Authorisation slider on the Publish Online Document page. Click OK.
-
Scroll down to the Online Document FastTab to see what actions the customer takes from the sent online document. Here you can see how many edit versions of the document are available, when the published online document was opened, when it will expire, and so on.

-
When a customer takes action, the Online Document FastTab is updated after a while. The following is an example of when the customer approves the document.

Set the Online Document to Require Authorisation by Default
To always publish the document that require the customer authorisation for the work to be done:
-
In the top right corner, choose the
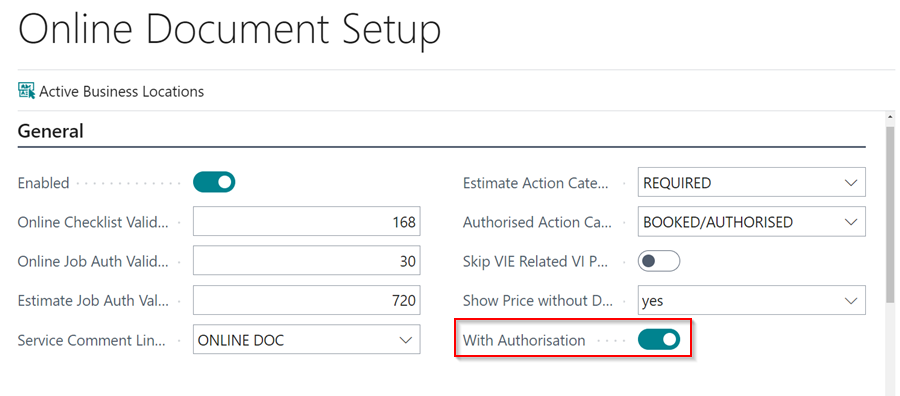
 icon, enter Online Document Setup, and select the related link.
-
Under the General FastTab, select the With Authorisation slider.
See Also
Introduction to Online Documents
Grouping document lines
Working with group items actions
Setting up online documents
Adding and Managing Media in Garage Hive
Using online documents in estimates, checklists and vehicle inspection estimates
What Happens When a Customer Acts on a Sent Online Document?