Using Parts Sales Order in Garage Hive
Parts Sales Order is the document in which you record the parts to sell to the customer at the agreed-upon cost and quantity. Sales orders, allow you to ship partially, deliver directly from your vendor to your customer, and initiate inventory processing. The Sales Order process integrates sales invoicing.
In this article
- Creating a Parts Sales Order
- Ship or Invoice the Parts Sales Order
- Partial Shipping in the Parts Sales Order
- Set up of Shipment Date to Be Equal to Work Date
- Creating a Jobsheet from a Parts Sales Order
Creating a Parts Sales Order
Here’s how to create the Sales Order in Garage Hive:
-
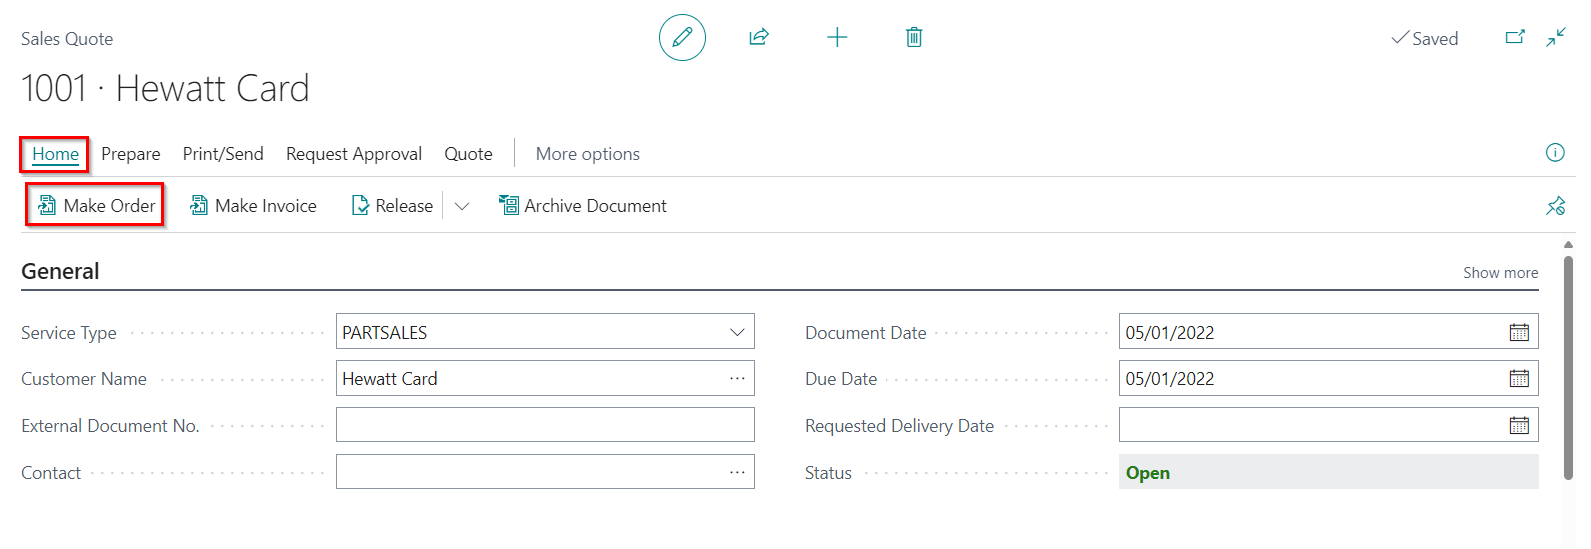
You can create a new Sales Order by selecting Sales Orders tile from the Parts Sales Admin role centre, or by creating one from a Sales Quote; select Home from the Sales Quote menu bar, followed by Make Order.
-
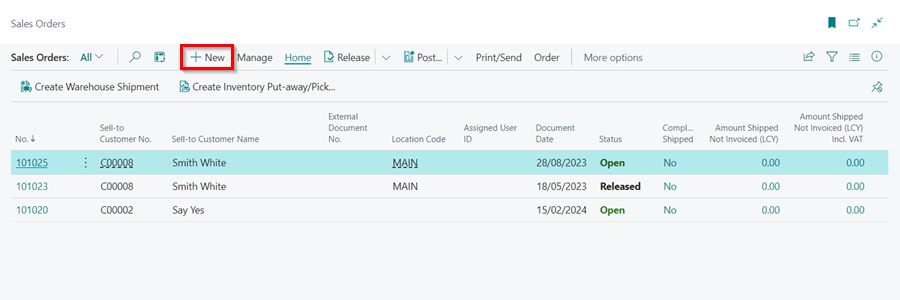
From the Sales Order list page, select New from the menu bar.
- Enter the customer’s name in the Customer Name field (if the order is new and not created from a sales quote).
-
Add the items for the parts ordered by the customer to the Lines sub-page.

-
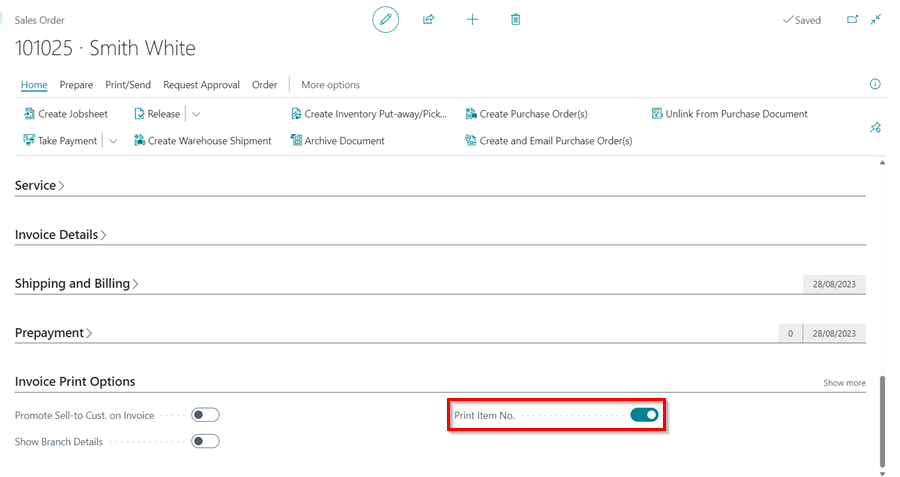
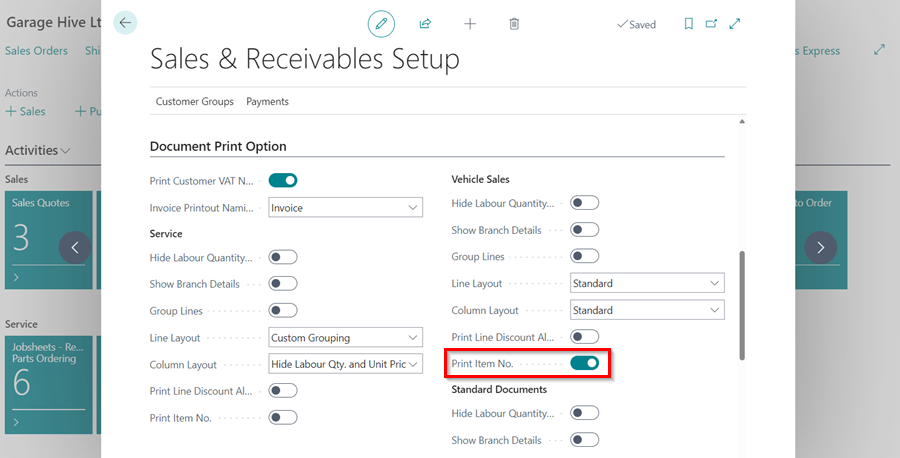
Scroll down to Invoice Print Options and select the Print Item No. slider if you want to print the Part/Item Numbers in the invoice. Part Numbers will be printed in brackets in the invoice line description.
-
To change the default Invoice Print Options for all Sales Order documents, choose the
 icon in the top-right corner, enter Sales & Receivables Setup, and select the related link.
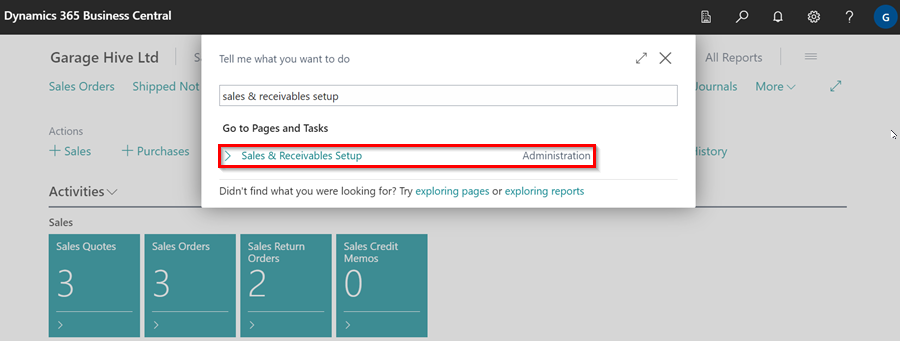
-
Select the Print Item No. slider from the Document Print Option FastTab.
-
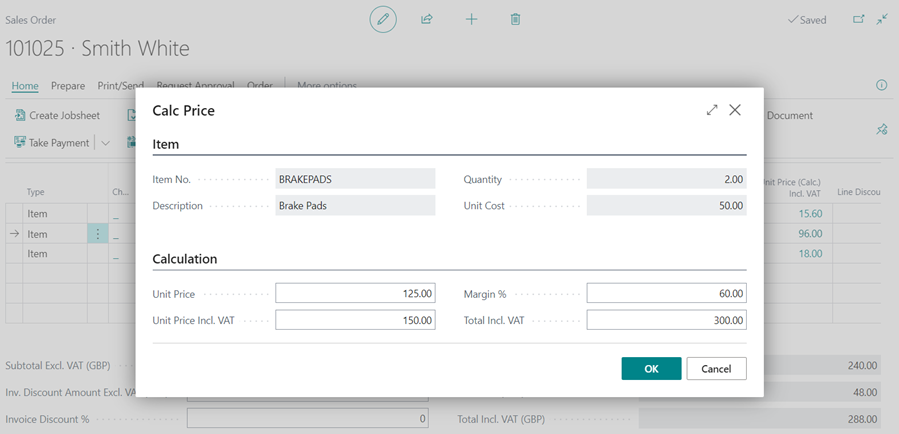
The column Unit Price (Calc.) Inc. VAT assists you in calculating the selling price and margin; click on the amount in the column, and enter the Unit Price or Margin % in the Edit - Calc Price window.

For example, you can enter a margin of 60 % for all items and so on.
-
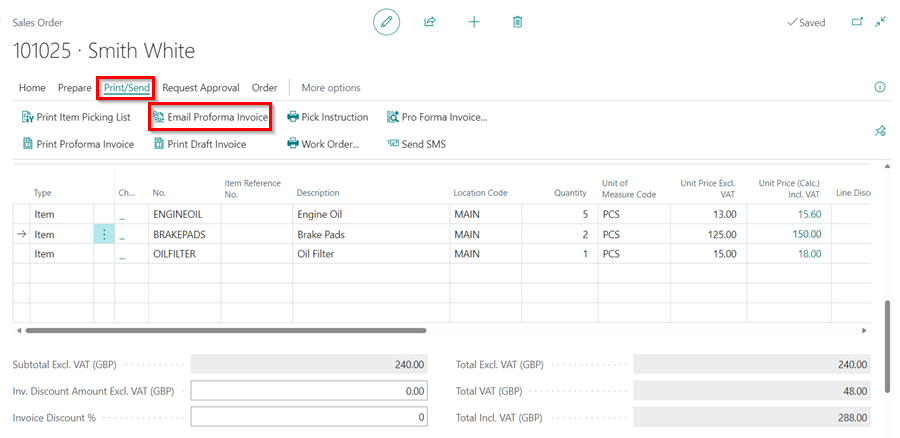
Select Print/Send from the menu bar, followed by Email Proforma Invoice to send the order confirmation to the customer.
Ship or Invoice the Parts Sales Order
-
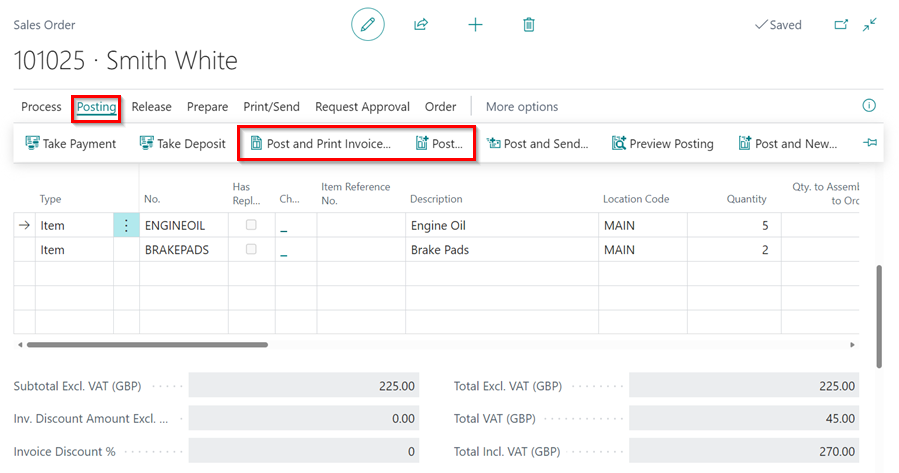
When you are ready to ship or invoice the order, select the Post and Print Invoice option from the Take Payment split button dropdown menu under Home in the menu bar, to post and print the invoice. Alternatively, if you only want to post the invoice without printing it, select Post.
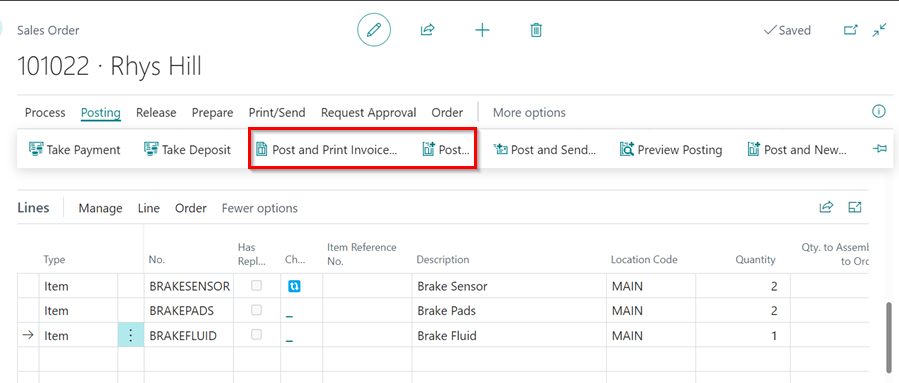
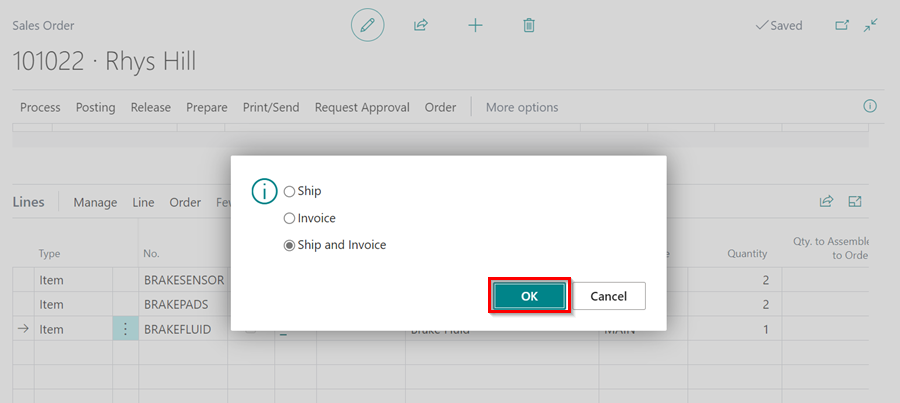
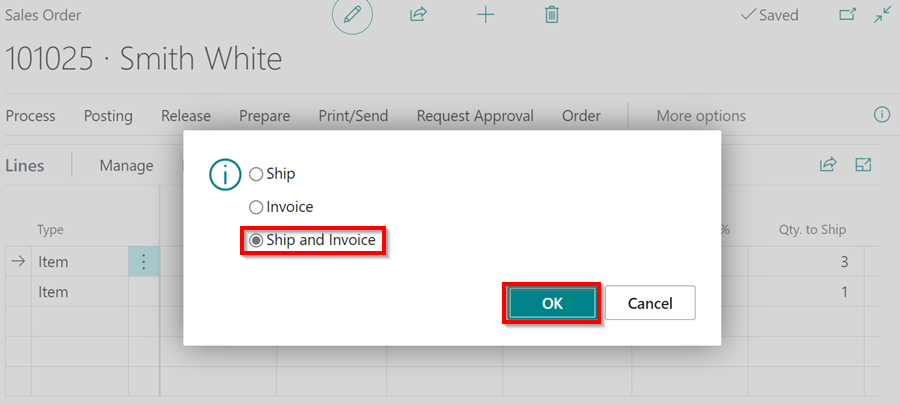
- You get three options:
- Ship - if the customer hasn’t paid but you have sent the parts to the customer.
- Invoice - can be used once the parts are shipped to create the sales invoice.
- Ship and Invoice - if the customer has paid and you have sent the parts to the customer at the same time.
Choose the suitable one for you and click OK.
-
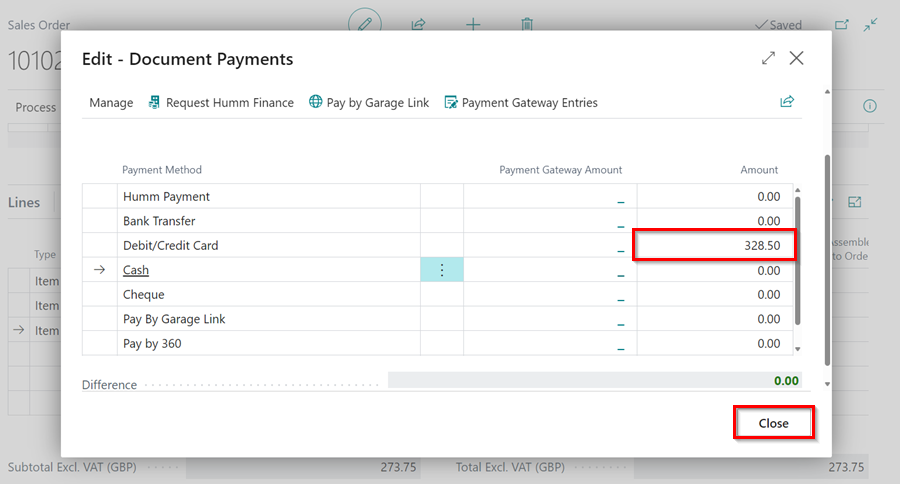
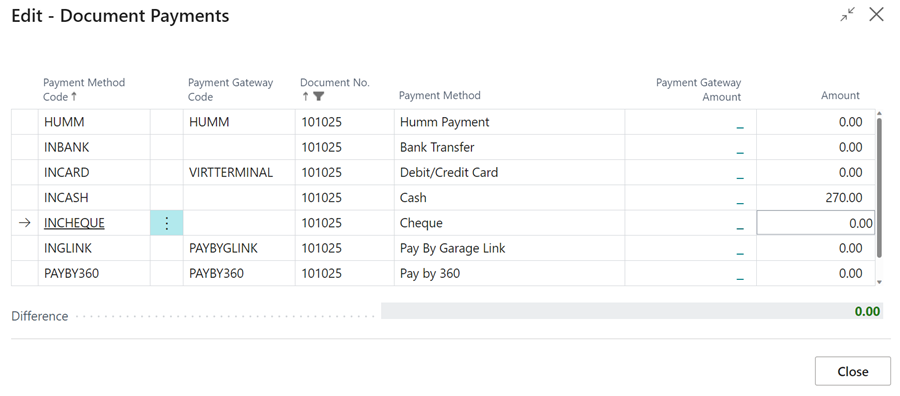
In the next window, select the method of payment from the customer and enter the amount in the Amount field to receive the payment. Click the Close button.
-
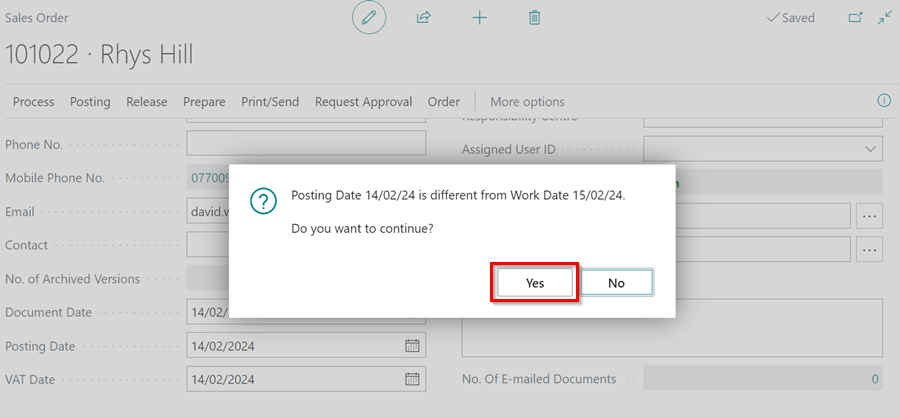
Confirm the posting date in the next popup box, click Yes to proceed or No if you want to modify the dates. Once confirmed, the Sales Order will be successfully posted. To view the invoice, simply open it.
Partial Shipping in the Parts Sales Order
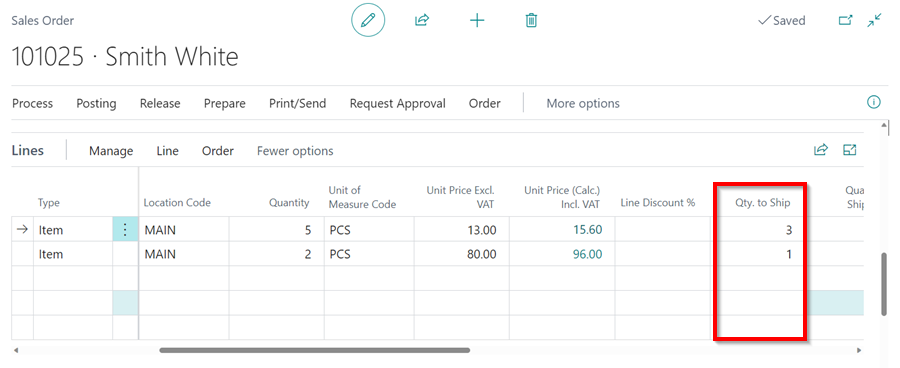
To partially Ship some of the items:
-
Scroll to the Qty. to Ship column in the lines of a Sales Order. Enter the items to be shipped.
-
To post and print the invoice, select the Post and Print Invoice option from the Take Payment split button dropdown menu under Home in the menu bar. Alternatively, if you only want to post the invoice without printing it, select Post.
-
Select Ship and Invoice in the pop-up options and click OK. Note, you can select Ship only to ship without invoicing.
-
Enter the payment details, and click Close.
-
The items shipped will be updated in the Quantity Shipped column, and the remaining items to ship will be updated in the Qty. to Ship column.

-
When the items in the Qty. to Ship column, are ready to ship, you can follow the same procedure above to ship and invoice them.
Set up of Shipment Date to Be Equal to Work Date
If you want the shipment date to be set by default equal to the work date:
-
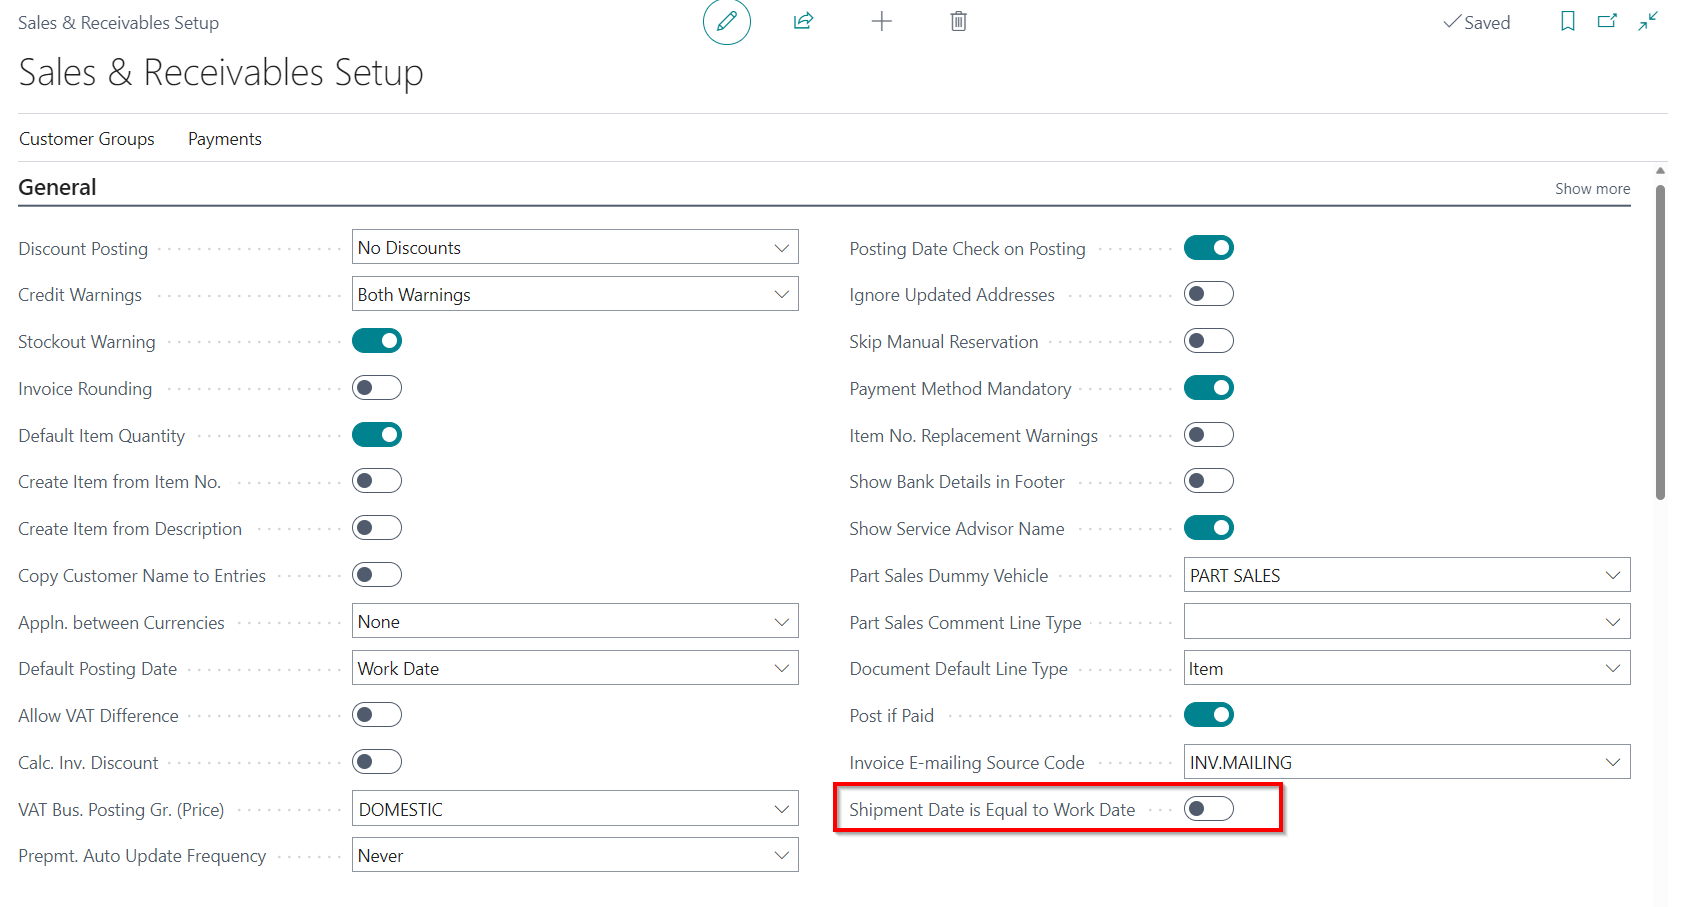
In the top-right corner, choose the
icon, enter Sales & Receivables Setup and select the related link.
-
In the General FastTab, scroll down to the Shipment Date Equal to Work Date slider, and enable it. This will always set the Shipment Date equal to Work Date by default.
-
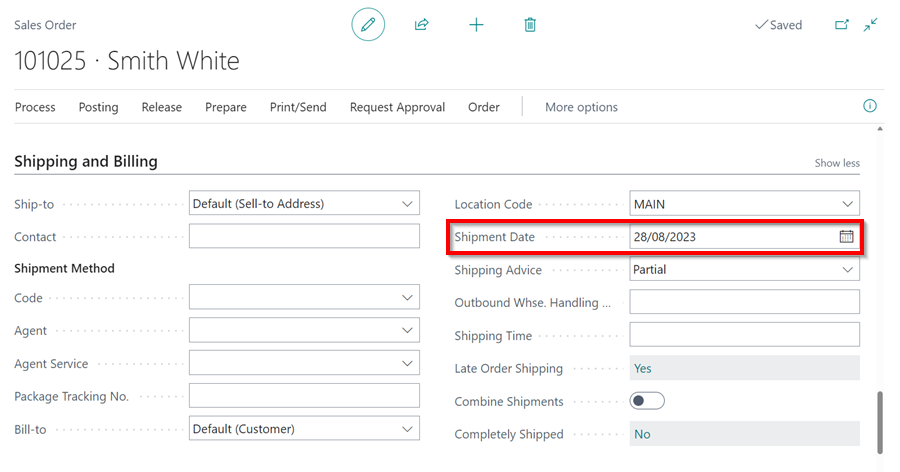
To change the Shipment Date manually, open the Parts Sales Order, scroll down to the Shipping and Billing FastTab, and change the Shipment Date field.
-
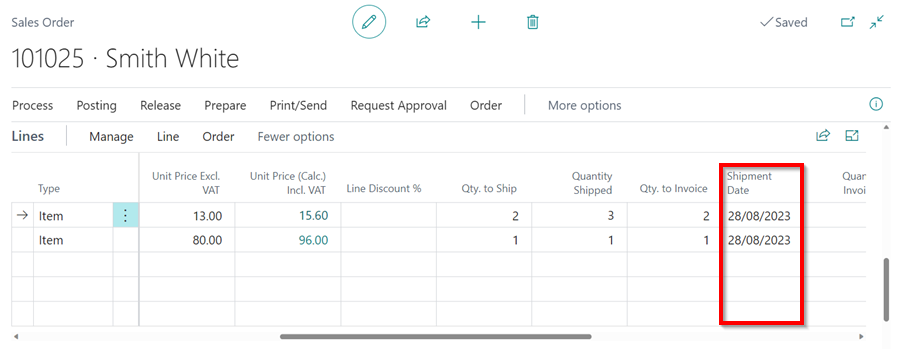
Or you can change it directly in the Lines sub-page, under the column Shipment Date.
Creating a Jobsheet from a Parts Sales Order
- If a customer requests that the parts be fitted to the vehicle, you can generate a Jobsheet from the Sales Order. Enter the vehicle registration number in the Vehicle Registration No. field under the Service FastTab.
-
Choose Home from the menu bar, followed by Create Jobsheet.
NoteIf you continue without entering a Vehicle Registration No., the system will generate a dummy registration number that you can replace later.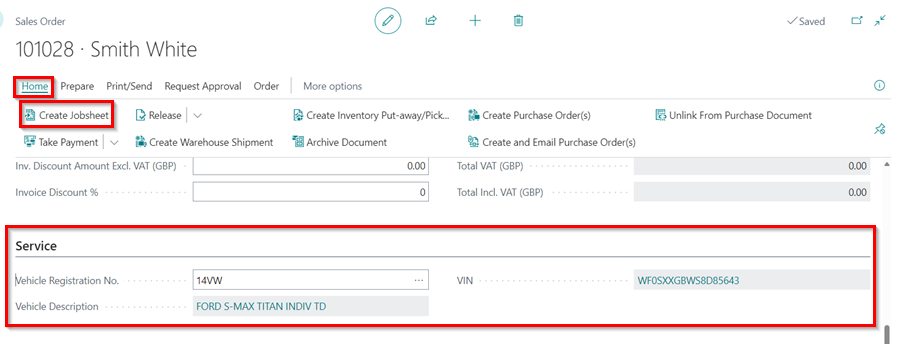
See Also
Creating a Parts Sales Quote in Garage Hive
Creating a Sales Parts Invoice
Using Parts Sales Return Order in Garage Hive
Item Substitution Management in Garage Hive