In this article
- What are Dimensions
- Setting up Dimensions
- Defining Dimensions in the General Ledger Setup
- Adding Dimensions in Documents
- Creating Default Dimensions
- Correcting Dimensions
What are Dimensions
In Business Central, a dimension is a term used to define an analysis category. Dimensions are used to group or categorise data for analysis. Dimensions consist of dimension values, which are subcategories or ‘tags’ linked to data to allow meaningful analysis. For example, you can have a Dimension as Branch and Dimension Values as Main, Vehicle Sales etc.
Examples of Dimensions::
Examples of Dimension Values:
So, when you analyse entries in your system, the branch dimension values show you which branch conducted which jobs and sold which items. The more dimensions you use, the more detailed reports you generate to support your business decisions.
Setting up Dimensions
To set up Dimensions in your system:
- Choose the
 icon, enter Dimensions, and then select the related link.
 -
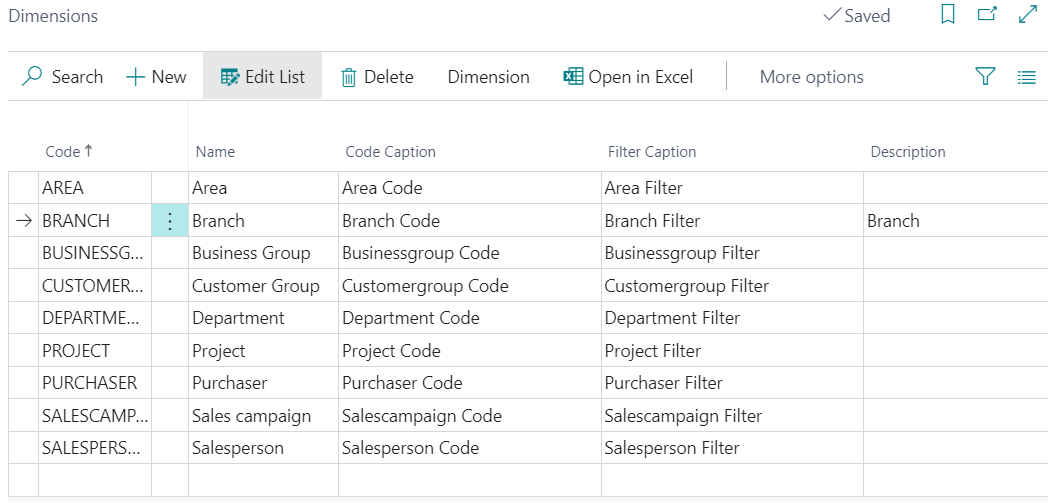
On the Dimensions page, add the dimensions to work with in your system, such as Area, Branch, Department etc.
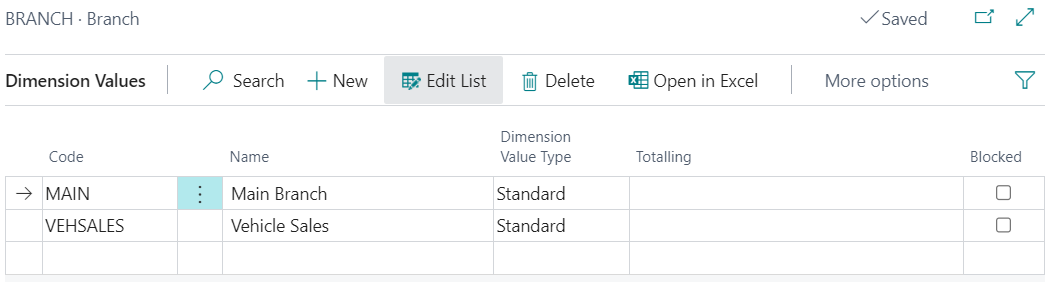
- After adding the Dimensions, select Dimension from the menu bar and choose the Dimension Values action to add the subcategories of the dimensions you added.
-
Add the subcategories on the Dimension Values page, such as Main, Vehicle Sales etc, for the Branch dimension. Press the Esc key to exit the page.
Defining Dimensions in the General Ledger Setup
You can define dimensions on the General Ledger Setup page as follows:
-
Choose the
icon, enter General Ledger Setup, and select the related link.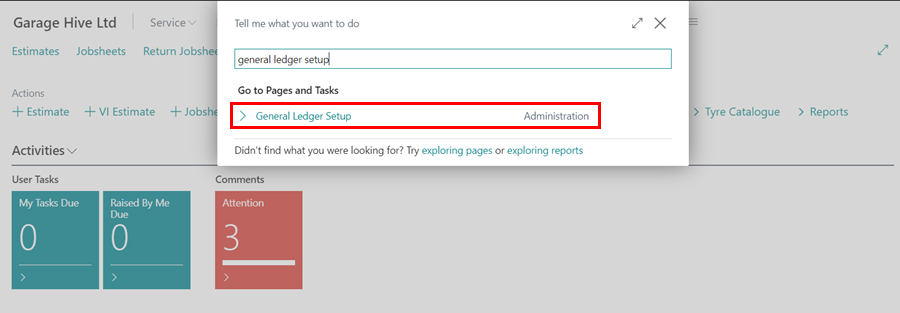
-
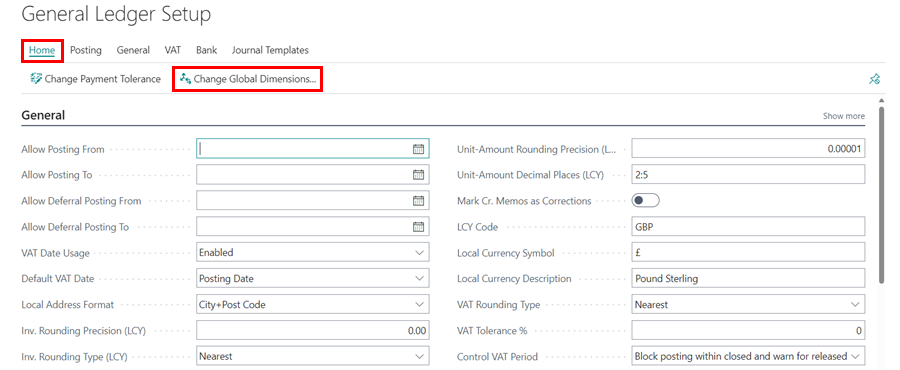
On the General Ledger Setup page, choose Home from the menu bar and select Change Global Dimensions action.
-
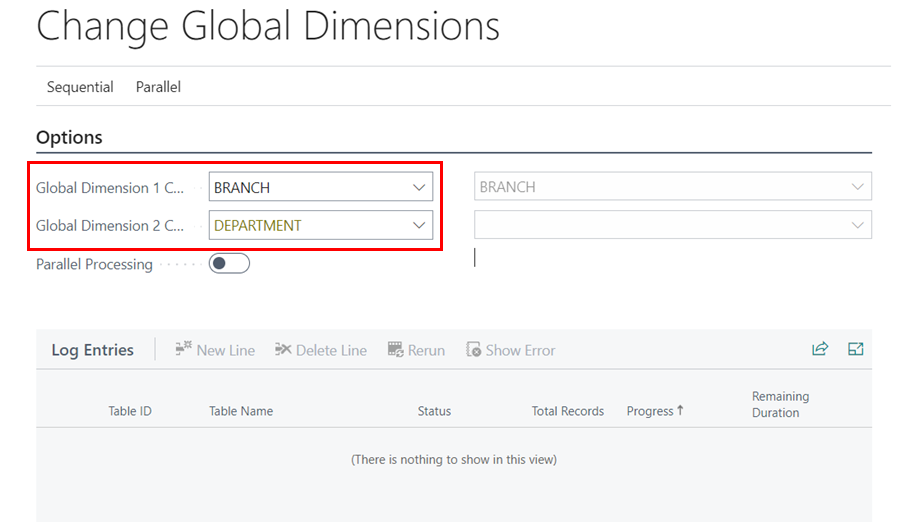
In the Global Dimension 1 Code field and/or Global Dimension 2 Code field select the dimension(s) to use as a Global Dimension from the previously added dimensions.
-
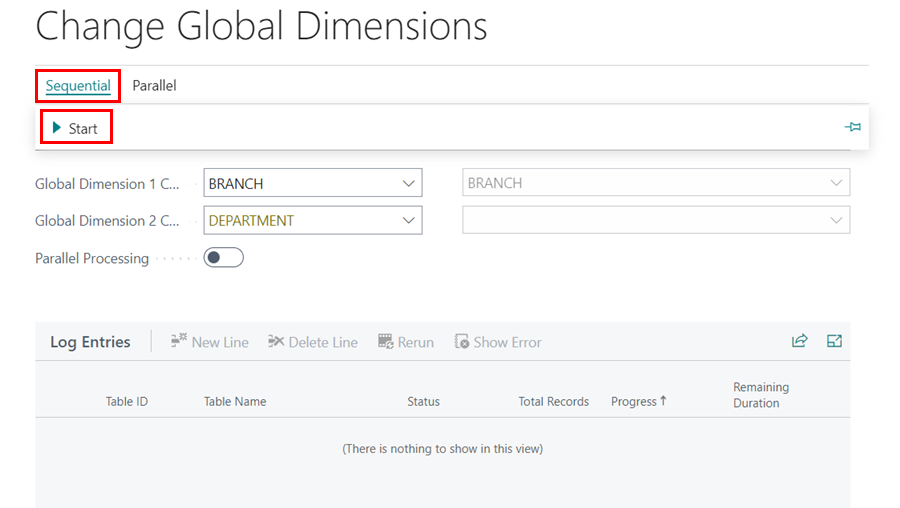
After adding the Global Dimension(s), select either Sequential or Parallel mode from the menu bar to define which mode the batch job is run.
- In Sequential mode (the default), the change is done in one transaction that reverts all entries to the dimensions they had before the change. In Sequential mode, choose the Start action.
-
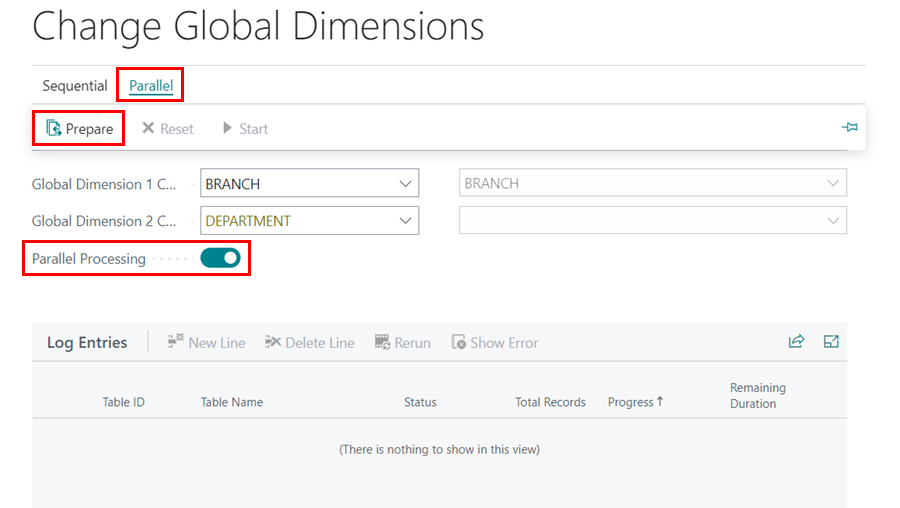
In Parallel mode, the dimension change happens in multiple background sessions and the operation is split into multiple transactions. To use this option, turn on the Parallel Processing slider, and choose the Prepare action.
Adding Dimensions in Documents
In documents, such as Purchase Orders, Jobsheets and so on, you can change dimensions for the whole document (all the document lines) or for particular document lines. To change for the whole documents:
-
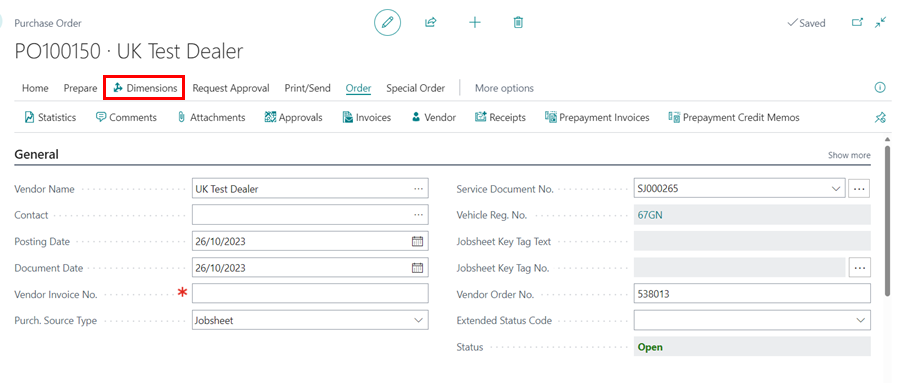
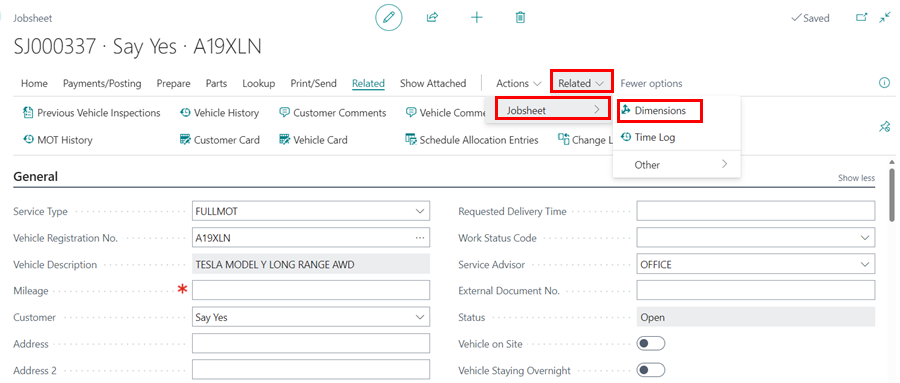
Open the document which you want to add/change the dimensions; for the Purchase Order, select Dimensions from the menu bar, for the Jobsheets, select Related from the menu bar, then Jobsheet, and choose Dimensions.
Purchase Order:
Jobsheet:
-
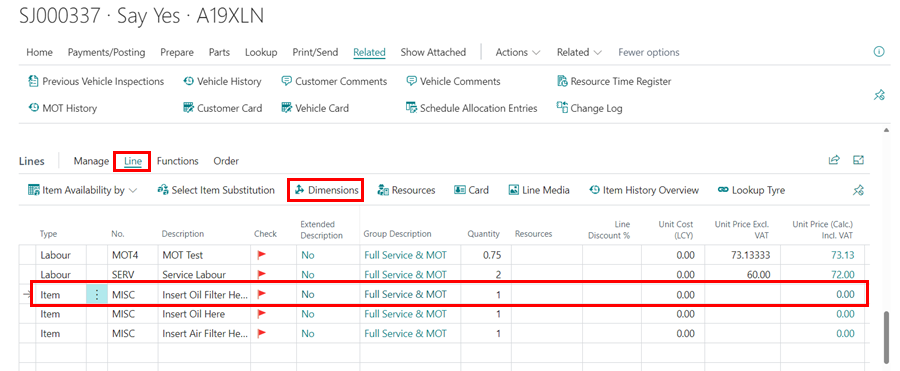
To add/change dimensions in specific document lines, open the document and select the line in the document. From the menu bar, click on Line, and choose Dimensions.
Creating Default Dimensions
You can create Default Dimensions to documents for specific accounts, customers, vendors, or items, which helps make reports more consistent. To add Default Dimensions for a specific Vendor:
-
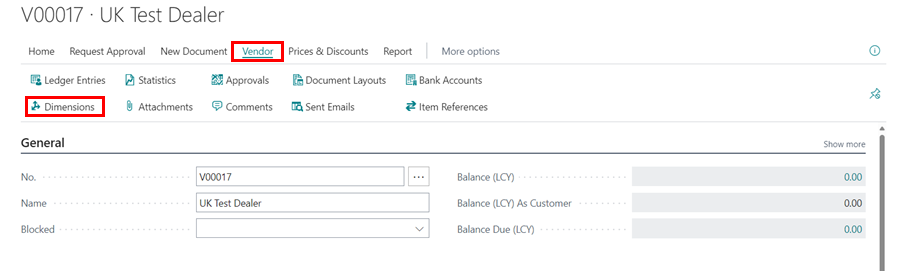
Select the vendor from the list of Vendors, and then from the menu bar select Vendor followed by Dimensions.
-
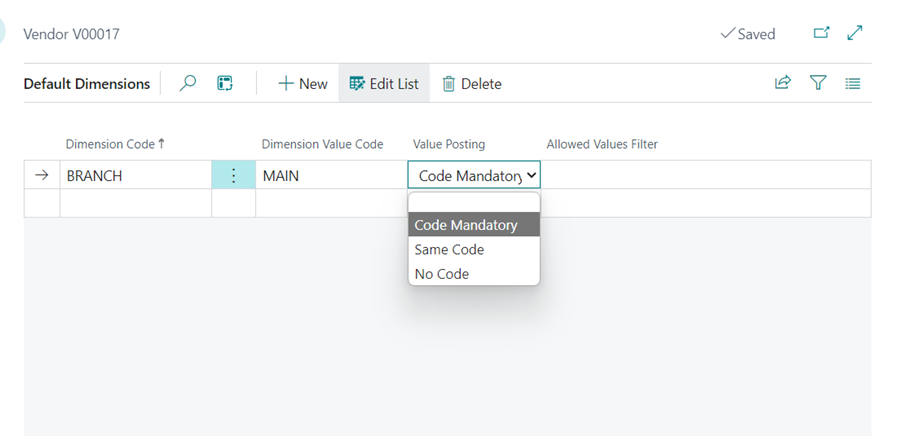
From the Default Dimensions page, select the dimension in the Dimension Code column, followed by the Dimension Value Code, and then Value Posting which can be:
- Code Mandatory - is used if you want the Vendor account to always have a Dimension, but allow any Dimension Value Code.
- Same Code - is used if you only want a single Dimension Value Code to be allowed for the vendor account. If you try posting the document, it will show an error when the Dimension Value Code is not selected.
- No Code - is used if you want to prevent a particular dimension from being used with that vendor account.
Correcting Dimensions
If you discover that an incorrect dimension has been used on posted general ledger entries, you can correct the dimension values; this helps in keeping the financial reports and analyses accurate. To start a dimension correction:
-
Choose the
icon, enter General Ledger Entries, and choose the related link.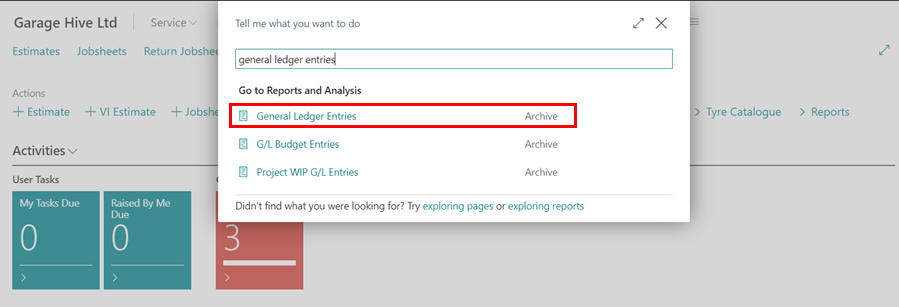
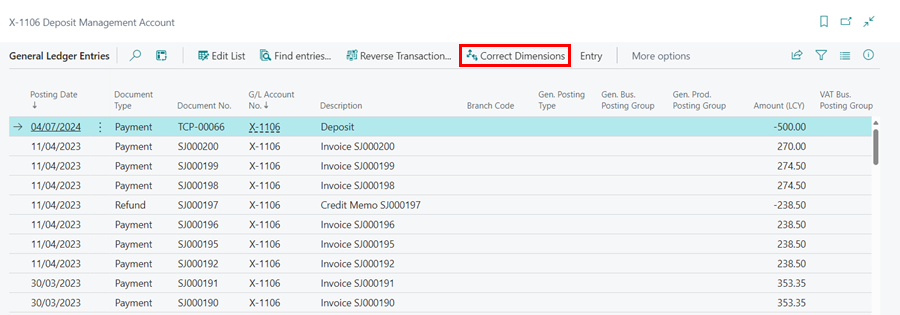
-
On the General Ledger Entries page, choose Correct Dimensions action from the menu bar.
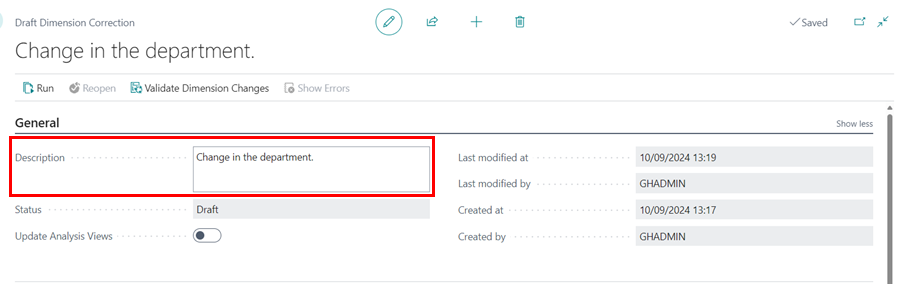
-
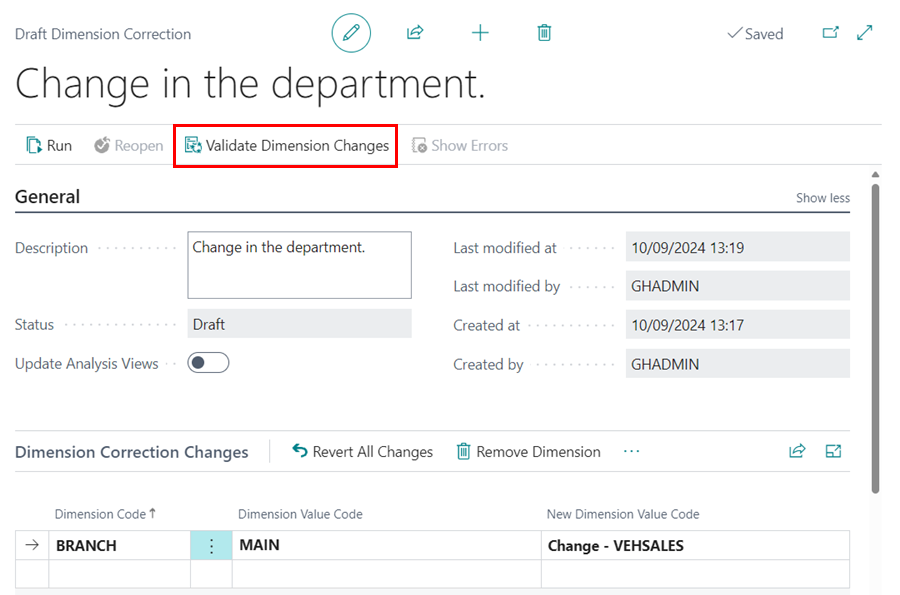
In the Description field, enter information about the change. Other people might use this information later to understand what was done.
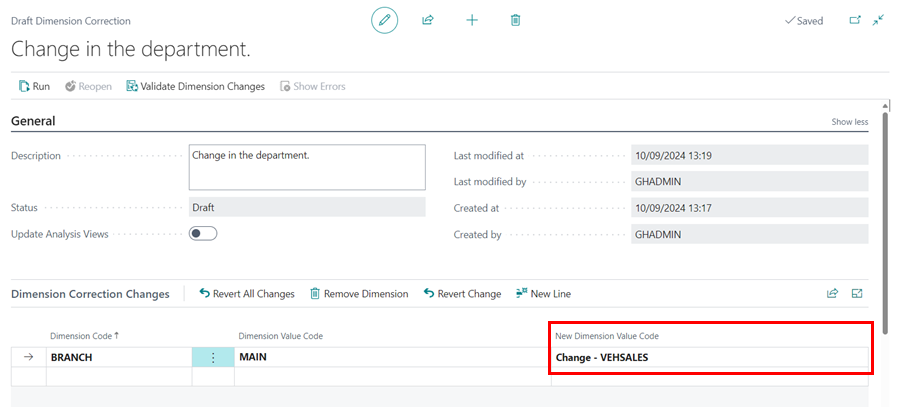
-
On the Dimension Correction Changes FastTab, choose the dimension that you want to change in the Dimension Code field and the New Dimension Value Code field.
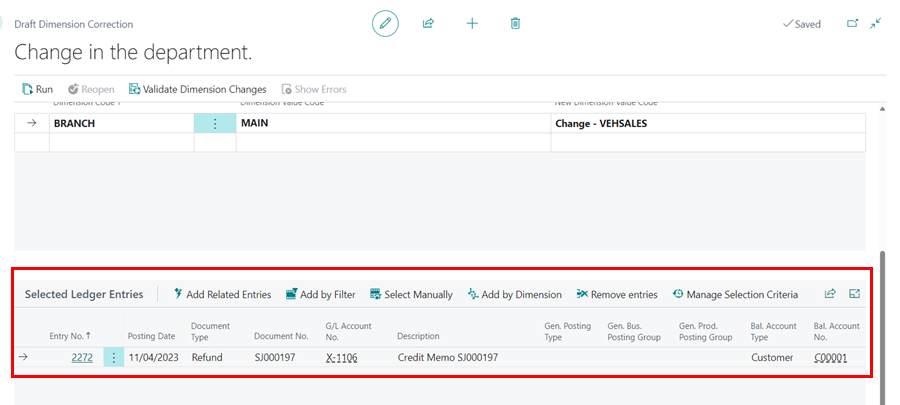
- On the Selected Ledger Entries FastTab, choose the relevant entries to correct. You have the following options of adding the entries:
- Add Related Entries - Add G/L entries that are in the same G/L register.
- Add by Filter - Use filter criteria when adding G/L entries.
- Select Manually - Select specific G/L entries.
- Add by Dimension - Filter G/L entries by dimensions.
- Remove Entries - Deselect G/L entries.
- Manage Selection Criteria - Keep track of the selection process, and undo selections if needed.
-
To validate the correction, choose Validate Dimension Changes from the menu bar.
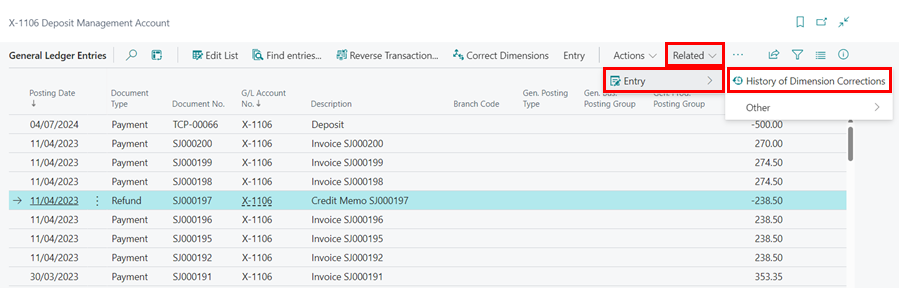
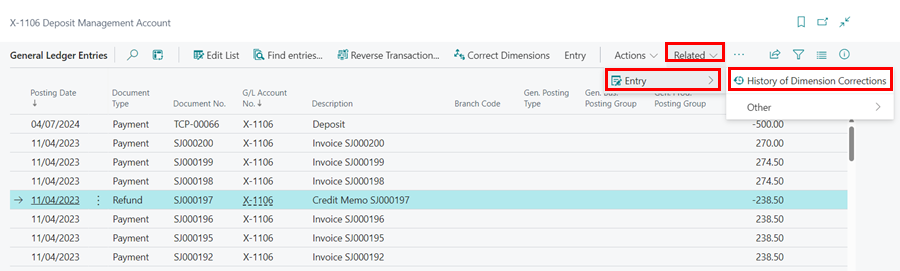
- After successfully validating the dimension change, click on Related, followed by Entry and then select History of Dimension Corrections from the General Ledger Entries menu bar, and then select the validated change.
-
Choose Run from the menu bar on the Draft Dimension Correction page. You can run it immediately instead of scheduling it by using the Run Immediately slider.
-
To undo a correction, click on Related, followed by Entry and then select History of Dimension Corrections
-
Select the change to be reversed, and then, from the Dimension Correction page, scroll to the Dimension Correction Changes FastTab, select Manage from the menu bar, and Revert Change for a single change or Revert All Changes for all changes made in the entry.