Document Print Options Setup
Garage Hive has a number of ways for printing a document, depending on the system setup. You can modify or add details that should be included in the top, middle, or bottom sections of the document. This article will explain how to modify the system’s options so that you can print a document in the way you would like.
In this article
- Changing Print Options for the Top Section
- Changing Print Options for the Middle Section
- Changing Print Options for the Bottom Section
- Setting Default Print Options for Documents
Changing Print Options for the Top Section
The following can be modified in the top section of a document:
-
By default the Customer name used is Sell-to unless the Bill-to customer is added in the Invoicing FastTab.

-
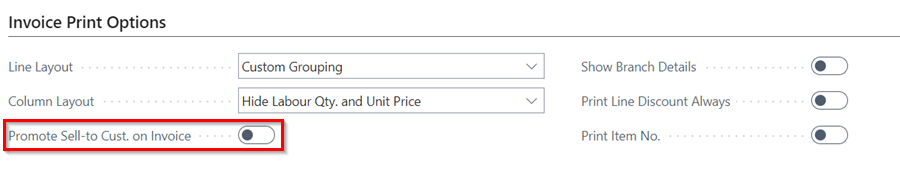
To promote the Sell-to customer name (Show the sell-to customer name even when the bill-to name is added), enable the Promote Sell-to Cust. on Invoice slider under the Invoice Print Options FastTab of the document.
-
To show the Branch Details, make sure the details of the branch are added in the in the Location card. Search for Locations in the top right corner
 icon, click on the related link and select the location to add the details.
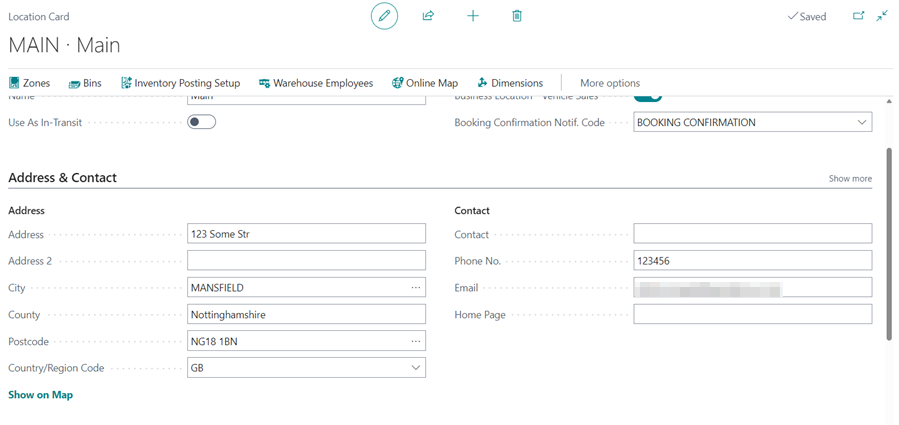
-
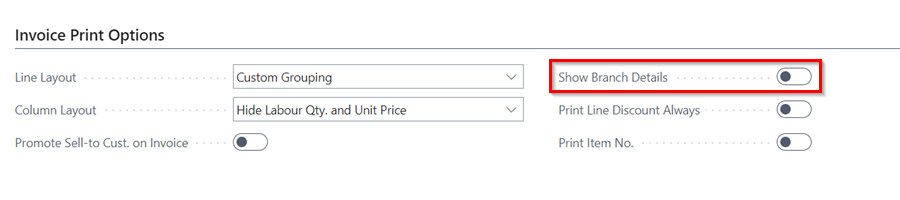
To view the branch details in the invoice, enable the Show Branch Details slider in the document’s Invoice Print Options FastTab.
-
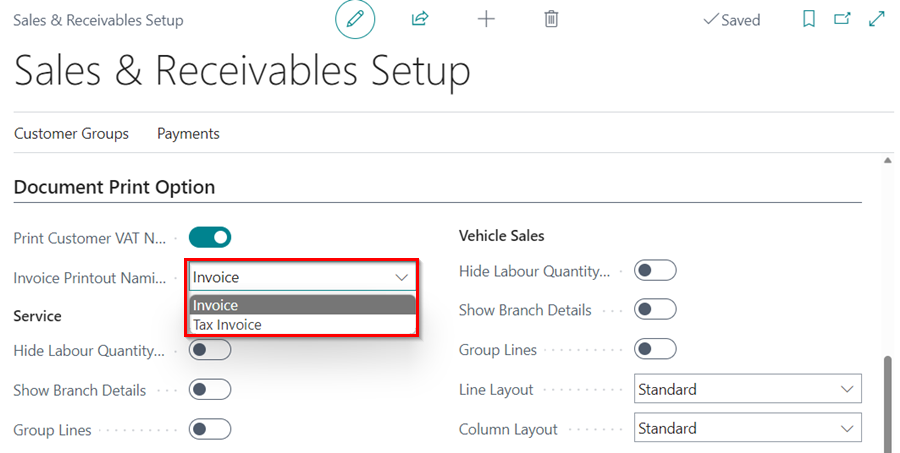
To print the Customer VAT No., search for Sales & Receivables Setup in the top right corner
icon, and click on the related link. Scroll down to the Document Print Option, enable the Print Customer VAT No. slider.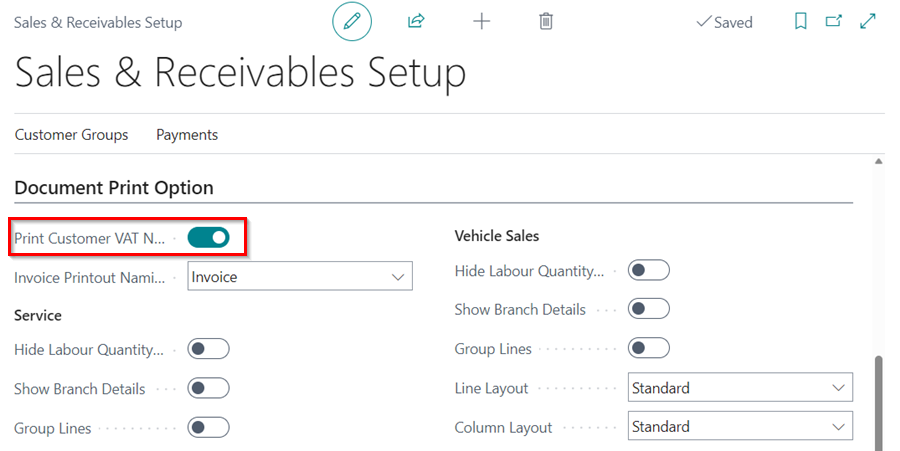
-
To indicate that an invoice is a Tax Invoice, under the Customer VAT No. slider, select Tax Invoice in the field Invoice Printout Naming field.
-
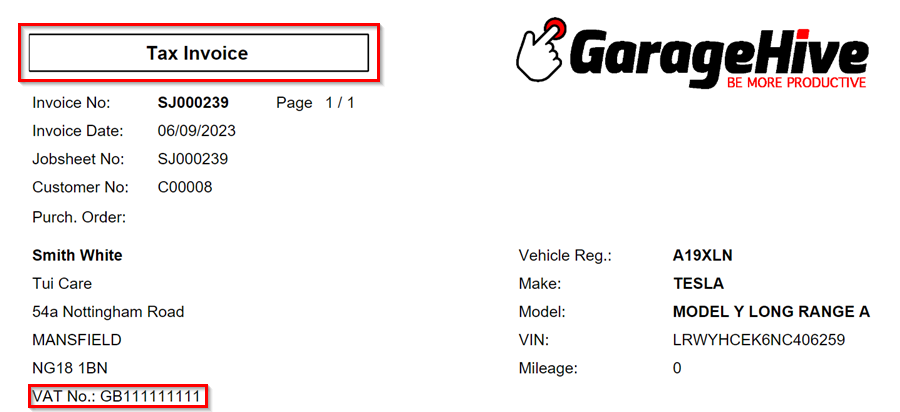
When printed it will appear as shown below.
Changing Print Options for the Middle Section
The following can be modified in the middle section of a document:
-
The lines and column print out for the middle section can be modifying in the document under the Invoice Print Options FastTab.
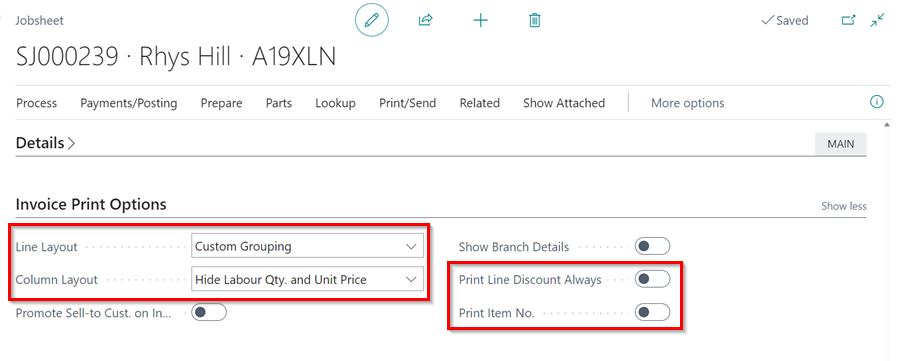
- There are several middle section print layout options for the document to choose from:
- Standard - Standard
- Standard - Hide labour Qty. and Unit Price
- Standard - Show Totals Only
- Group by Line Type - Standard
- Group by Line Type - Hide labour Qty. and Unit Price
- Group by Line Type - Show Totals Only
- Custom Grouping - Standard
- Custom Grouping - Hide labour Qty. and Unit Price
- Custom Grouping - Show Totals Only
- Print Line Discount Always
- Print Discount Totals
- Print Item No.
- To learn more about the invoice print options, and see how they appear follow this link, Invoice Print Options available.
Changing Print Options for the Bottom Section
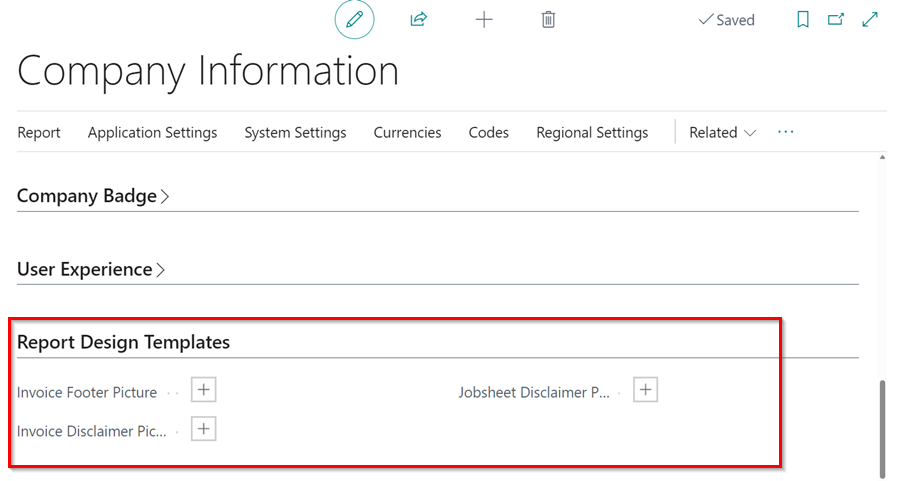
In the botton section you can add the Invoice Footer Picture or the Invoice Disclaimer Picture, and for the Jobsheet the Jobsheet Disclaimer Picture. To add these:
-
Search for Company Information in the
icon, at the top-right corner, and select the related link.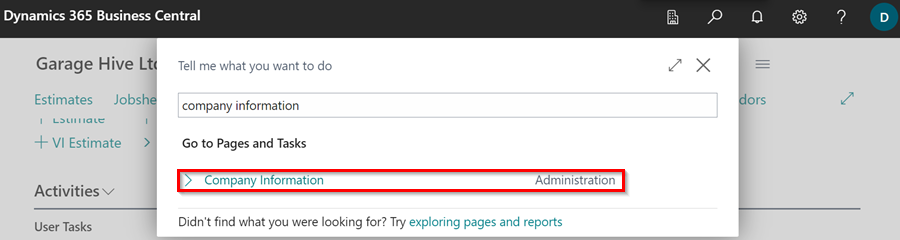
-
Scroll down to the Report Design Templates, and you can add the different picture options available.
-
If you have the Show Branch Details enabled in the document, then you need to add the pictures in the Location card. Search for Locations in the top right corner
icon, click on the related link and select the location to add the pictures. Scroll down to the Pictures FastTab and to add the pictures.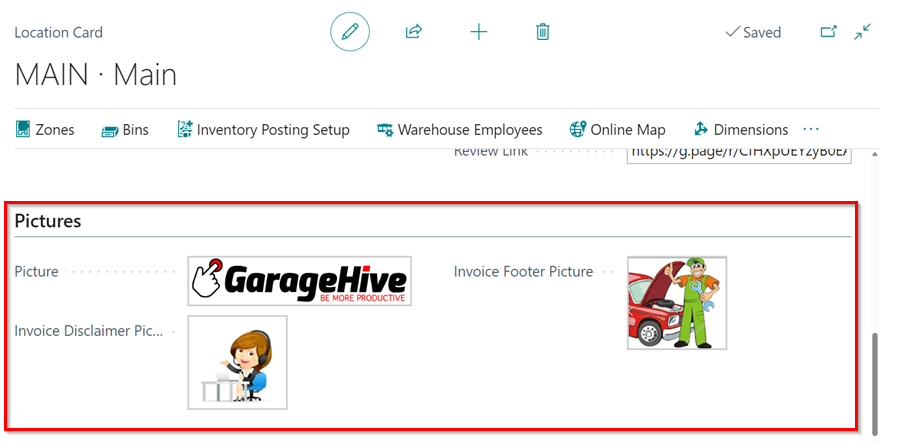
Setting Default Print Options for Documents
You can set default print options for all new documents in the Sales & Receivables Setup page. Once setup, this settings will apply only to documents created after the setup is complete; it will not affect any documents that were created before the change. To set up:
-
Search for Sales & Receivables Setup in the
icon, at the top-right corner, and select the related link.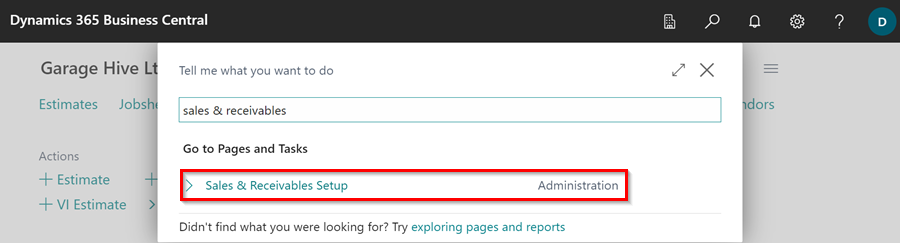
- Scroll down to the Document Print Options FastTab. Here you will find the options to set the following documents’ default print options:
- Service Documents: Includes the Jobsheets, Estimates and Vehicle Inspection Estimates.
- Vehicle Sales Documents: Includes the Vehicle Sales Invoices and Vehicle Sales Orders.
-
Standard Documents: Includes the standard Business Central Documents.
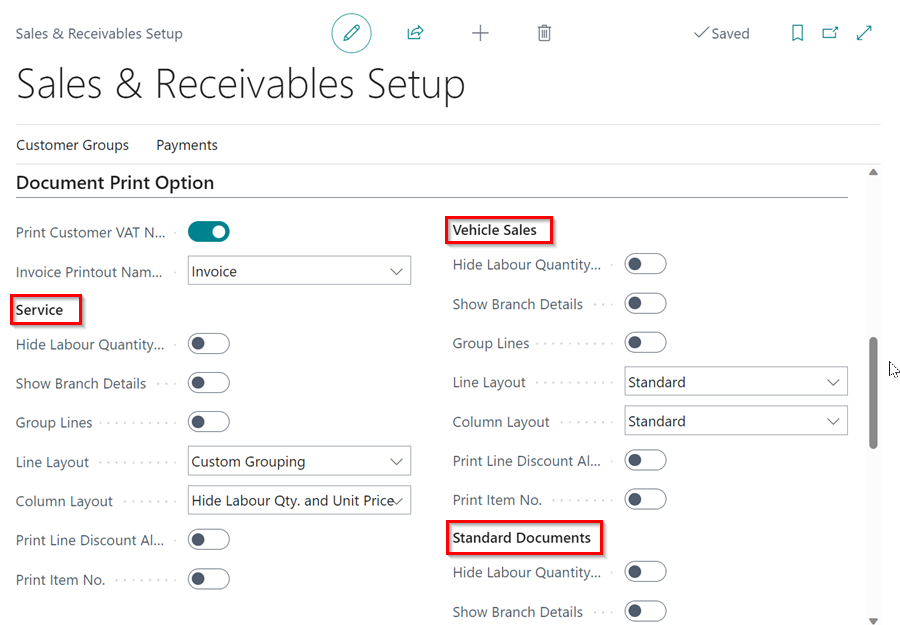
- Adjust the default setting that you would like for the documents and close the page.