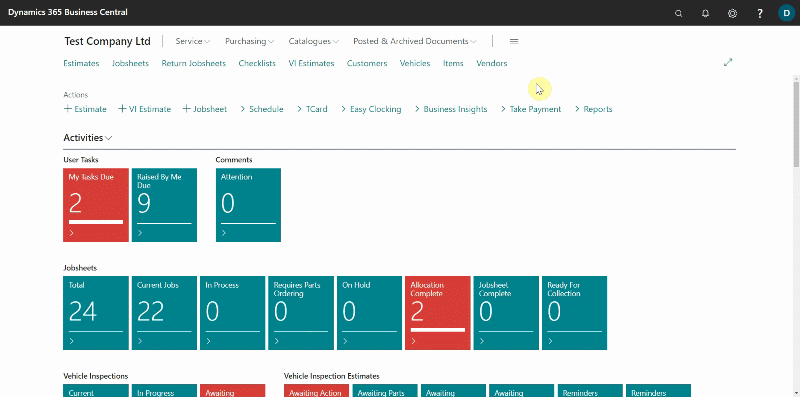
Using the Jobsheet
There are various methods for creating a Jobsheet, as described here. In this article we’ll look at the standard way of using the Jobsheet. The Jobsheet typically includes information about the labour and items used during the repair or maintenance process of the vehicle, as well as any additional charges or discounts.
In this article
- Creating a New Jobsheet
- Add Items and Labour
- View the Factbox and copy the VIN
- Viewing Document Statistics
- Setup for Jobsheet Deletion Reasons
- Transferring Lines to an Estimate
Create a New Jobsheet
-
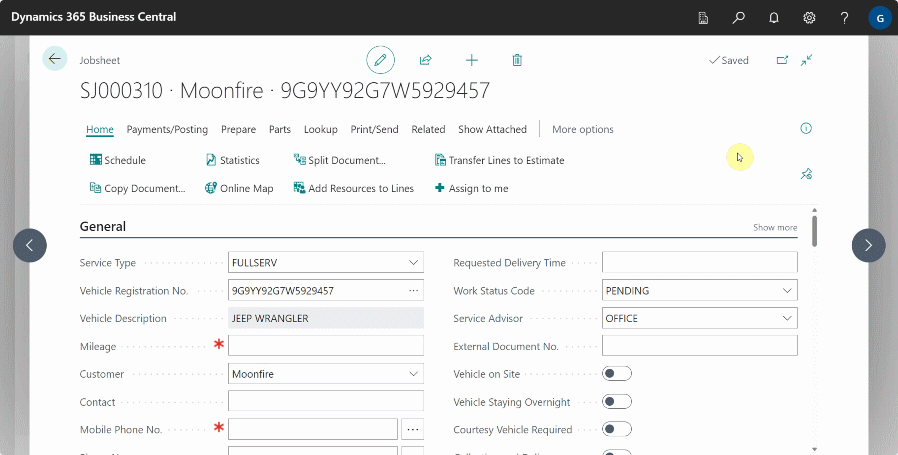
Select Jobsheets in the Home Screen, and then choose New.
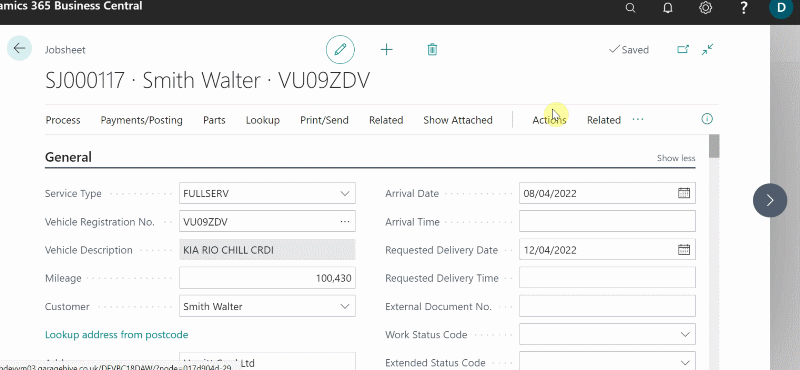
- Select the Service Type - This is the type of job to do.
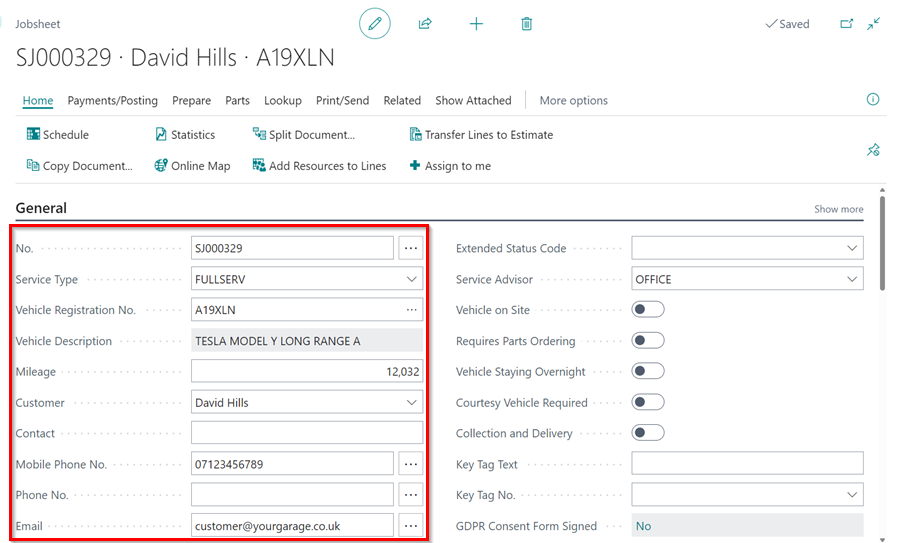
- Fill in the Vehicle Registration No.:
- If the vehicle is in the system, the vehicle information will be auto-filled.
- If the vehicle is not in the system, the system will look it up using VRM to obtain the vehicle’s details.
-
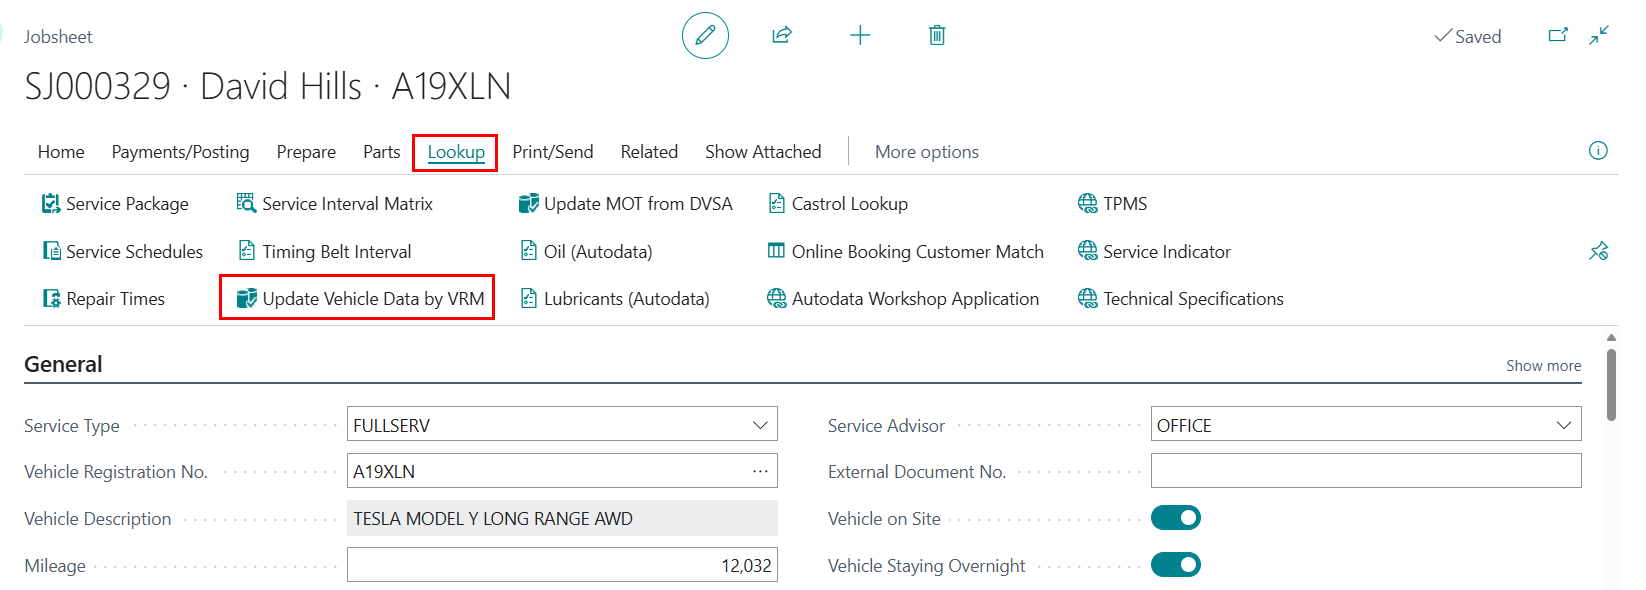
Confirm with the customer that the Vehicle Description matches the actual vehicle. If it does not, select Lookup from the menu bar and use the Update Vehicle Data by VRM action. This will update the vehicle details in the system.
- Enter the current vehicle mileage, in the Mileage field.
- After the VRM lookup for the vehicle, enter the customer information:
- If the customer’s information was previously entered for another vehicle, the system will obtain the customer’s information and link it to the vehicle.
- If the customer is new to the system, the system will prompt you to Create a new customer card.
- You can now add the following details:
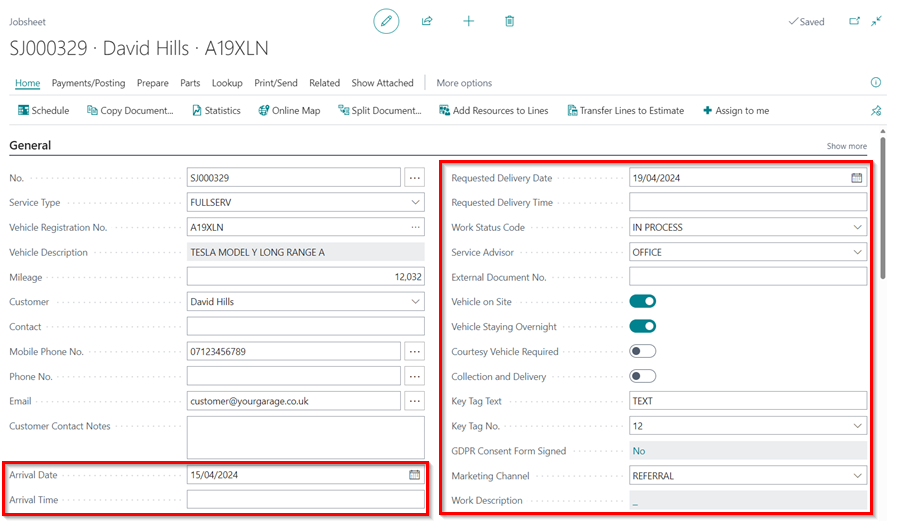
- Arrival Date and Arrival Time - This is the day and time the vehicle will arrive on site, or when it is expected to arrive.
- Requested Delivery Date and Requested Delivery Time - This is the date and time the customer has requested that the car be delivered after the work has been completed.
- External Document No. - This is the number for the external document that is related to the work being done on the vehicle.
- Work Status Code - This is the status of the work being done on the vehicle.
- Vehicle on Site - This indicates that the vehicle is on site.
- Vehicle Staying Overnight - This indicates that the vehicle will be staying overnight in the garage.
- Collection and Delivery - This indicates whether the car should be picked up from the customer’s location and delivered once the work is completed.
- Key Tag Text - This is the number marked on the vehicle key attachment, which can also be a text.
- Key Tag No. - This is the number marked on the vehicle key attachment, and set up in the system to help also identify parts that belong to the vehicle by using the same number in a purchase order.
- Marketing Channel - This is the channel through which the customer found the business.
- Work Description - This is the description of the products or services being offered, it appears at the top of the invoice when printed.
-
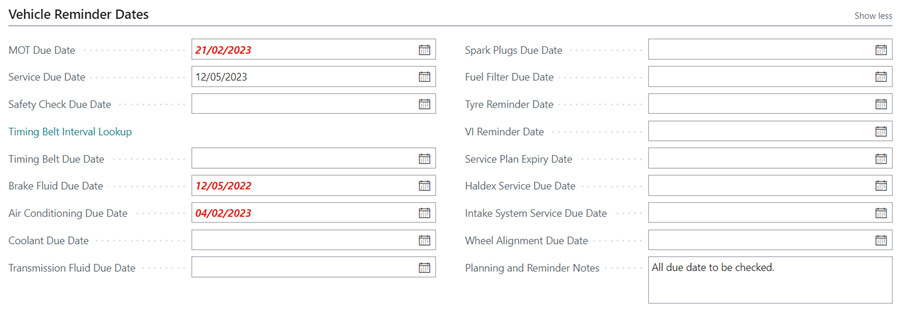
The Vehicle Reminder Dates FastTab shows the dates on which various vehicle parts should be changed, serviced or checked.
-
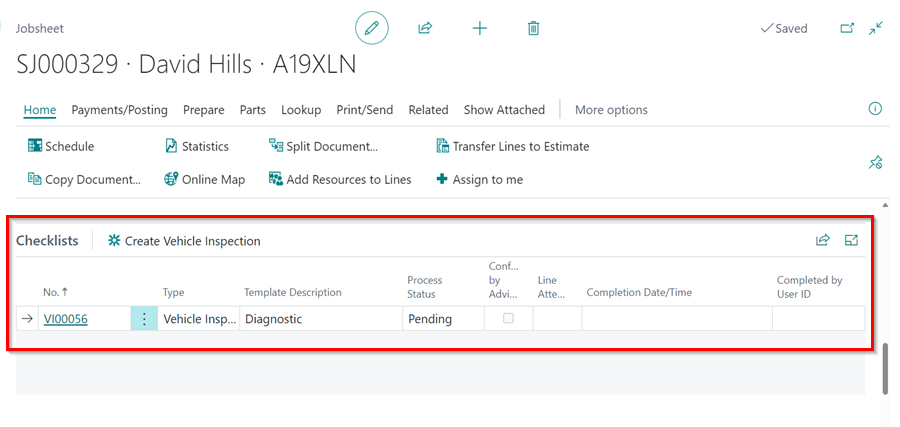
Under the Checklist subpage, you may view and access any checklists that are linked to the Jobsheet.
-
In the Comments subpage, you can enter any information the customer has provided about the job to be done.

-
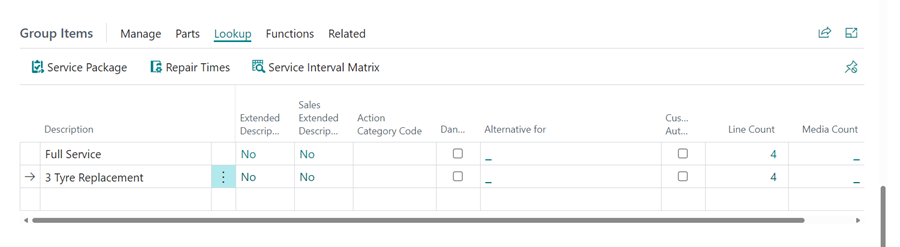
Under the Group Items section, you create groups where you add lines based on group title. The groups help in the categorisation of the lines. Read more here Grouping document lines.
Add Items and Labour
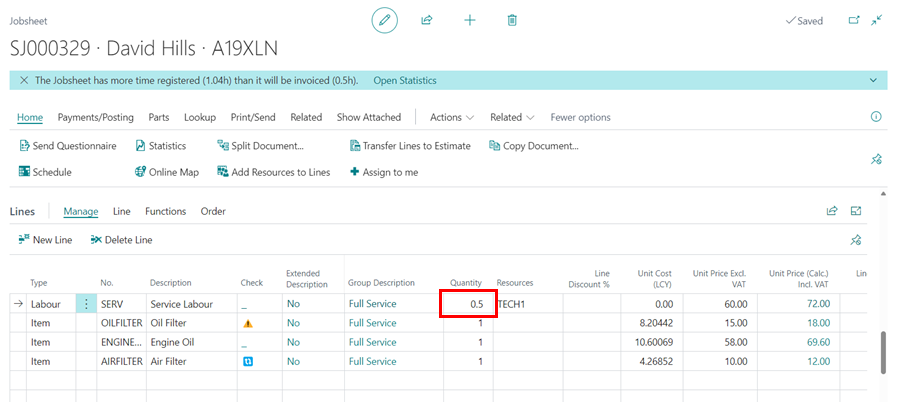
- You may now begin adding Labour lines, Item lines, or Service Packages to the Jobsheet:
- Type column - Select either Labour or Item to define what type of details are to be entered in the line.
- No. column - Enter the number for Labour or Item as added in the system. For example, for labour, you can choose service labour, standard labour or other labours; for item, you can choose inventory items like air filters and engine oil, non-inventory items like consumables, or external services or other items.
- Description column - This is the item or labour description that will appear in the customer’s invoice.
- Quantity column - Enter the quantity of items or hours to sell.
- Unit Cost column - This is the cost of an item to the business. This field is left blank for labour.
- Unit Price - This is the price at which the customer will buy the item or labour per unit.
- Unit Price (Calc) Incl. VAT column - When you click on the amount in this field, a pop-up window will appear, showing the Unit Price, Margin %, Unit Price Incl. VAT, and Total Incl. VAT, allowing you to do price calculation.
- Line Discount % column - If you want to apply a discount to the line, within this field, fill in the percentage discount.
- Line Discount Amount column - This is the amount applied to the line as a discount. By default this column is not visible, but you can use personalisation to add it.
-
Line Amount Excl. VAT - This is the pre-VAT total line amount.

View the Factbox and copy the VIN
-
The FactBox is located to the right of a Jobsheet and provides quick information and links about the work being done on the Jobsheet, the customer, and the vehicle, including a link to immediately Copy the VIN.
Viewing Document Statistics
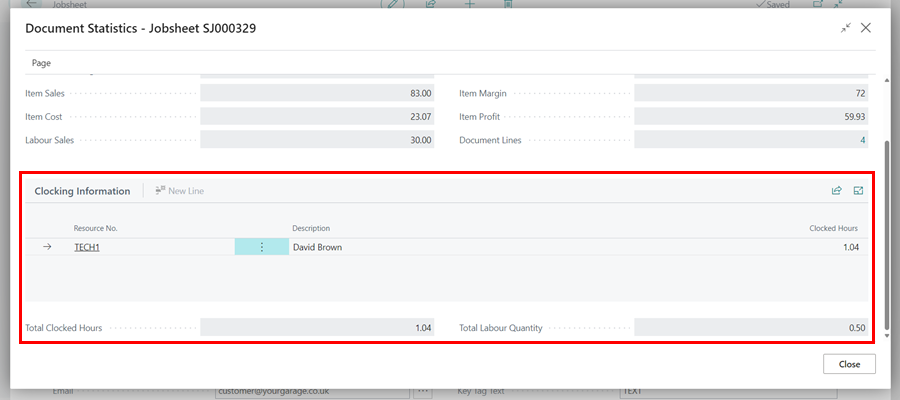
The Document Statistics page gives you an overview of the financial metrics for the Jobsheet, covering sales and profit margins for both parts and labour. It helps you understand the job’s profitability and how resources were used. To view the document statistics page:
-
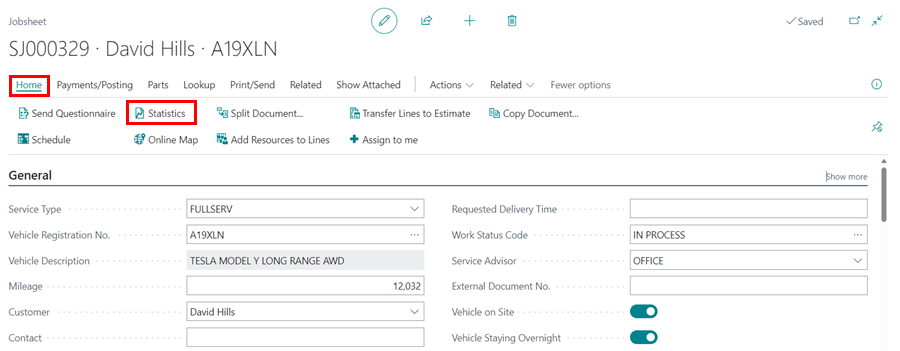
Open the Jobsheet, then click on Home and select Statistics from the menu bar.
-
This opens the Document Statistics page for the Jobsheet.
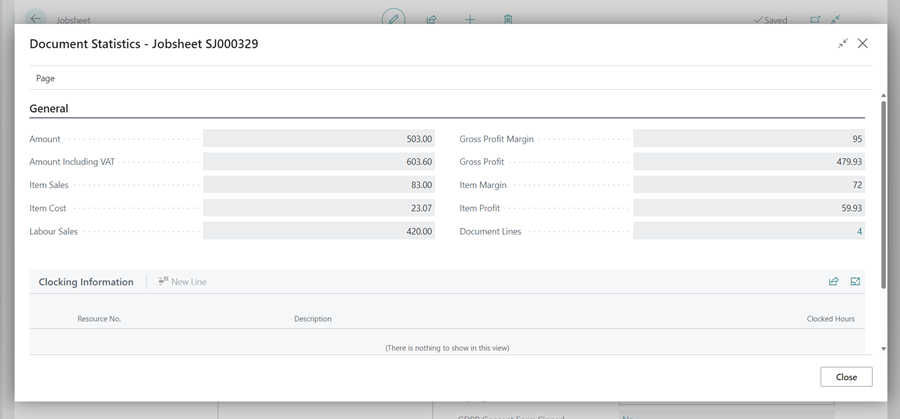
- If you’d like to receive a notification when the hours to be Invoiced are less than the Total Clocked Hours, you’ll need to enable the Jobsheet Labour Overrun Notification setting.
-
To enable it, search for Service Mgt. Setup GH using the search
 icon in the top-right corner, and select the related link.
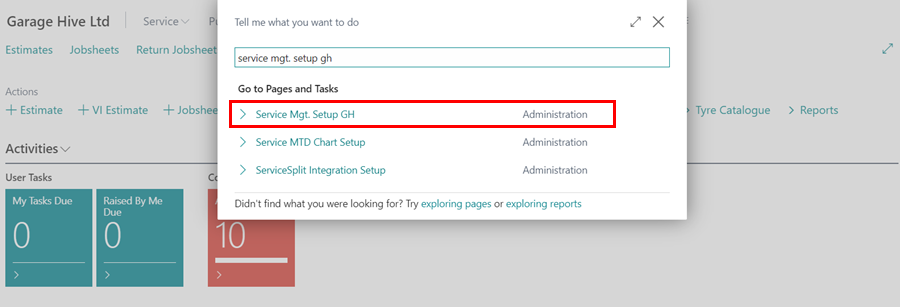
-
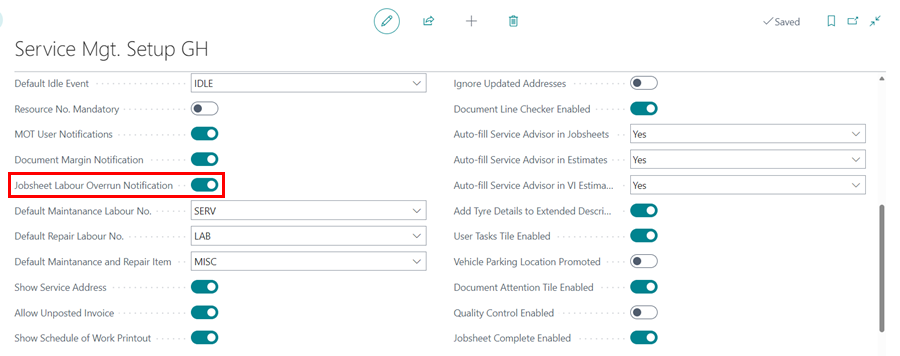
Under the General FastTab, enable the Jobsheet Labour Overrun Notification slider.
-
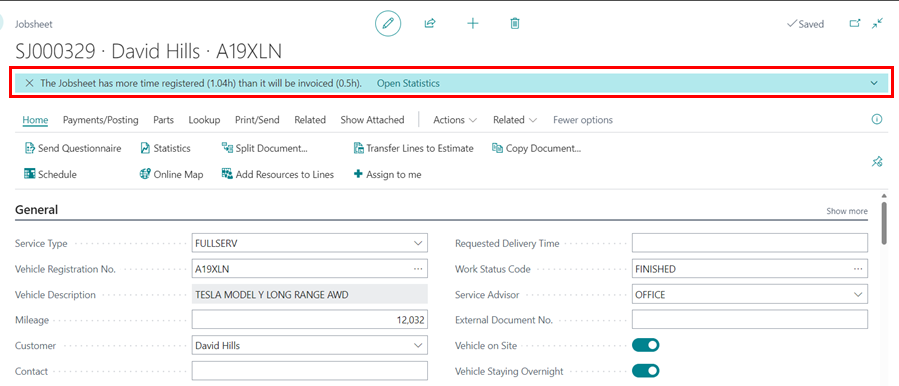
Now, when you open a Jobsheet that has less hours to be Invoiced than the Total Clocked Hours, you’ll receive a notification at the top.
-
Click on the Open Statistics action to view the Clocking Information in the Document Statistics page.
-
You can adjust the hours to be invoiced in the document lines, or leave it as is, as this won’t affect the posting of the document.
Setup for Jobsheet Deletion Reasons
To setup Jobsheet deletion reasons:
- In the top-right corner, choose the icon, enter Service Mgt. Setup GH, and select the related link.
-
Scroll to the Archive FastTab and select the Ask for Reason on Jobsheet Delete slider to the right. Exit the setup page.
- To personalise your Jobsheet deletion reasons, choose the icon, enter Document Deletion Reasons, and select the related link.
- Choose New from the menu bar, then Document Type as Jobsheet, a Code for the reason, and then the description. For example, you may enter Booking as the code and Booking Cancelled as the description.
-
Add several reasons and then exit the page when done.
-
Open the Jobsheet to delete, and at the top of the Jobsheet, you’ll see an icon to delete a Jobsheet; click on it, choose Yes on the pop-up, and choose the reason for deleting the Jobsheet.
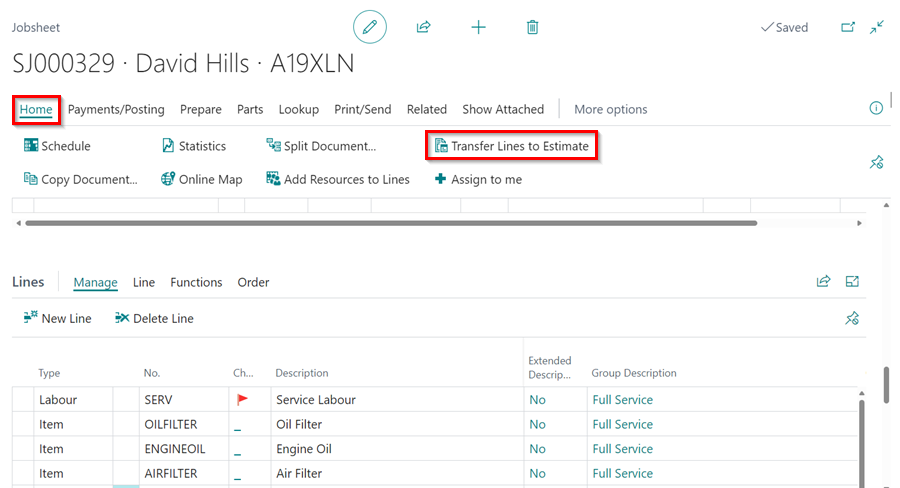
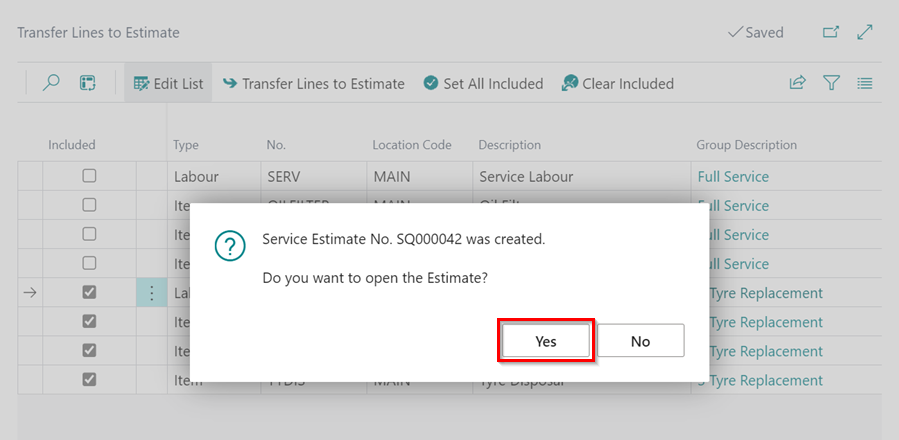
Transferring Lines to an Estimate
Transferring lines to an Estimate is a feature available in a Jobsheet that allows the user to create an Estimate directly from the Jobsheet when the added lines in the Jobsheet have not yet been approved by the customer. To transfer lines to an Estimate:
-
Open the Jobsheet with the lines you want to transfer, then select Home from the menu bar, followed by Transfer Lines to Estimate.
-
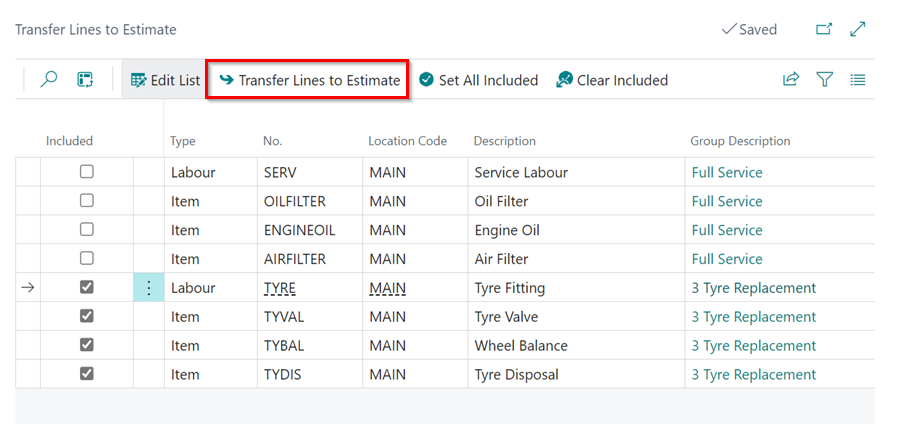
This opens a list of all the lines added to that Jobsheet. Select the checkboxes in the Included column for the lines you want to transfer to an Estimate, and then click Transfer Lines to Estimate from the menu bar.
-
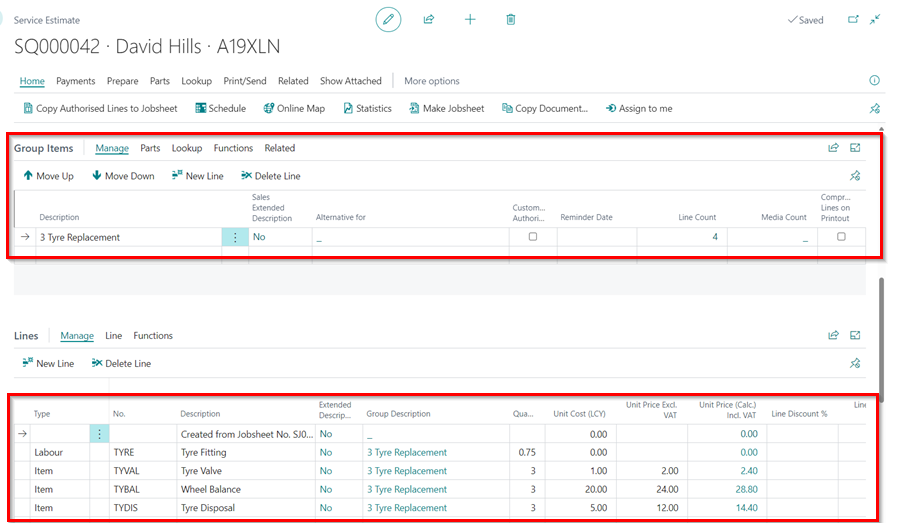
You will see a pop-up notification that an Estimate has been created and you can open it by clicking Yes.
-
It is worth noting that Group Items are transferred as Group Items.
See Also
Grouping document lines
Creating a New Jobsheet From Various Places in Garage Hive
Taking a Payment and Posting a Jobsheet
Posted & Archived Jobsheets
Managing Key Numbers in Garage Hive
Customising Vehicle Reminder Dates