How to Setup and Use Checklist Text Templates in Garage Hive
The Checklist Text Templates feature allows you to pre-assign templates in checklist Item lines, which technicians can use to ensure consistency in reporting and increased efficiency. To setup the Checklist Text Templates:
- In the top-right corner, choose the
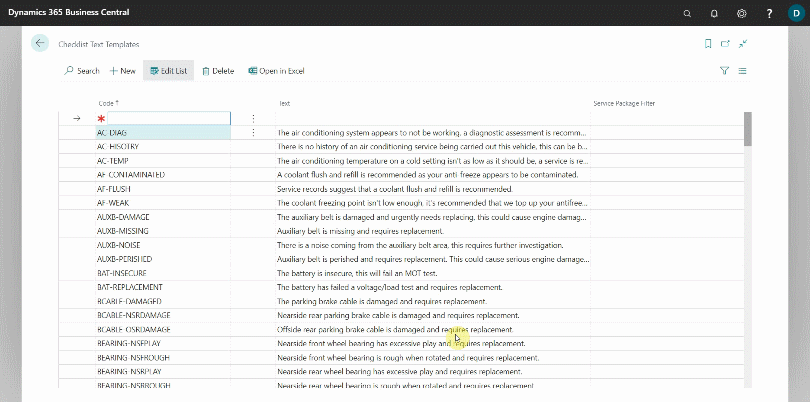
 icon, enter Checklist Text Templates and choose the related link.
 - The page that opens contains a list of all the Checklist Text Templates that have been set up, or if none have been set up, this is where they will appear.
-
Select New, to create a new one.
-
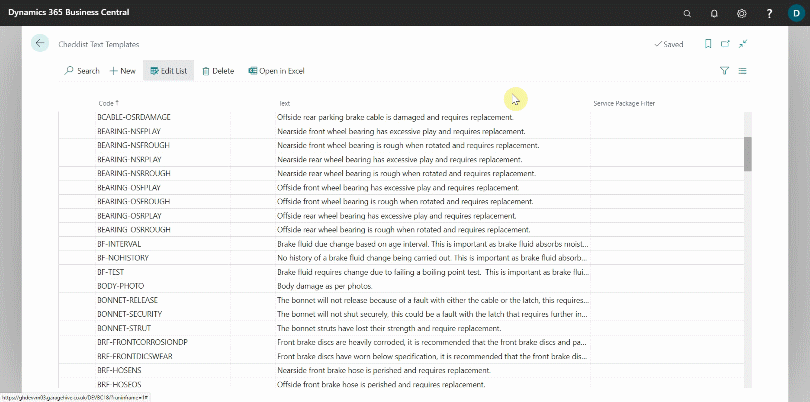
When creating a Checklist Text Template, it is recommended that you always group them by function by prefixing them with the same code. For example, you can use the letters TY to prefix all tyre-related Checklist Text Templates; this helps in sorting, as we will see later. In the below example, we will add a Tyre related Checklist Text Template.
- After you’ve added the Checklist Text Templates, you’ll need to enable them in the Checklist Template; learn more about Checklist Templates here.
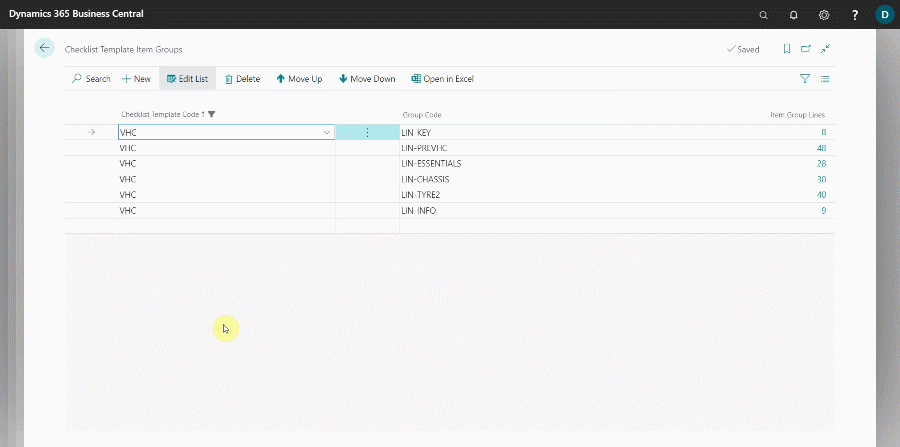
- Enter Checklist Templates in the icon, and select the related link. Choose one of the Checklist Templates from the list to which you want to add the Checklist Text Templates that you have created. In this case we’ll use the VHC Checklist Template.
-
Select Linked Item Groups from the menu bar to open a list of Checklist Template Item Groups in the Checklist Template; learn more about Checklist Template Item Groups here.
- Select a Checklist Template Item Group, and then, in the Group Code field, click the down arrow on the right and select Select from full list.
-
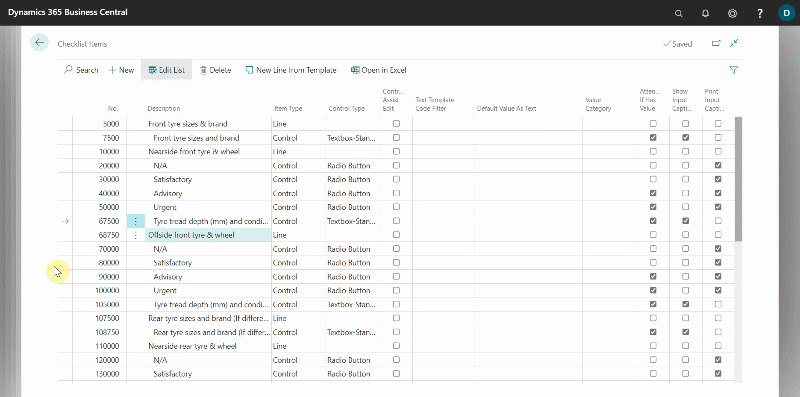
The page that appears contains all of the system’s Checklist Item Groups, which are the groups that contain the questions found in a checklist. Select an Checklist Item Group and from the menu bar, click on the three dot and then Items.
- Check that the Control Assist Edit and Text Template Code Filter columns are available; if not, learn how to add a column here.
- To enable the Checklist Text Templates in a Checklist Item line, select the checkbox under Control Assist Edit with the Control Type set to Textbox-Standard.
- Then, under the Text Template Code Filter column, choose the Text Template Code to apply. This is where you use the prefix you created for the Checklist Text Templates. For example, to filter only the Tyre Checklist Text Templates, use the prefix TY followed by an asterisk * , for example TY*.
-
If you only want to select one Checklist Text Template, remove the asterisk and choose the single Checklist Text Template from the list. If you want to add more than one group of Checklist Text Template, write the prefix code, followed by an asterisk, and then a vertical bar to separate the groups, for example TY* | SERV* (spaces are added here for readability, don’t use them in the system).
-
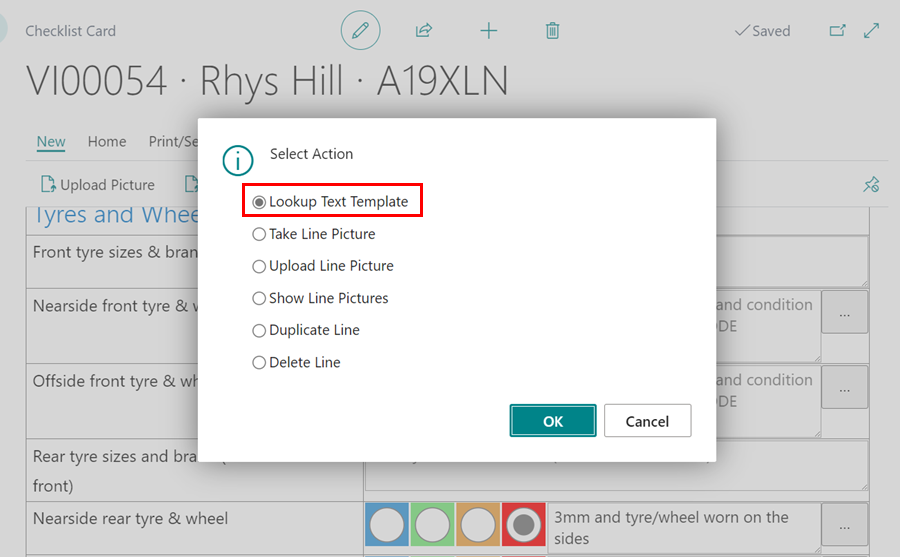
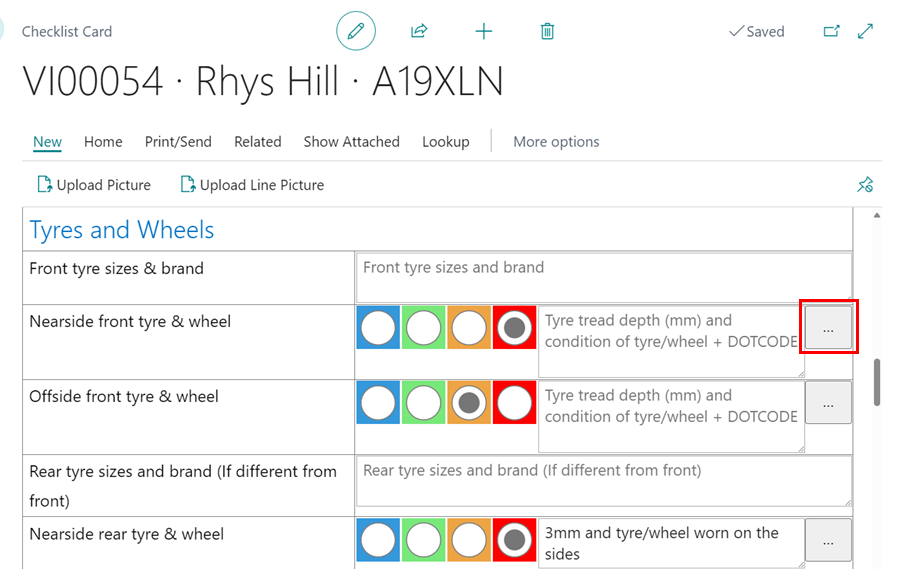
To view the Checklist Text Templates in a checklist, open the checklist, click the ellipsis (…) at the end of the Checklist Item line.
-
Click Lookup Text Template in the dialogue box. If you din’t filter, the entire list of the Checklist Text Template will be displayed.