How to Create a Customer Card in Garage Hive
A Customer card in Garage Hive stores all the details about a customer. This includes the customer’s name, address, phone number, email address, payment details, invoicing details and other relevant information. A Customer card can either be created from the Role Centre/Home Screen or when Creating a Booking for a new customer. In this case we’ll look at how to create a customer card from the Role Centre.
Creating a Customer Card From the Role Centre
-
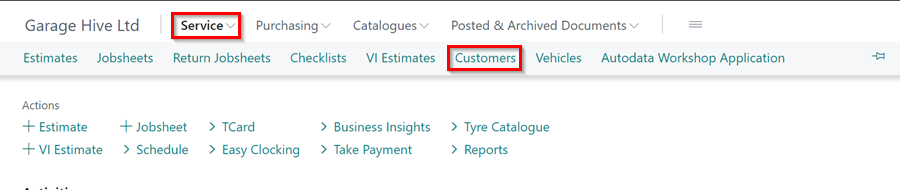
From the Role Centre, select Service, followed by Customers.
-
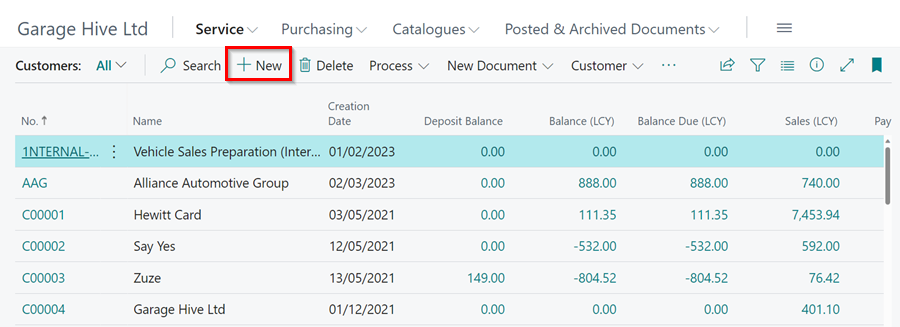
Click on New in the Customer list that opens.
-
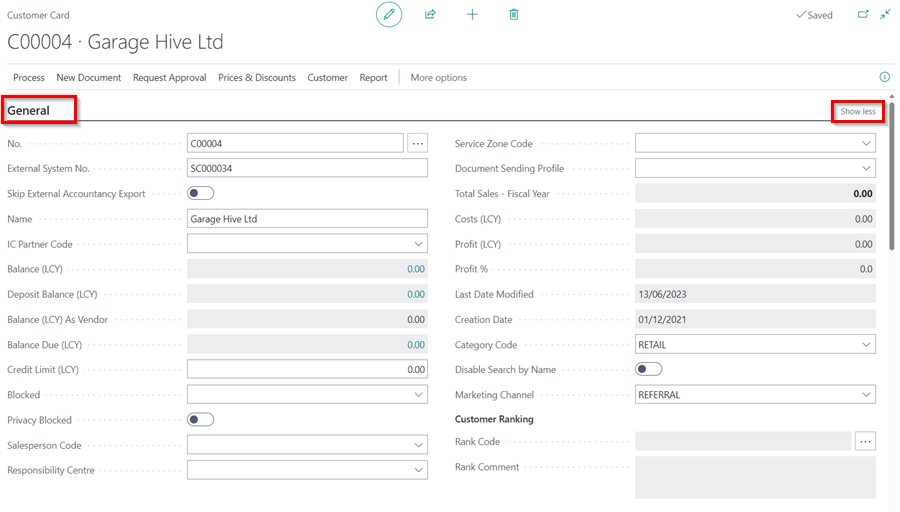
A new Customer card will now be created, and you can start adding details about the Customer.
Customer Card Details Sections
The Customer card is divided into several sub-categories, as listed below:
1. General Information
In the General section, you can add or view general Customer details, such as the Name, assigned No. in the system, External System No., Credit Limit (LCY), whether they are Blocked or not, among other general information about the Customer. Click on Show More/less in the top right of the General section, to reveal more fields or hide some of the fields.
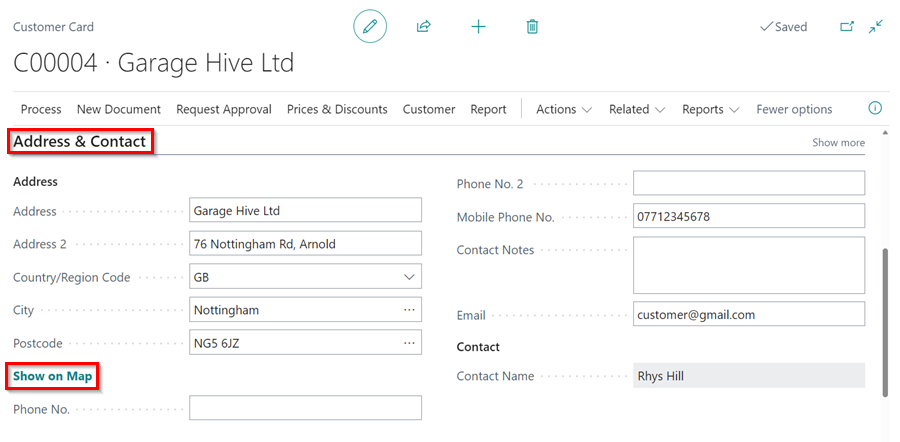
2. Address & Contact
The customer’s address and contact details are contained in this section. After entering the address details, you can select Show on Map to view the exact location on maps.
3. Invoicing
In the Invoicing section, the posting details of the Customer are added here.
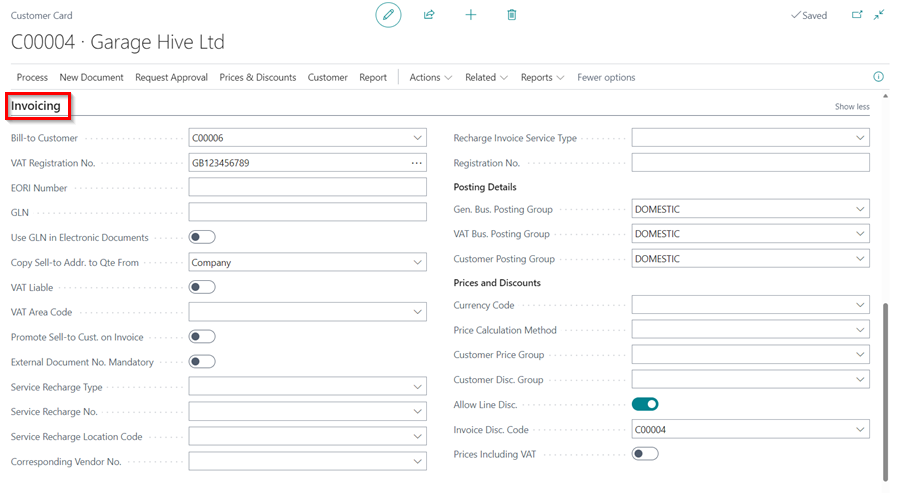
- Bill-to Customer - This is the Customer to whom the charge will be applied as well as the name that will be printed on the invoice. (I.e. If you have a customer who had a lease car, you want their name to remain attached to the car. But you want the invoice to be charged to the lease company, you can change this here.)
- VAT Registration No. - If the Customer is registered for VAT, this can be filled in here.
- Promote Sell-to Cust.on Invoice - Tick this box, if you are changing the Bill-to Customer, but you wish the Sell-to Customer’s name to remain on the invoice.
- Gen. Bus. Posting Group - These are pre-defined fields to select from.
- VAT Bus. Posting Group - These are pre-defined fields to select from. Please note that the majority of the time this should be set up as DOMESTIC.
- Customer Posting Group - These are pre-defined fields to select from. Please note that the majority of the time this should be set up as DOMESTIC.
- Customer Price Group - You can select specific Pricing Groups for individual customers. See link below.
- Customer Disc. Group - You can select specific Discount Groups for individual customers. See link below.
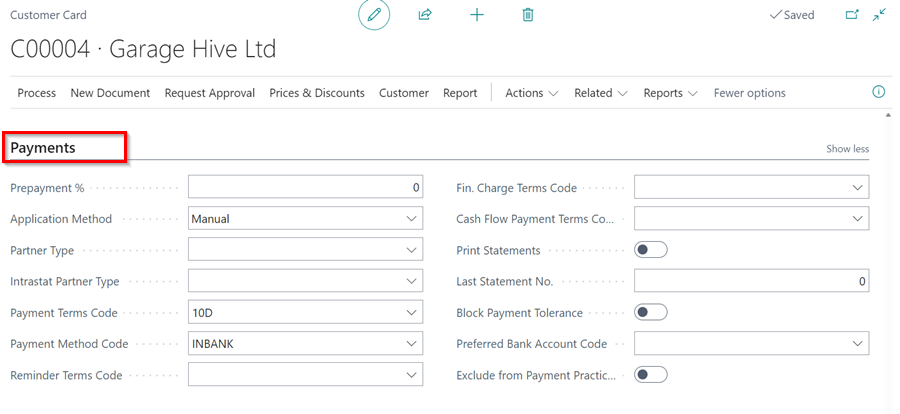
4. Payments
In the Payments section, we have the payment method, payment terms, reminder terms, and other related information about the customer’s payment.
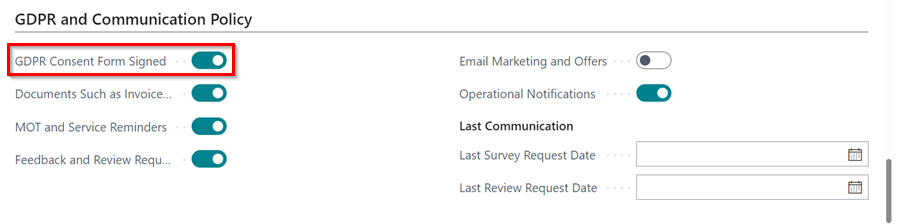
5. GDPR and Communication Policy
In the GDPR and Communication Policy section, You can tick off the customer’s communication preferences.
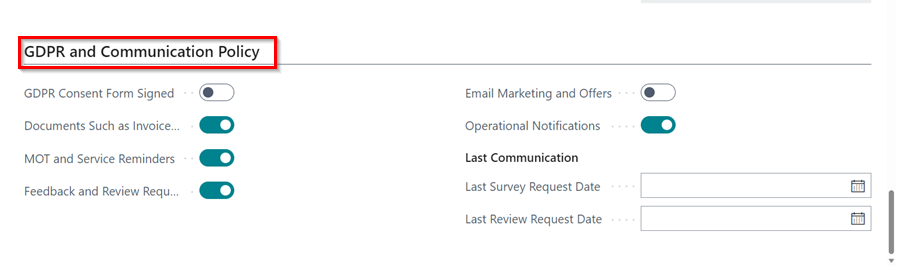
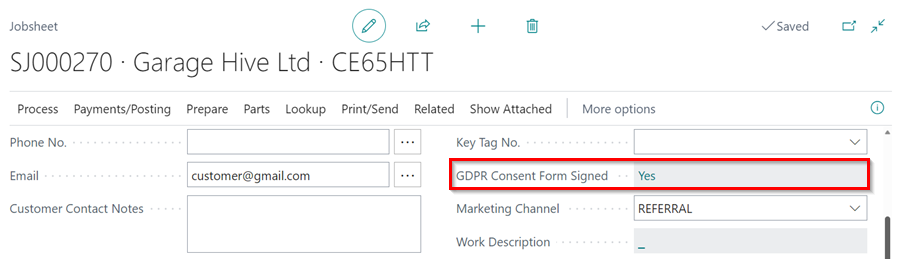
Once the GDPR Consent Form is signed, enable the GDPR consent form signed slider.
In the customer’s Jobsheet, the signed GDPR Consent form status will be displayed as Yes.