Using the Estimate
An Estimate is used to provide a breakdown of the items and services to be provided to potential customers, including the quantity and prices. This helps in communicating with customers ahead of time and providing transparency in pricing and services provided.
In this article
- Creating an Estimate
- Add Group Items
- Add Items and Labour
- Converting the Estimate to a Jobsheet
- Adding Customer Authorisation and Copying the Lines to a Jobsheet
Creating an Estimate
To create a new Estimate:
-
Select Estimates in the Home Screen, and then choose New.
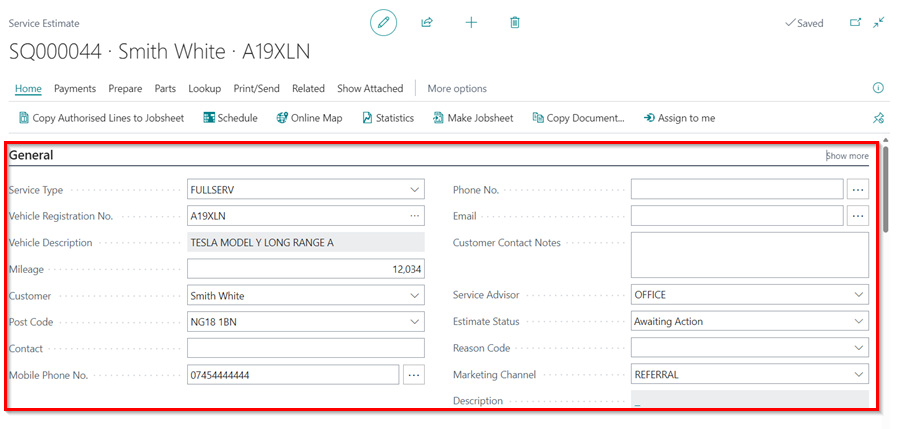
- Select the Service Type - This is the type of job that you are quoting.
- Fill in the Vehicle Registration No.:
- If the vehicle is in the system, the customer card will be auto-filled.
- If the vehicle is not in the system, the system will look it up using VRM to obtain the vehicle’s details.
- After the VRM lookup for the vehicle, enter the customer information:
- If the customer’s information was previously entered for another vehicle, the system will obtain the customer’s information and link it to the vehicle.
-
If the customer is new to the system, the system will prompt you to Create a new customer card.
-
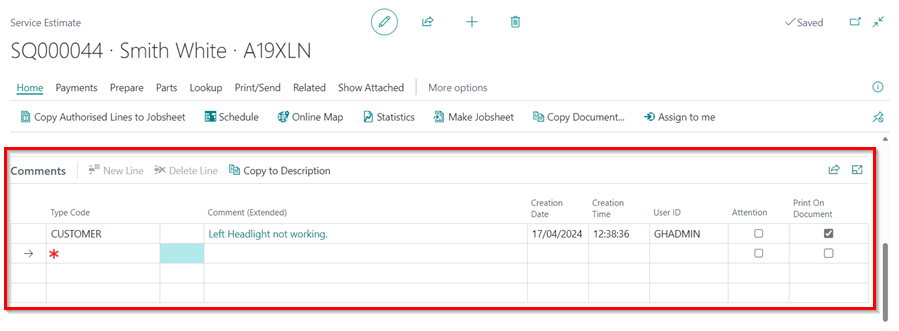
You can enter any information the customer has provided about the Estimate in the Comments section.
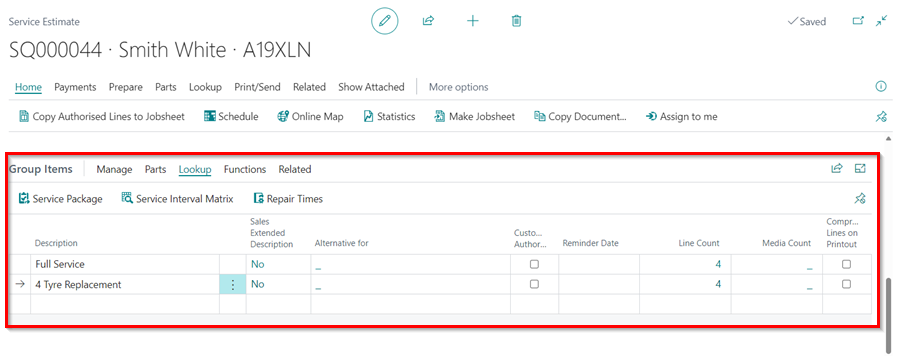
Add Group Items
-
Under the Group Items section, you can create groups where you add lines based on job to be quoted. The groups help in the categorisation of the lines, for example you can create groups like Full Service and MOT, Tyre Replacement or other group items. Read more here Grouping document lines.
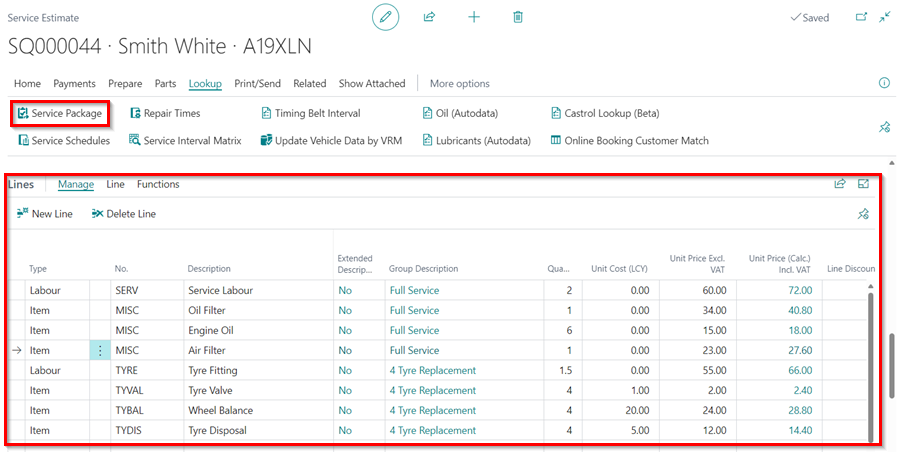
Add Items and Labour
- You can now begin adding Labour lines, Items lines, or Service Packages to the Estimate:
- Type column - Select either Labour or Item as the line.
- No column - Enter the number for Labour or Item, in the system. For example, for item, you can use a placeholder item number, such as MISC for items you currently don’t have in stock, inventory items like air filters and engine oil, non-inventory items like consumables, or external services, or other items; for labour, you can choose service labour, standard labour, or other labours.
- Description column - This is the item or labour description that will appear in the customer’s estimate.
- Quantity column - Enter the quantity of items or hours to quote.
- Unit Cost column - This is the cost of an item to the business. This field is left blank for labour.
- Unit Price - This is the price at which the customer will buy the item or labour per unit.
- Unit Price (Calc) Incl. VAT column - When you click on the amount in this field, a pop-up window will appear, showing the Unit Price, Margin %, Unit Price Incl. VAT, and Total Incl. VAT, allowing you to do price calculation.
- Line Discount % column - If you’d like to apply a discount to the job, within this field, fill in the percentage discount.
- Line Discount Amount column - This is the amount applied to the line as a discount. By default this column is not visible, but you can use personalisation to add it.
-
Line Amount Excl. VAT - This is the pre-VAT total line amount.
-
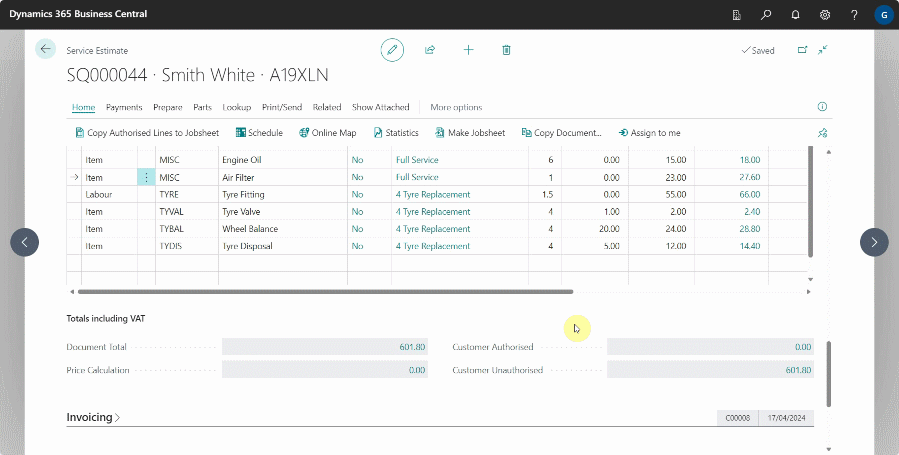
If you click on any amount under the Totals Including VAT section, which is below the Estimate lines, a pop-up window appears which shows the Document Total, Price Calculation, Customer Authorised totals and Customer Unauthorised totals.
Converting the Estimate to a Jobsheet
You can either create a Jobsheet with all of the items from the Estimate added to it, which will close the Estimate, or you can select specific lines from the Estimate to add to an open Jobsheet if one already exists. To convert the whole Estimate into a Jobsheet:
-
In the menu bar, select Home, then click Make Jobsheet. This will convert your Estimate into a Jobsheet, which you can then use to create an allocation for the job in the schedule for the relevant day.

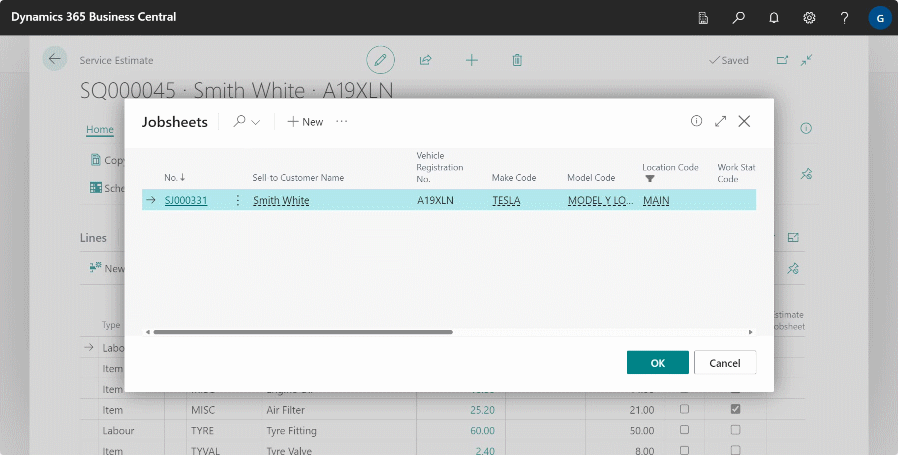
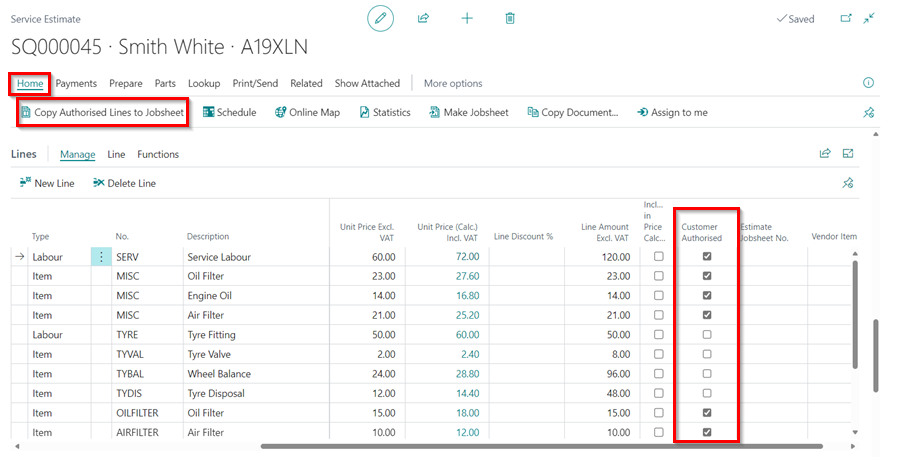
Adding Customer Authorisation and Copying the Lines to a Jobsheet
To Select partial lines from the Estimate to add to an open Jobsheet:
- From the Estimate lines, tick the checkbox in Customer Authorised field, for all the lines that have been authorised by the customer.
-
Select Home from menu bar, followed by Copy Authorised Lines to Jobsheet, and select the Jobsheet to which you want to copy the lines, and click OK.
-
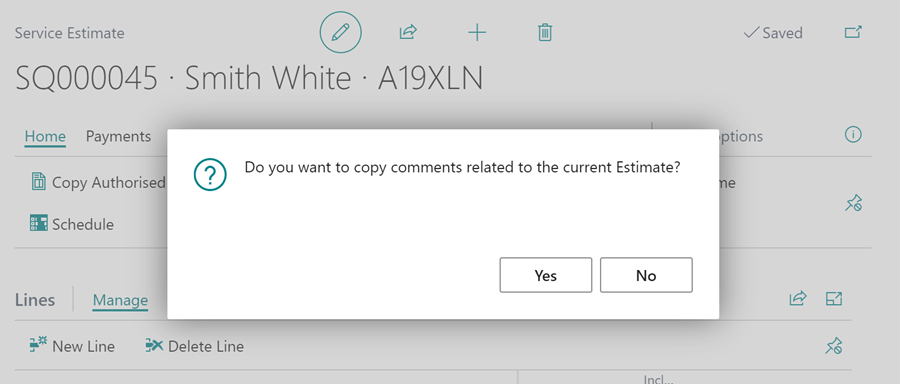
You will be prompted, ‘Do you want to copy comments related to the current Estimate?’ ** Select Yes to copy the comments to the Jobsheet.
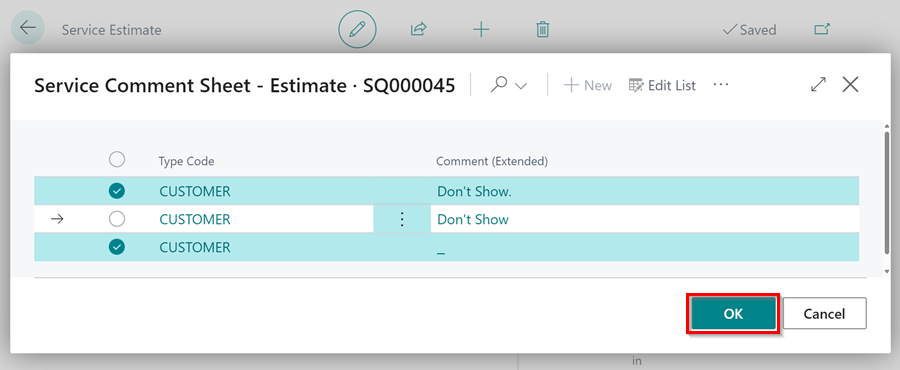
- Select the comments to copy to the Jobsheet. Click Ctrl key and hold, and then click on the all the comments you want copied to the Jobsheet. Click OK.
-
This will add the selected lines and comments to the selected Jobsheet.
- Select the Jobsheet to copy the the authorised lines, and click OK.
-
You can click Yes to open the Jobsheet.