Personalisation of Garage Hive
Personalizing Garage Hive is quick and easy, such as adding fields to pages and hiding columns. Let’s take a look at some of the ways you can maximize on the personalization feature.
In this article
- Adding Fields to Pages
- Hiding or Moving Columns
- Freezing and Resizing the Columns
- Adding or Removing Fields from a Collapsed Fasttab
- Customising Garage Hive for each User
Adding Fields to Pages
To add a field into a page:
- Open the document, or page to add a field.
-
Select the Settings icon in the top-right corner, then Personalise. At the top, the Personalising bar appears.
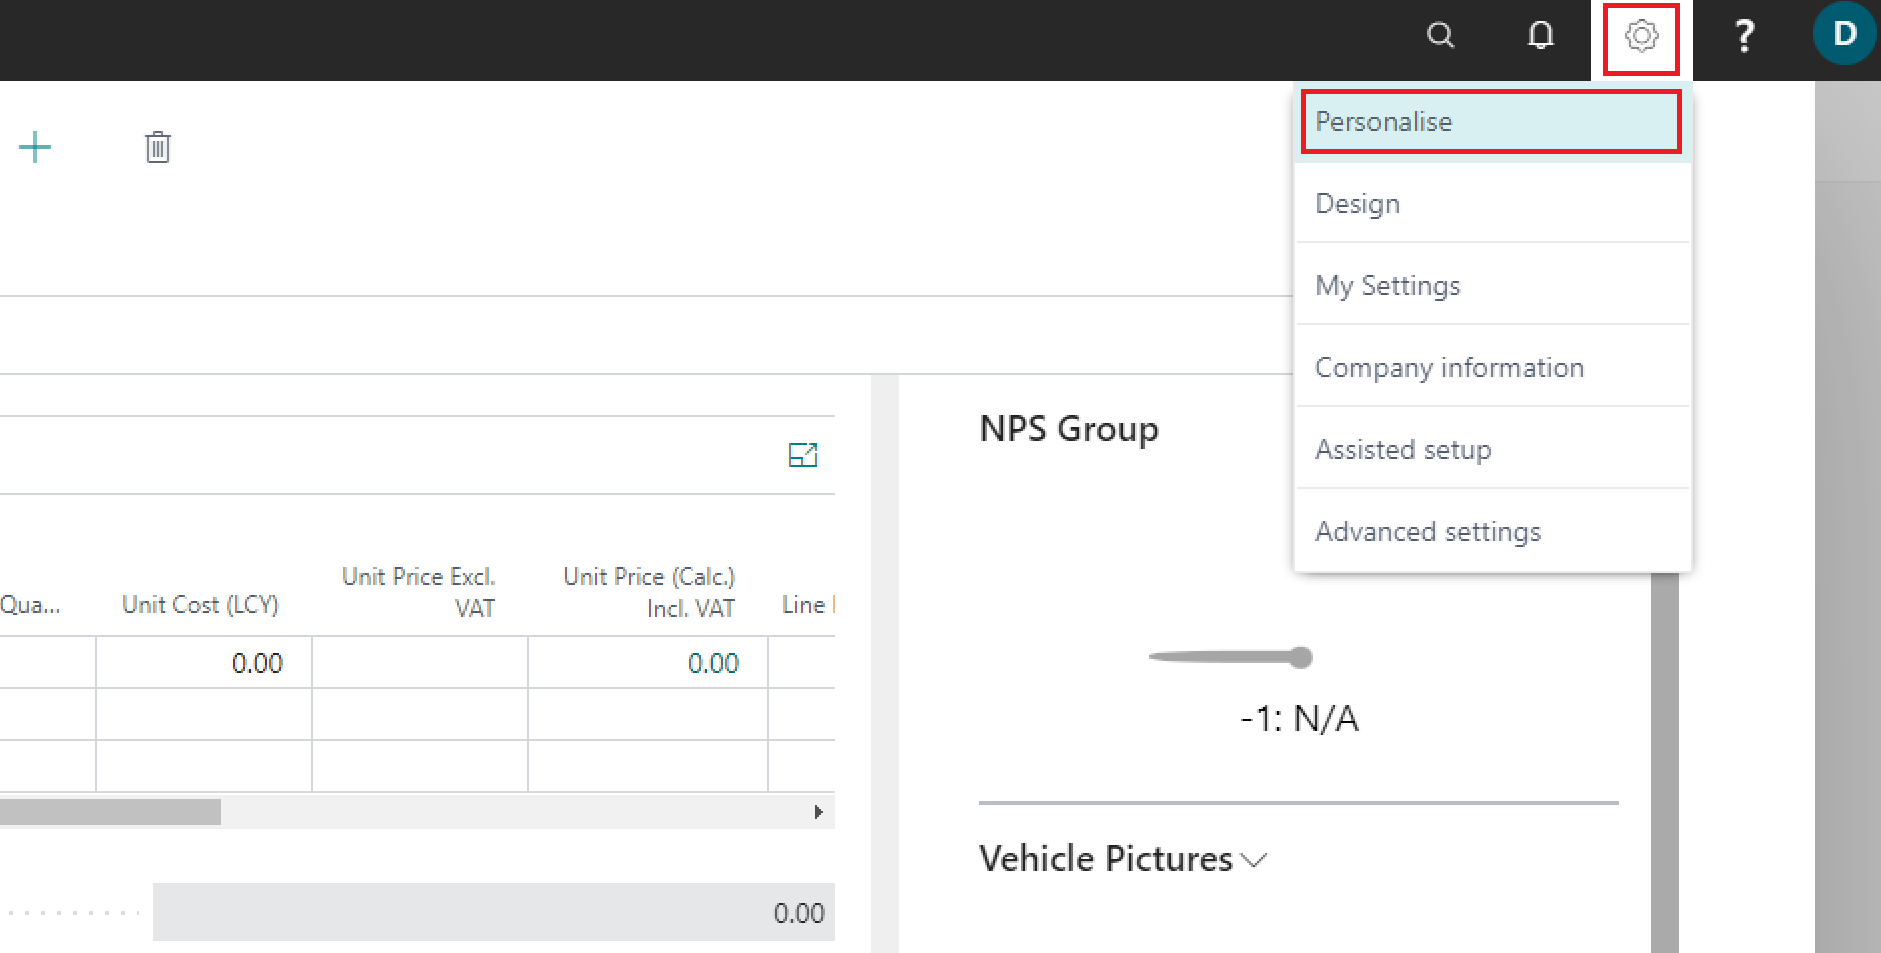
- Click on the section to add a field in the page, some sections will be highlighted with a red box to indicate that it has been selected.
-
Click on the Field option from the Personalising bar at the top, which now adds options to the right side of the screen to select from.
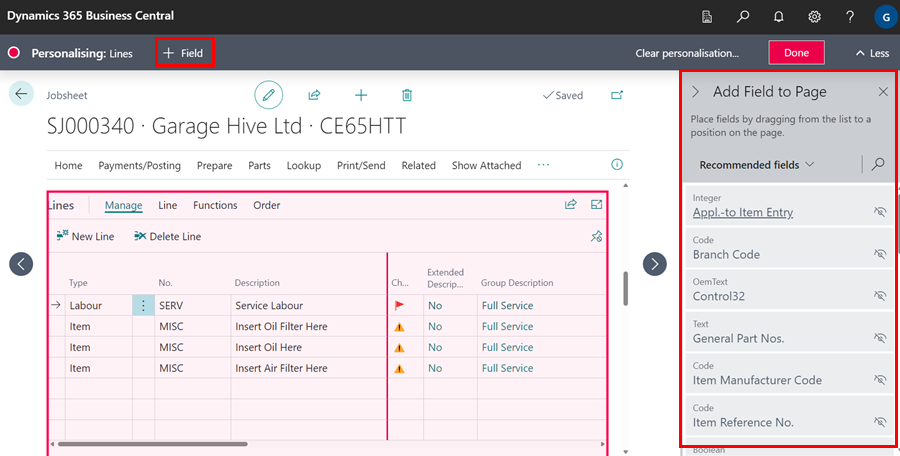
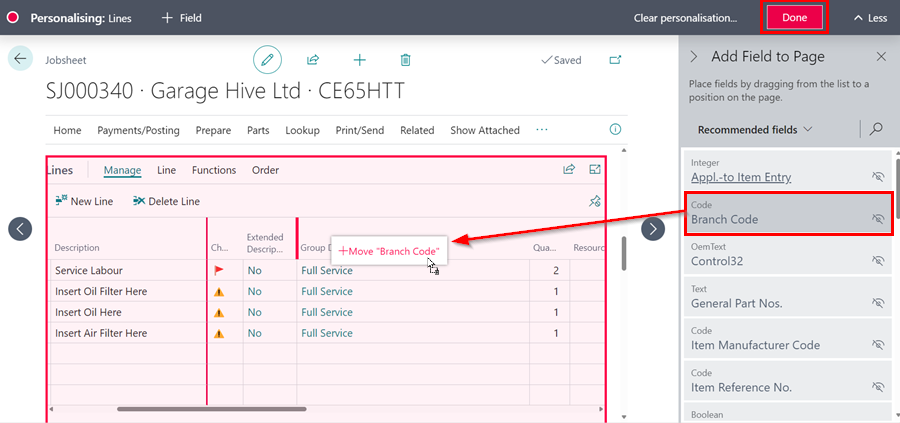
- Choose the field to be added, then click and hold it while dragging it to the desired position.
-
When you’re finished, click Done in the top-right corner of the Personalising bar.
Hiding or Moving Columns
To hide or move a column:
-
Select the Settings icon in the top-right corner, then personalise.At the top, the Personalising bar appears.

-
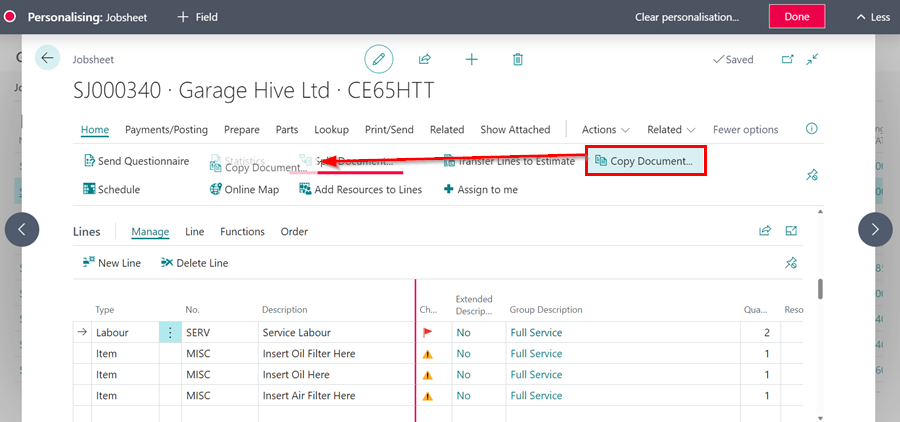
Place your cursor over the Field you want to hide or move, and then click on the small red arrow that appears on the right side of the field. To hide the field, click Hide.
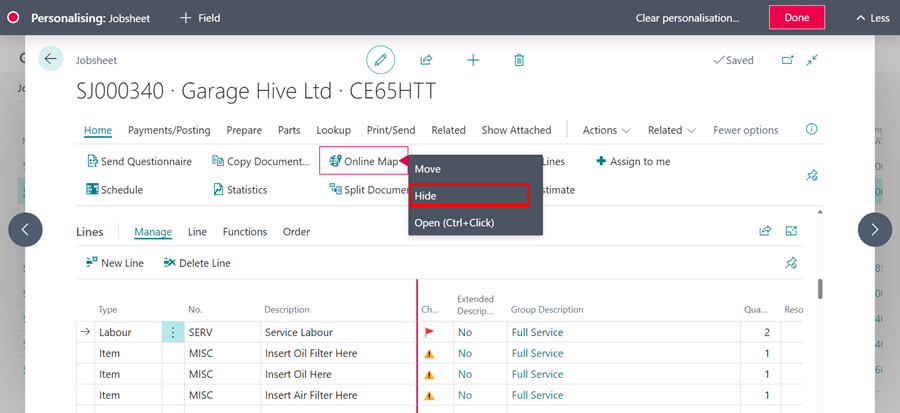
- To move the field, click and hold the small arrow that appears when you place your cursor over it, then drag it to the desired position.
-
When you’re finished, click Done in the top-right corner of the Personalising bar.
Freezing and Resizing the Columns
To freeze or resize the columns:
-
Click on the Settings icon in the top-right corner, then select Personalise. The Personalising bar will appear at the top.

-
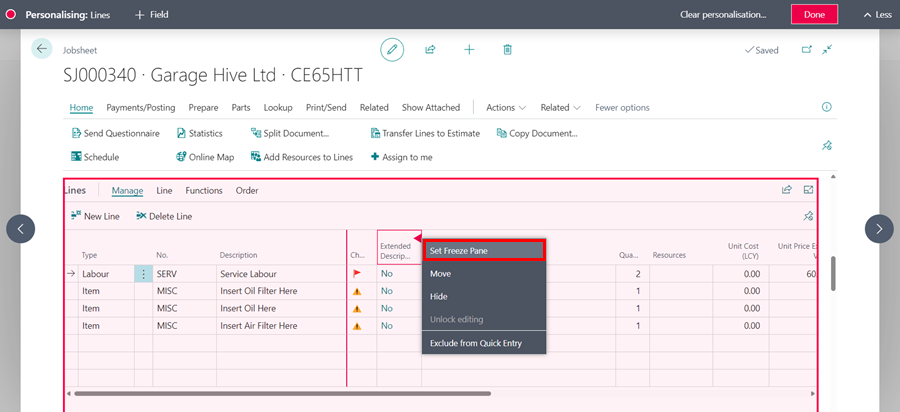
Hover over the column you want to freeze and click the small red arrow to the right of the column header. To freeze the column, select Set Freeze Pane. This will ensure that all columns to the left of the frozen column remain visible when scrolling across the table.
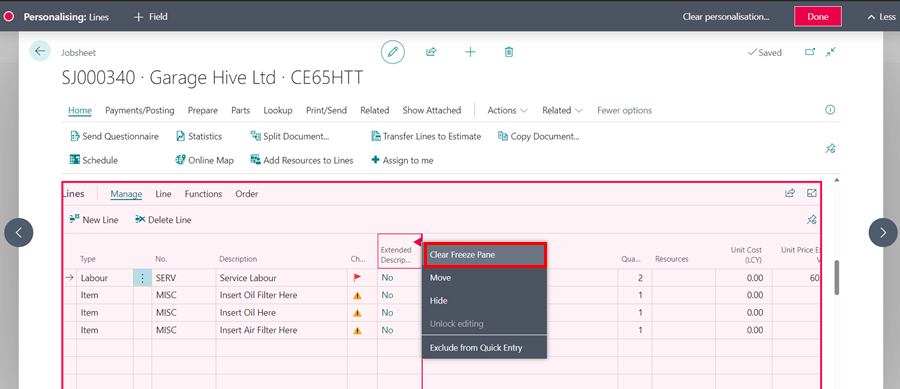
- To remove the freeze pane, select the column with the freeze pane enabled, click the small red arrow, and then select Clear Freeze Pane.
-
Once you have finished, click Done in the top-right corner of the Personalising bar.
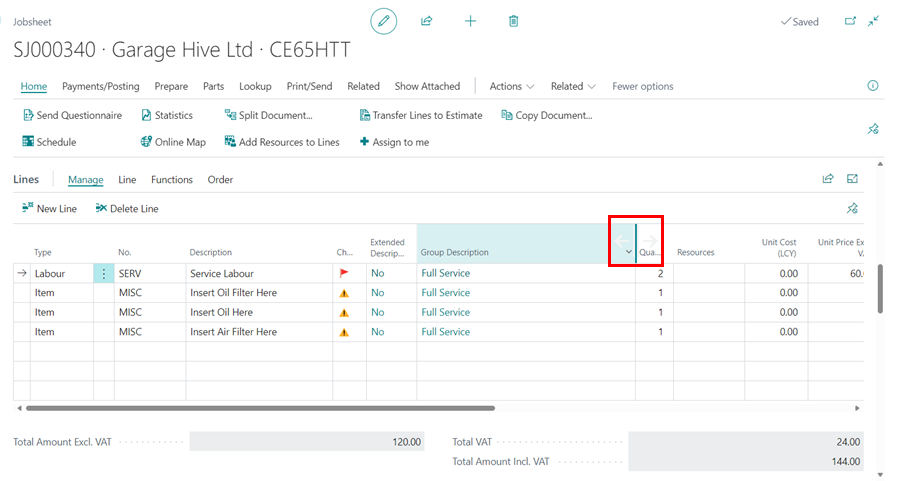
- To resize a column, move your cursor to the right edge of the column until the cursor changes to a double-headed arrow with parallel lines. Then, click and drag left to reduce the column’s size or right to increase it.
-
Columns can be resized without entering the Personalising mode.
Adding or Removing Fields from a Collapsed Fasttab
To add or remove a field in a fastab when collapsed:
-
Select the Settings icon in the top-right corner, then personalise. At the top, the Personalising bar appears.

-
Place your cursor over the Field you want to add, then click the small red arrow to the right of the field. Select Show Always or Show When Collapsed to add the field so that it appears when the FastTab is collapsed.
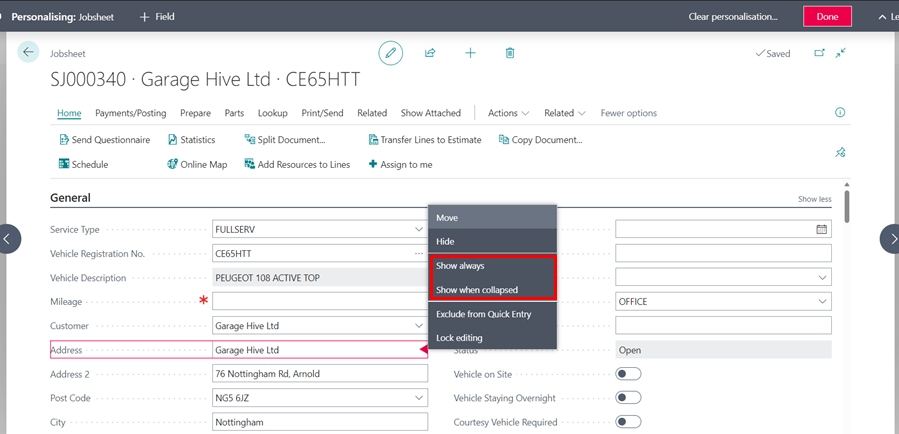
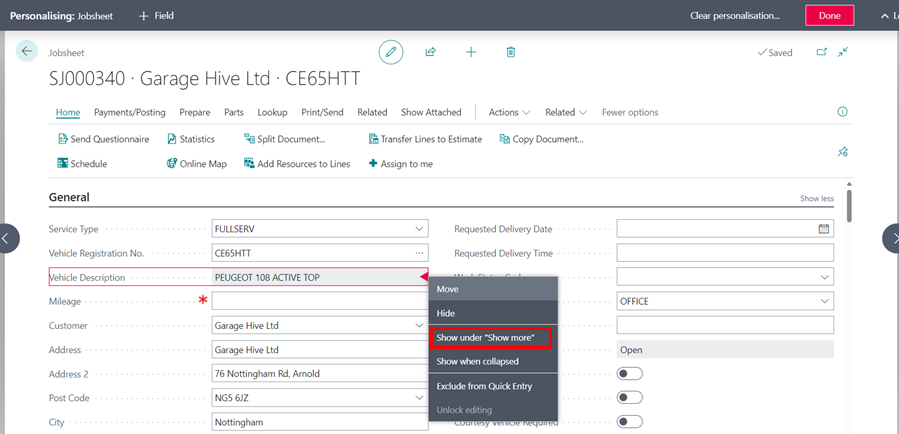
- To hide a field when the FastTab is collapsed, place your cursor over the Field you want to hide, then click the small red arrow to the right of the field. Select Show Under “Show More” to hide the field when the FastTab is collapsed.
-
When you’re finished, click Done in the top-right corner of the Personalising bar.
Customising Garage Hive for each User
When working with Garage Hive, you may want to customise Garage Hive differently for different users so that you can limit what a user can see when they are on the system. Here’s how to personalise it for each user:
-
Select the
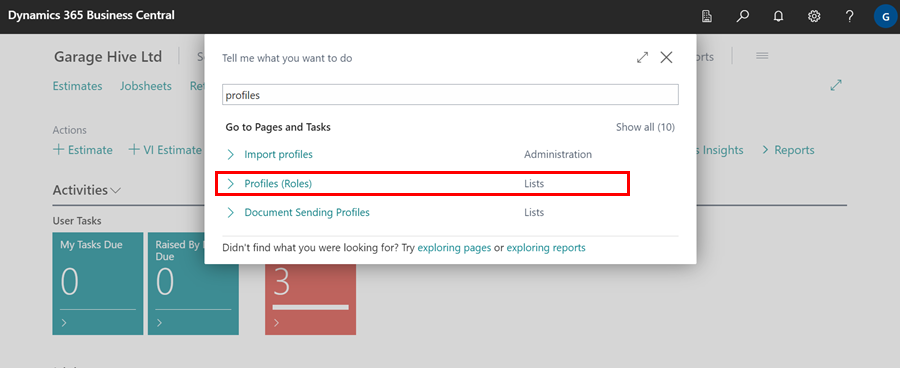
 icon in the top-right corner, enter Profiles, and select the related link.
-
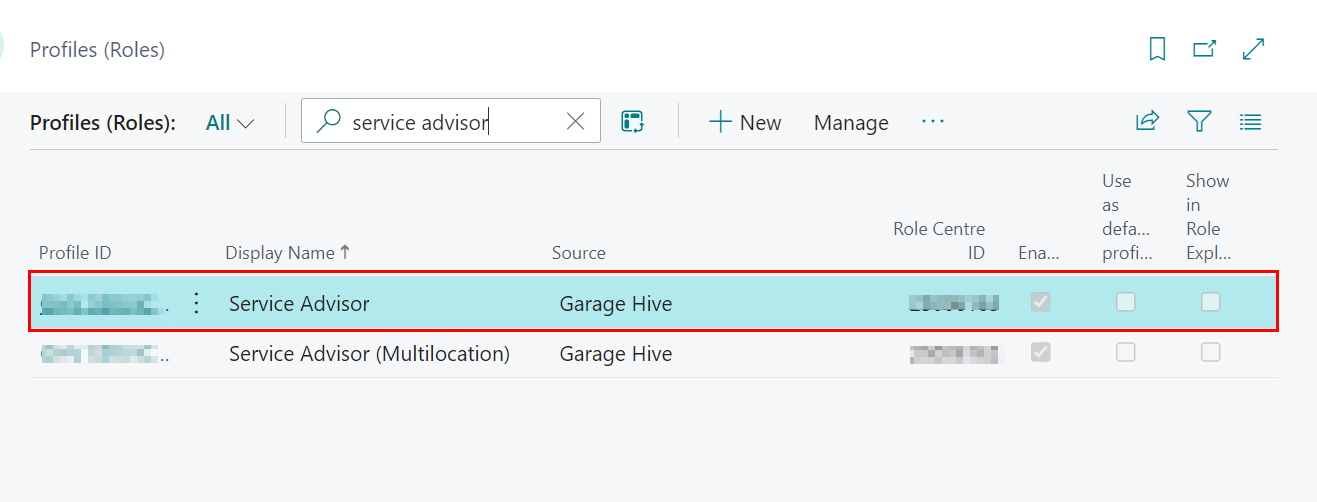
Search for the user whose system you want to customise, and then click on the user’s Profile ID to open the user’s profile.
-
Select Customise Pages from the menu bar.
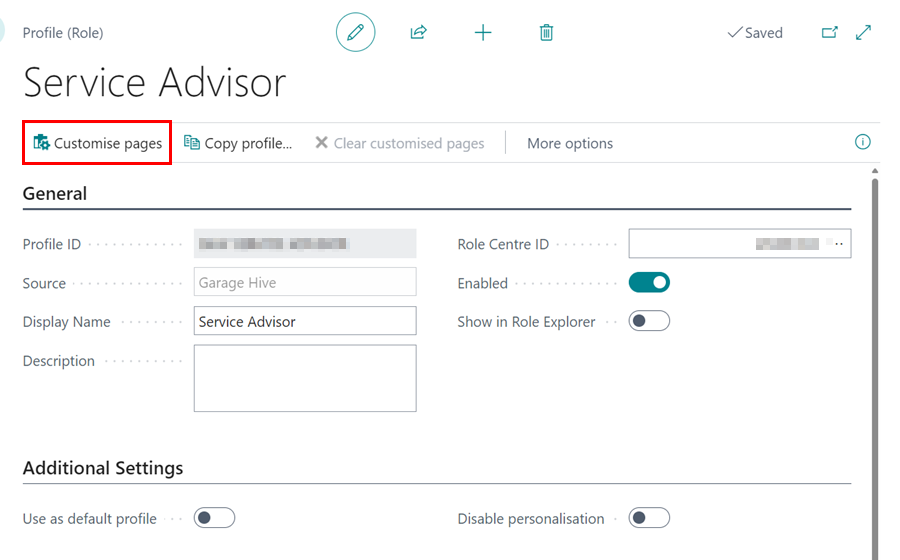
- The Customising page opens in a new browser tab. You can now customise the user’s system from this Customising page.
-
To open a page, click on the page link you want to open and then select Open (Ctrl+Click). You can also use the shortcut Ctrl + Left-Click on the page.
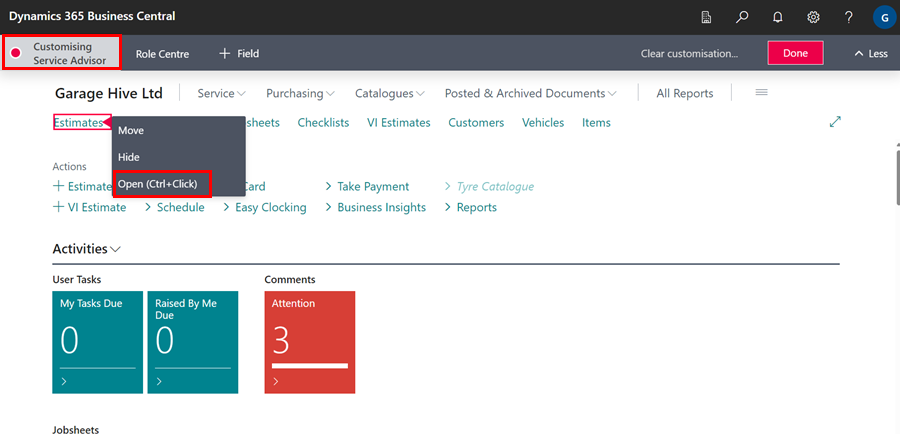
- You can now personalise the opened page using any of the methods described above.