Tyre Scanner Integration in Garage Hive
In this article
- Tyre Scanner New Account Registration
- Tyre Scanner System Setup
- Tyre Scanner Checklist Template
- Getting the Tyre Scanner Report
- Create VIE from the Tyre Scanner Report
Tyre Scanner New Account Registration
As a new Tyre Scanner customer, you should first register as follows:
Tyre Scanner new account registration link: tSCAN UK Account Information
- Click on the link above to enter the necessary information required for the creation and setup of your customer account.
-
To obtain the Endpoint URL, which is required in the form, select the
 icon, enter Tyre Scan Setup, and select the related link.
-
In the Tyre Scan Setup page, click Get Endpoint Url and copy the URL from the pop-up notification.

- When you’ve finished filling out the form, click Submit and wait to hear back from the tScan team.
Tyre Scanner System Setup
To connect the Tyre Scanner to the system:
-
In the top right corner, choose the
icon, enter Tyre Scan Setup, and select the related link. - Create a new text template code to be used in the Checklists in the field Alignment Text Template Code.
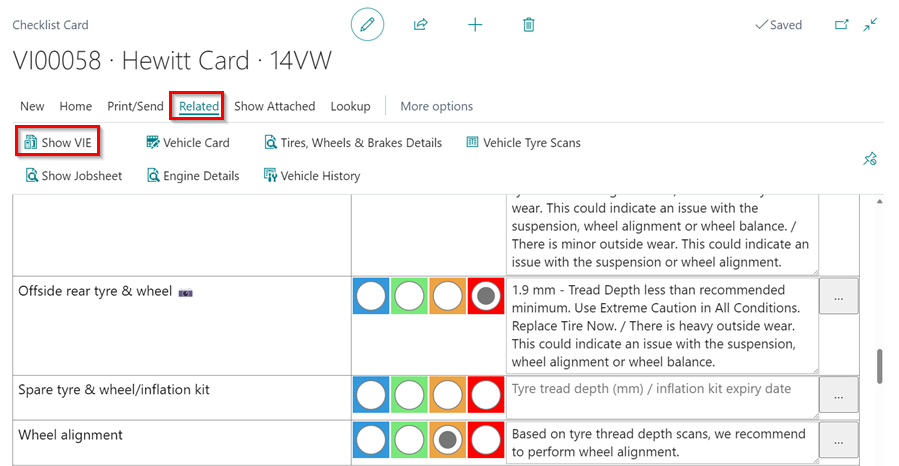
- Click New at the bottom left of the drop-down list, enter the Code as ALIGNMENT, and enter the Text that will inform the customer about the report, such as “Based on tyre thread depth scans, we recommend performing wheel alignment.”.
- Select the Align service package in the Service Package Filter column to use when quoting for the alignment. When completed, click OK.
-
Then, to enable the Tyre Scan in the system, slide the Enable slider to the right.
Tyre Scanner Checklist Template
The Tyre Scanner is used in conjunction with the Checklist, which is where the Tyre Scan report is obtained. To achieve this, you should create a checklist template to be used with the tyre scanner report. Here’s how to do it:
- In the top right corner, choose the icon, enter Checklist Templates, and select the related link.
-
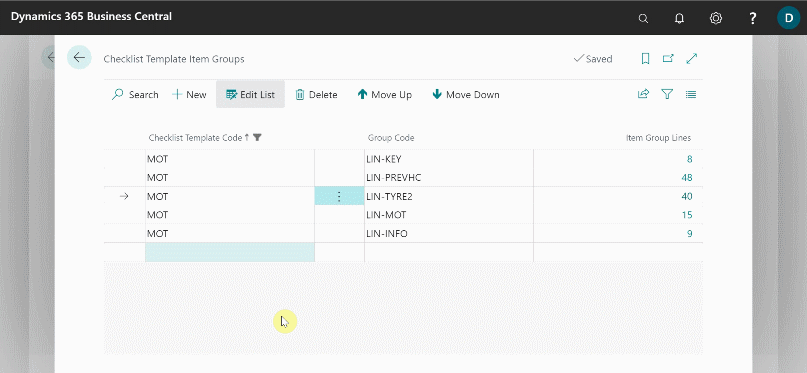
Select the MOT checklist template from the list, and then click on Linked Item Groups in the menu bar.
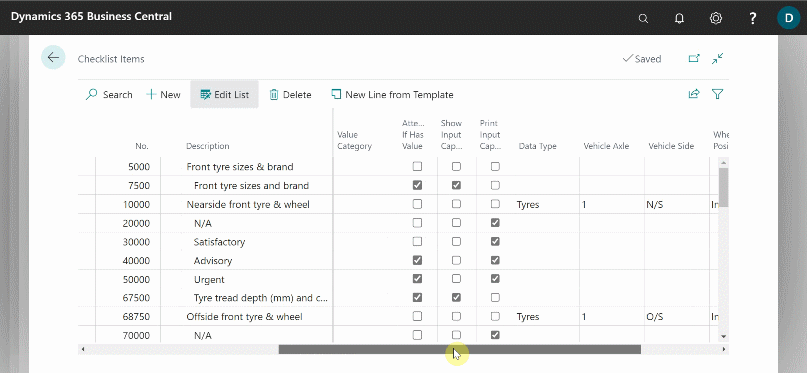
- Select the one related to the Tyres on the Checklist Template Item Groups page, and then click on the number in the column Item Group Lines. Click on Edit List, to enable editing on this page.
-
If the Data Type, Vehicle Axle, Vehicle Side, and Wheel Position columns are not visible in the Checklist Items page, add them through personalisation and move them closer together.
-
Customize the Checklist Items lines with tyres for the vehicle by filling in the following fields:
Checklist Item Description Data Type Vehicle Axle Vehicle Side Wheel Position Nearside front tyre & wheel Tyres 1 N/S Inner Offside front tyre & wheel Tyres 1 O/S Inner Nearside rear tyre & wheel Tyres 2 N/S Inner Offside rear tyre & wheel Tyres 2 O/S Inner Wheel alignment Alignment blank blank blank 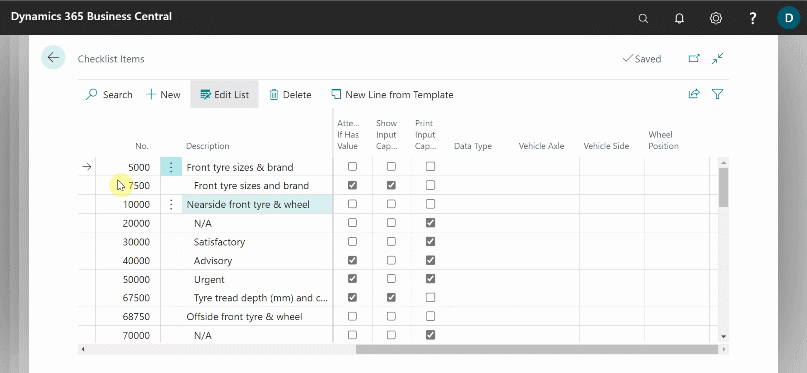
-
Then, in the Value Category column, select Satisfactory, Advisory, and Urgent under each tyre, which should match the description on each line. When finished, close the pages.
- This Checklist Template setup allows the system to automatically fill in the fields from the Tyre Scan.
Getting the Tyre Scanner Report
After scanning the tyres and sending the report to the system, you should create a new Checklist or select an existing one to get the Tyre Scanner Report. Here’s how:
-
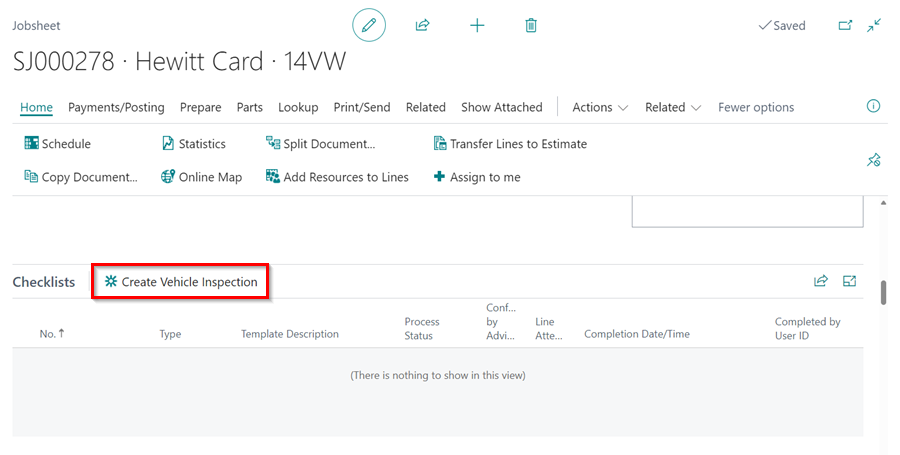
Open the Jobsheet for the vehicle in which you scanned the tyres and scroll down to the Checklist sub-page. Select Create Vehicle Inspection.
-
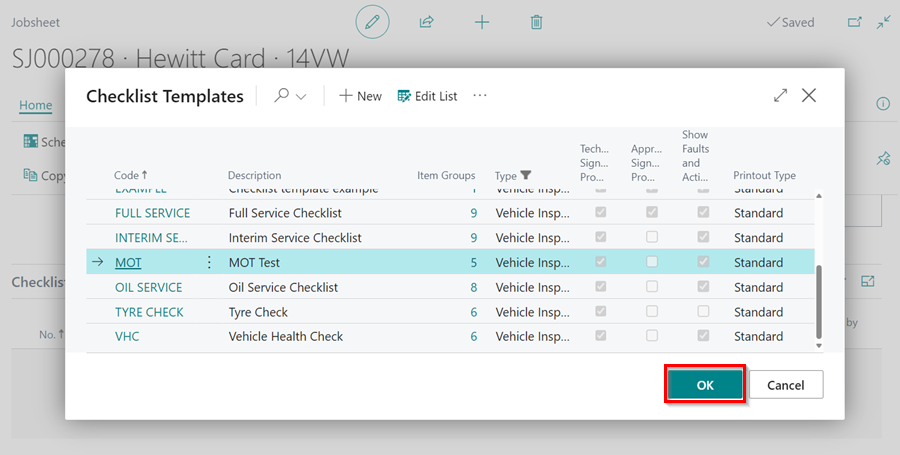
Then choose the MOT checklist template that you have already set up on the page that appears. Click OK.
- Click on the Checklist No. to open it. To make the Checklist editable, click on the Edit icon at the top.
-
Select Home menu, then Get Tyre Scan from the menu bar, and the report will be applied to the Checklist.
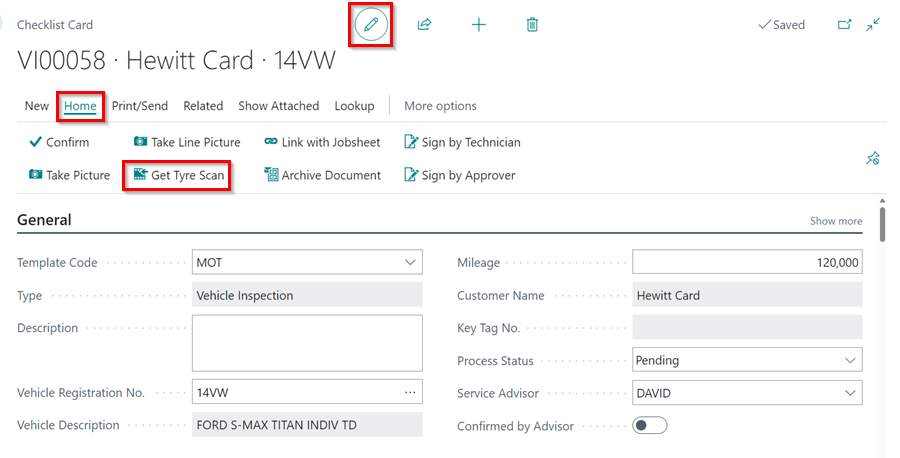
- Scroll down to the Tyres and Wheels section of the Checklist to see the applied report.
-
A comment and a photo have been added to each tyre line, and you can view the photo by clicking on the ellipsis (…) at the end of the line.
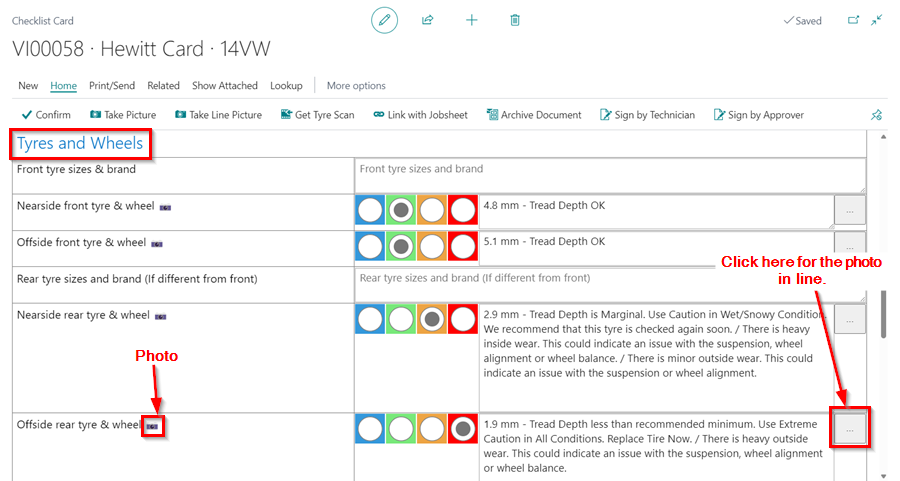
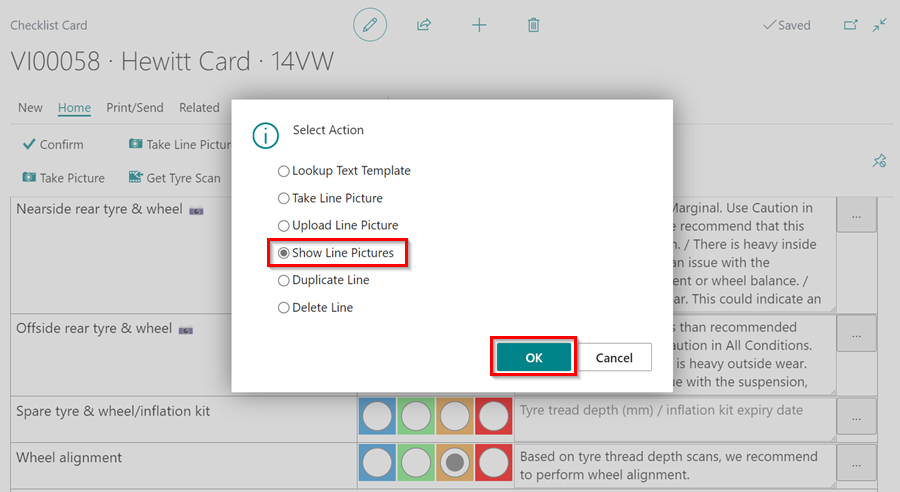
-
Select Show Line Pictures.
-
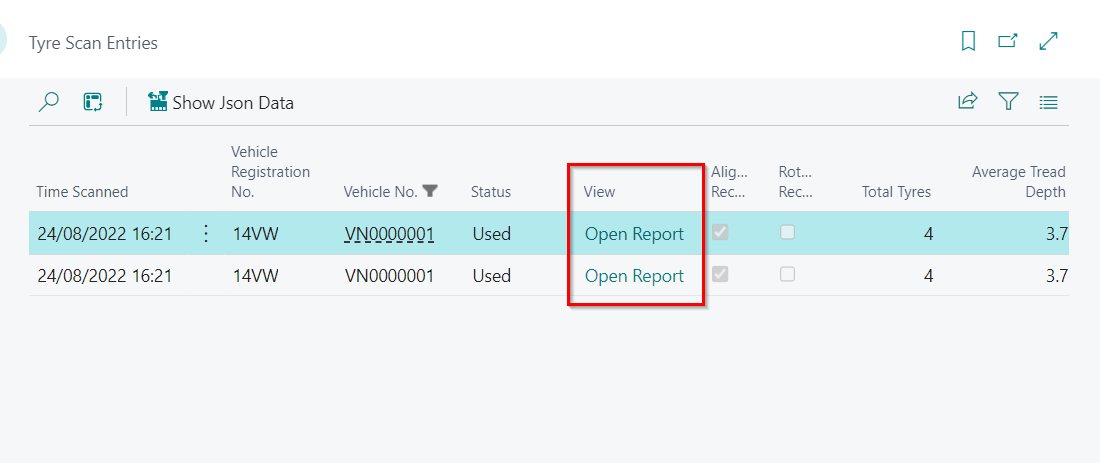
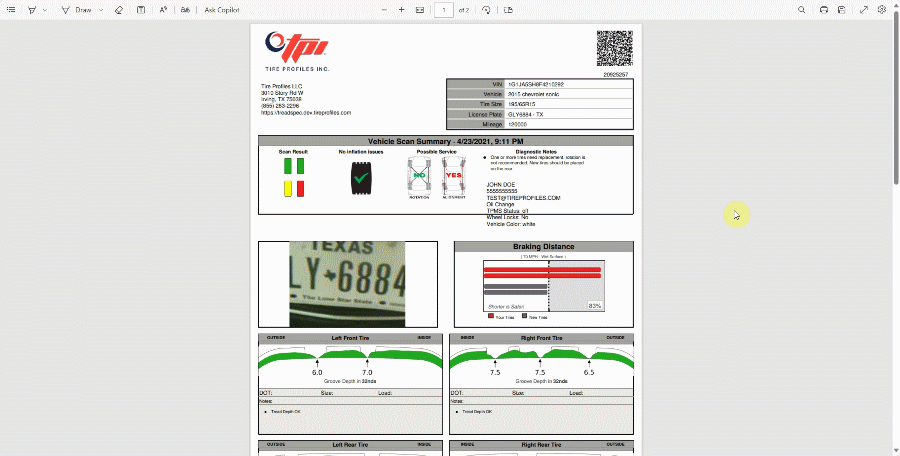
You can also view the Tyre Scanner’s actual PDF report by selecting Related from the menu bar and then Vehicle Tyre Scans.
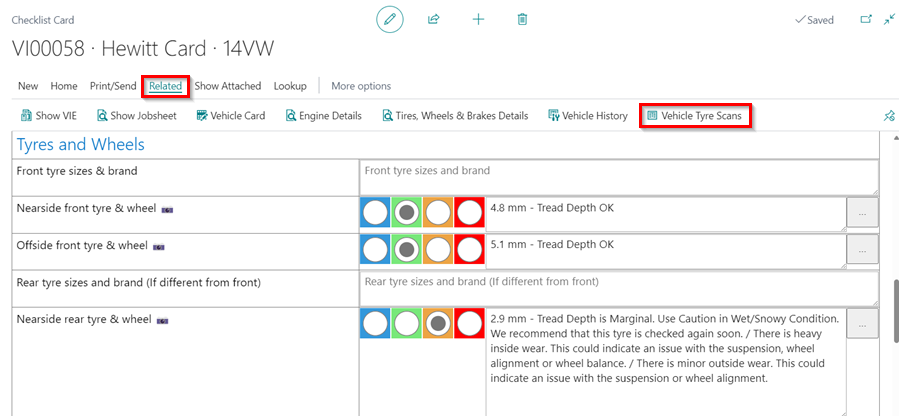
- Select Open Report from the View column on the Tyre Scans Page.
The Report looks like this.
Create VIE from the Tyre Scanner Report
-
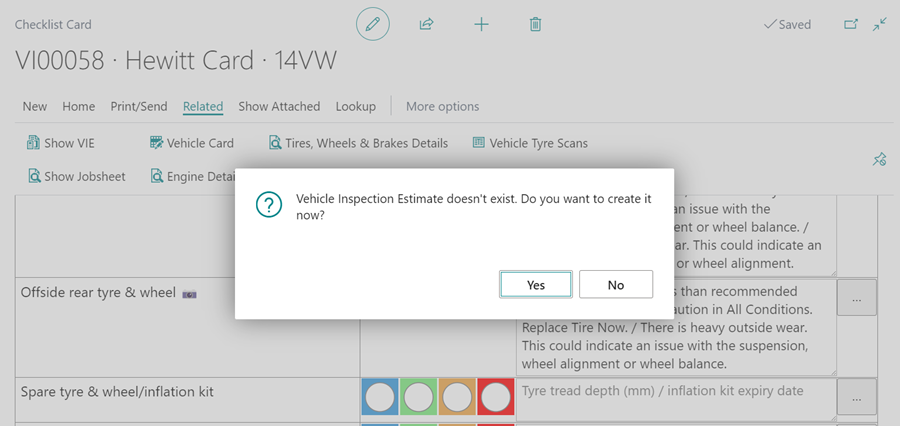
To create a VIE from the tyre scanner report, select Related from the menu bar, then Show VIE.
-
If no VIE is linked with the checklist, the system will prompt you to create one; click Yes.
-
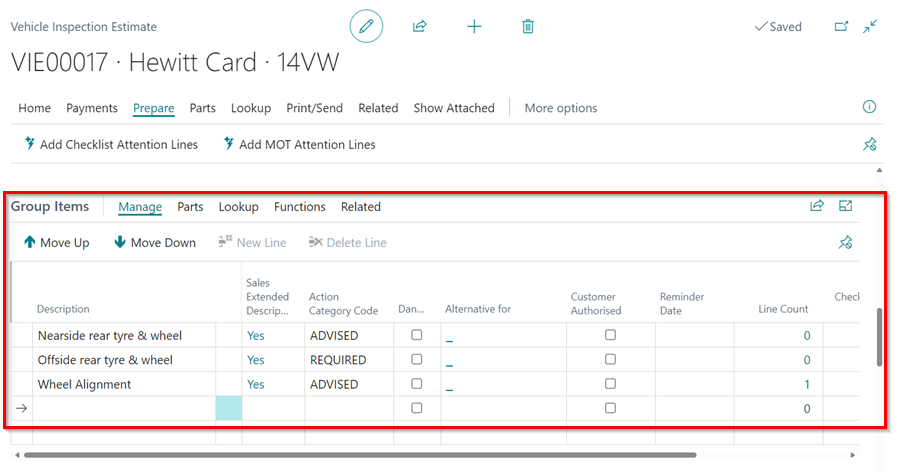
Select Prepare from the menu bar of the newly created VIE, followed by Add Checklist Attention Lines.
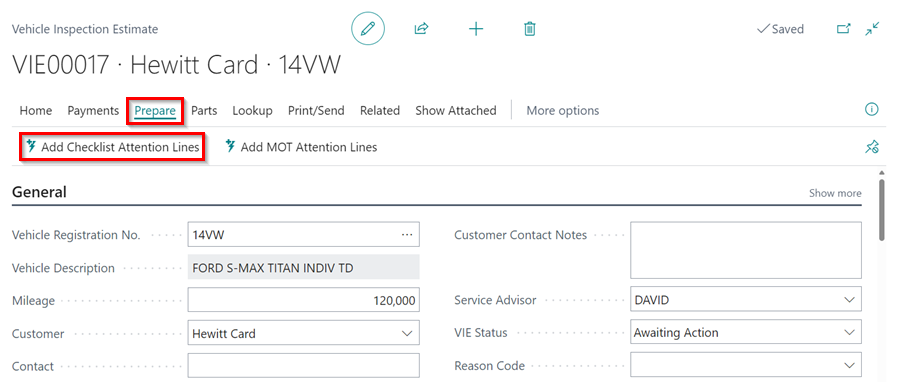
-
The checklist attention lines will be added in the VIE under the Group Items FastTab.