How to Use the Gearbox Sales Module in Garage Hive
In this article, we will explain how to use the Gearbox Sales Module, specifically for Garages that are involved in the assembly or rebuilding of Gearboxes from available stock. The module simplifies the process of selling a fully assembled Gearbox by ensuring that Garages can effectively track the items used in the Gearbox, ensuring accountability, and accurately determining the overall cost of the Gearbox unit.
In this article
- Duplicate the Vehicle Sales Role
- Create an Item for Pricing up the Gearbox
- Create a Sales Quote for the Gearbox
- Create the Gearbox Item to Sell
- Create an Internal Gearbox Preparation Jobsheet
Duplicate the Vehicle Sales Role
To make it easier to use the Gearbox Sales Module, duplicate the Vehicle Sales Admin role to create a Gearbox Sales Admin role, and then personalise the Role Centre for Gearbox Sales:
-
In the top right corner, choose the
 icon, enter Profiles (Roles), and select the related link.
-
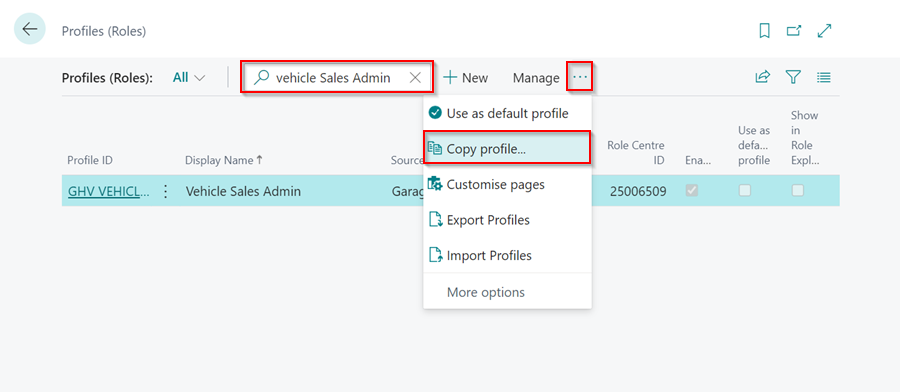
In the Profiles (Roles) page, search for Vehicle Sales Admin, click on the ellipsis (…) in the menu bar and select Copy Profile.
-
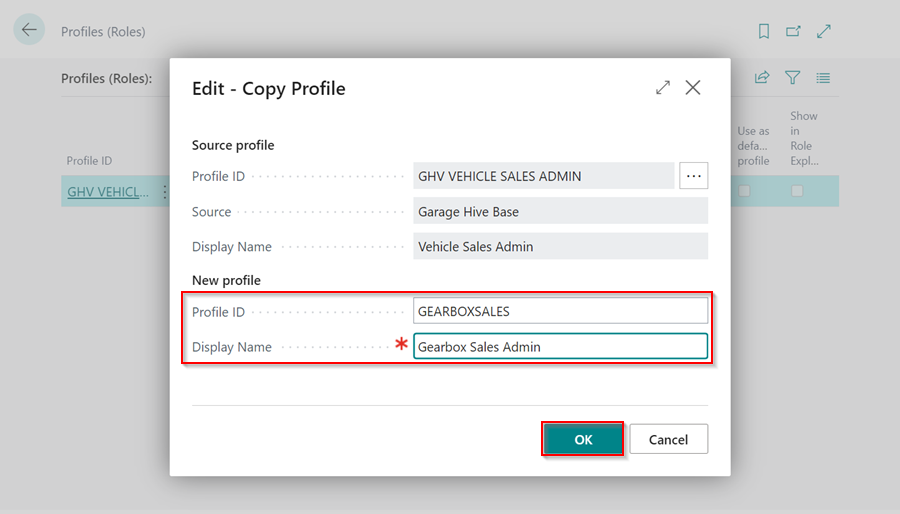
Name the new Profile ID as GEARBOXSALES and the Display Name as Gearbox Sales Admin. Click OK.
-
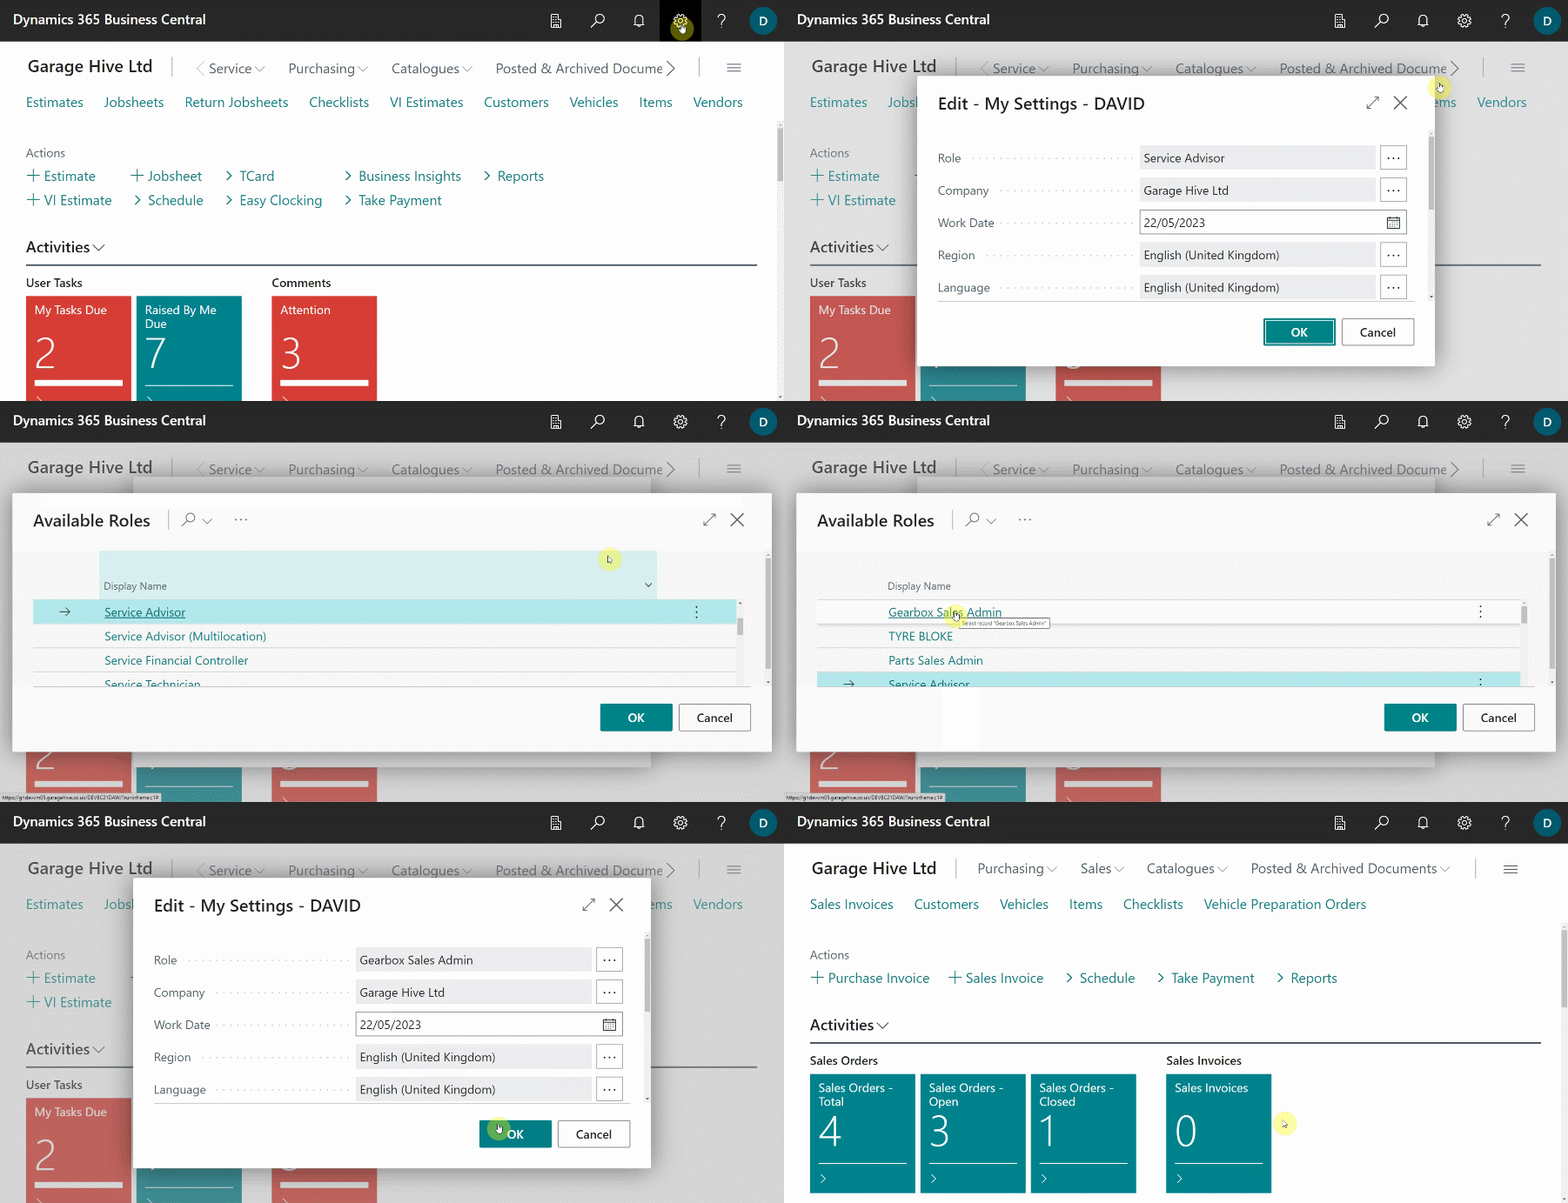
The new profile will now be created. Return to the Role Centre and click the settings gear icon in the top right corner, then My Settings, then the three dots next to the Role field, followed by Gearbox Sales Admin. Click OK.
Create an Item for Pricing up the Gearbox
The next step is to create a Placeholder Item to use when pricing up the Gearbox for sale:
-
Open the Item Lists, select New, enter the Item No. as COR0001, Description as Gearbox for Car, and the Item Category Code as GEARBOXES.

-
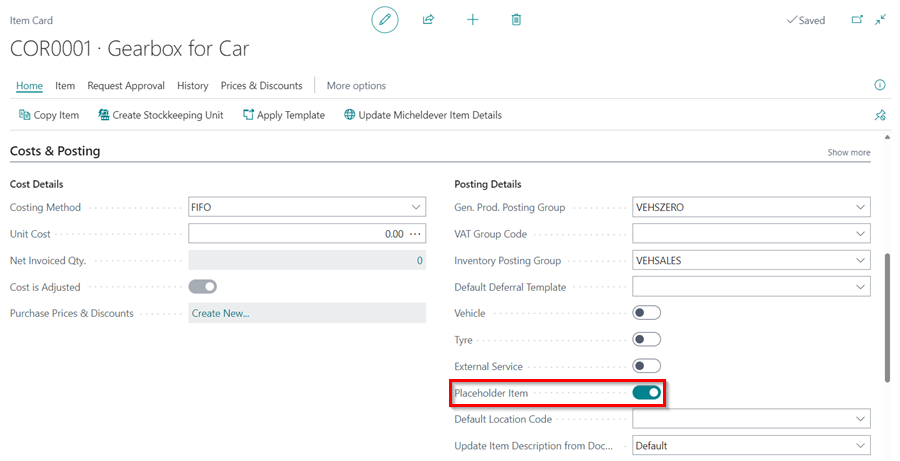
Select the Placeholder Item slider under Costs and Posting FastTab so that the item cannot be sold. The goal of creating this item is to help in pricing and quoting the Gearbox.
-
When you’re finished, close the Item Card.
Create a Sales Quote for the Gearbox
To quote the customer, you now need to create a Sales Quote:
-
In the top right corner, choose the
 icon, enter Sales Quote, and select the related link.
-
Click New to create a Sales Quote. Select Service Type as Gearbox and enter Customer Name.

-
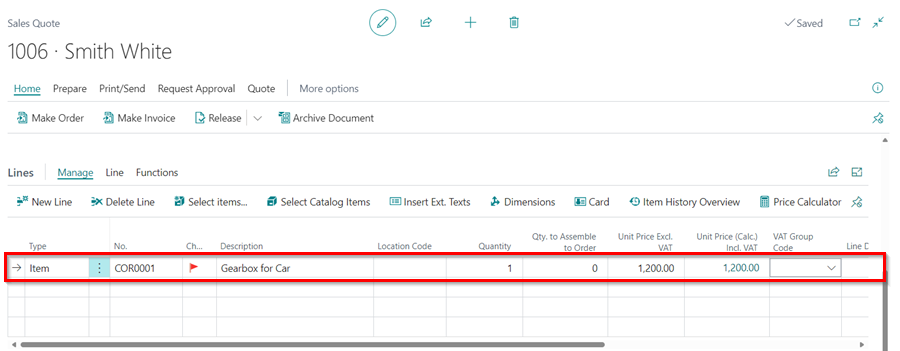
Scroll down to the Lines FastTab, select the item you created, and enter the Unit Price you want to sell the Gearbox for.
-
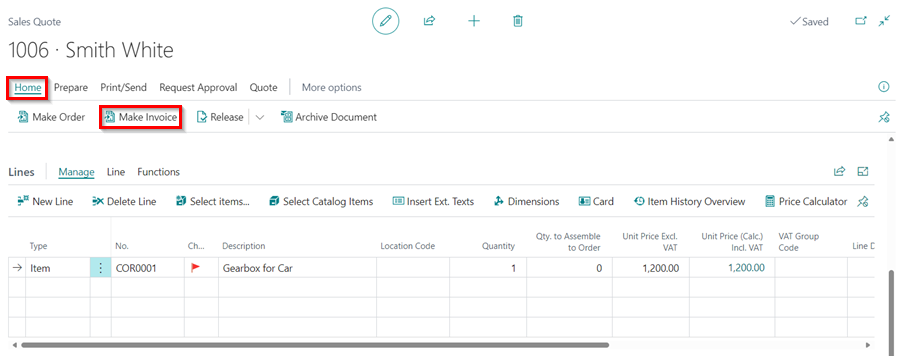
After sending the Sales Quote to the Customer and receiving their approval, convert the Sales Quote to an invoice. Select Home and then Make Invoice.
-
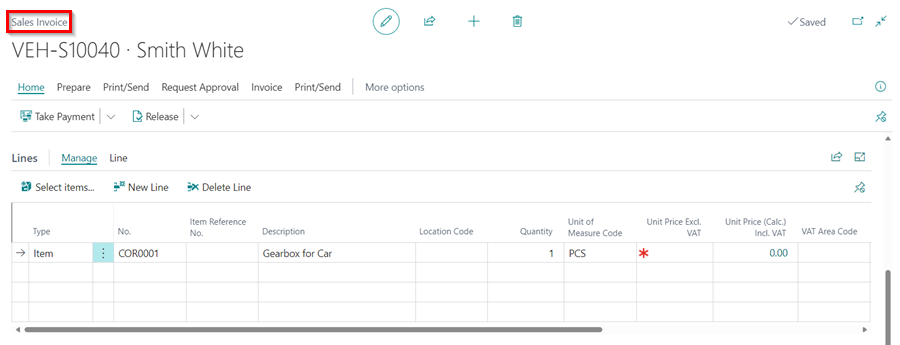
The new Sales Invoice will be created for the Gearbox item.
Create the Gearbox Item to Sell
To create the Gearbox item for selling:
-
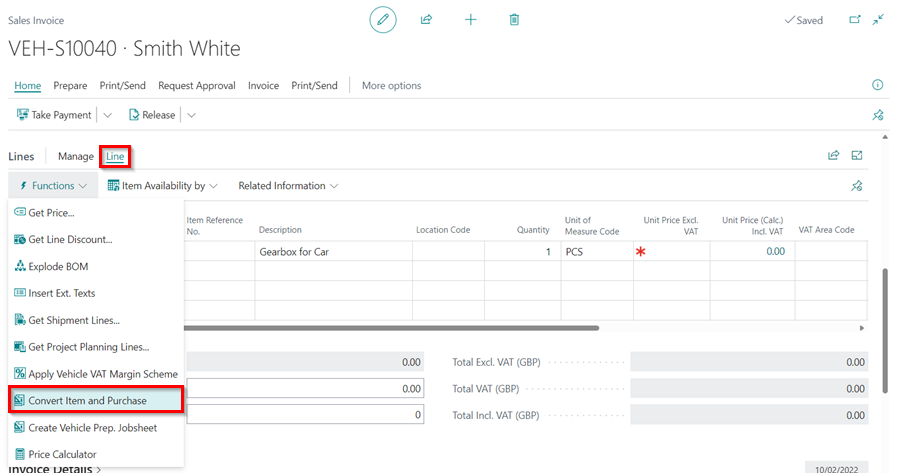
Scroll down to the Lines FastTab in the Sales Invoice you created, then select Line from the Lines Menu bar, followed by Functions, and then Convert Item and Purchase.
-
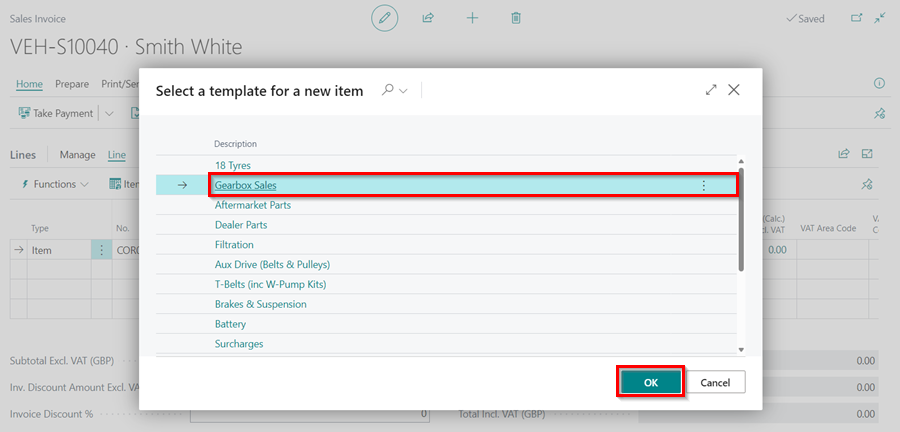
Select Gearbox Sales as the template for the new item, and click OK. This creates a new Item and a Purchase Order for the new item.
-
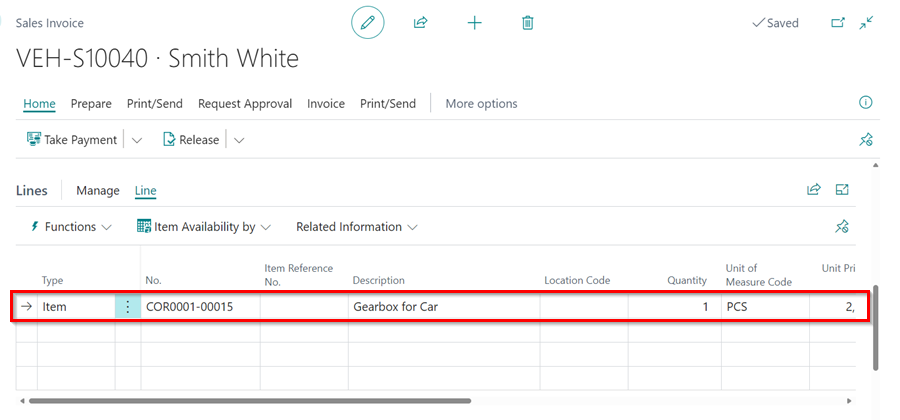
The Placeholder Item is removed and replaced in the Sales Invoice by the new item to sell. The new item appends a string of numbers to the end of the Placeholder’s Item number.
Create an Internal Gearbox Preparation Jobsheet
The next step is to create a Preparation Jobsheet on which all the items that will be used to rebuild the Gearbox will be added:
-
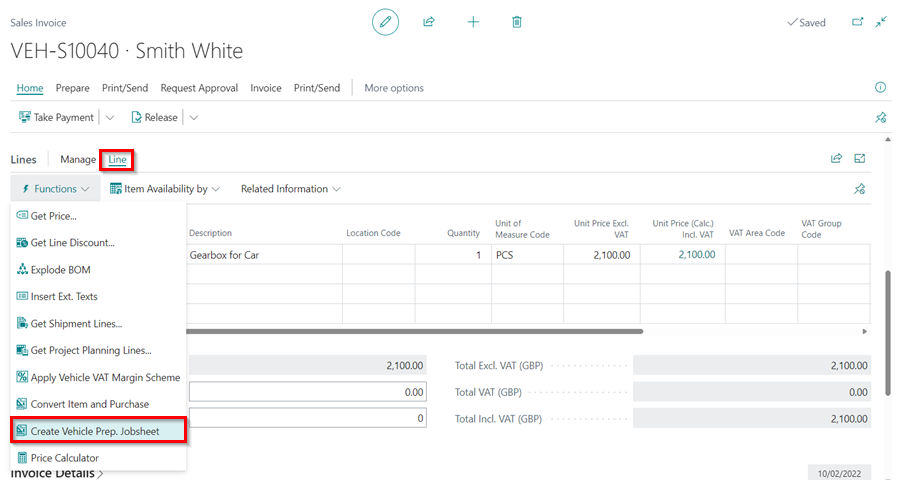
In the Sales Invoice with the Gearbox item to sell, scroll down to the Lines FastTab, then select Line from the Lines Menu bar, followed by Functions, and then Create Vehicle Prep. Jobsheet.
-
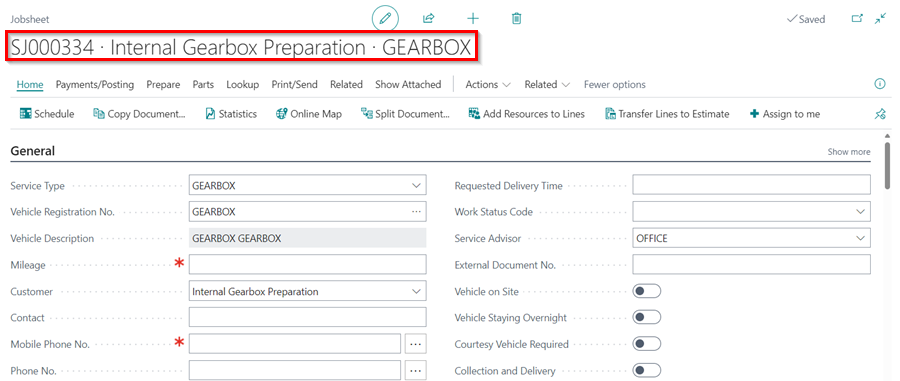
This creates an Internal Gearbox Preparation Jobsheet, where all the items used to rebuild the Gearbox are added.
-
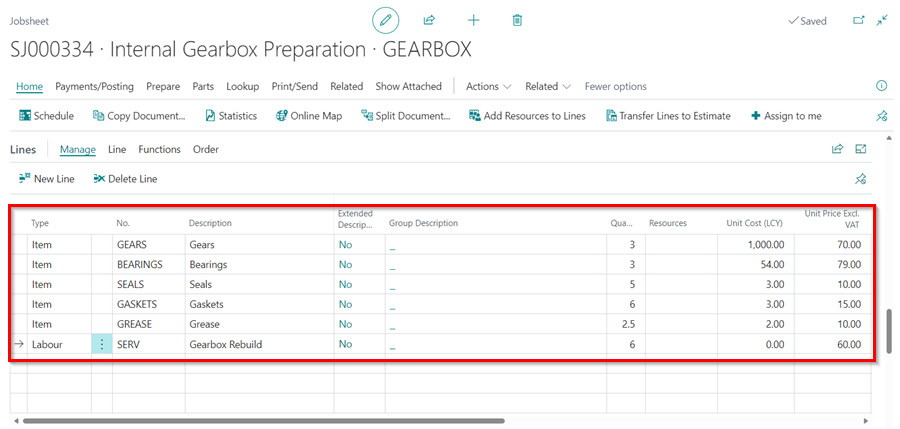
Add all the items that are used to rebuild the Gearbox in this Jobsheet.
-
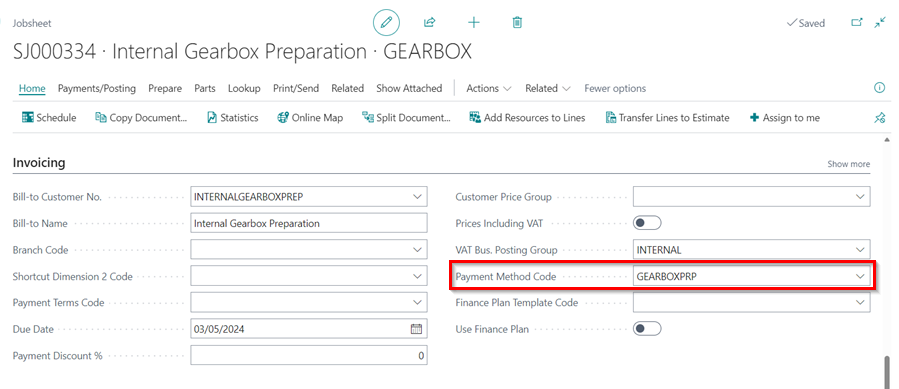
Add the Payment Method Code as GEARBOXPRP under the Invoicing FastTab, so that you can use it to fully pay the Jobsheet.
-
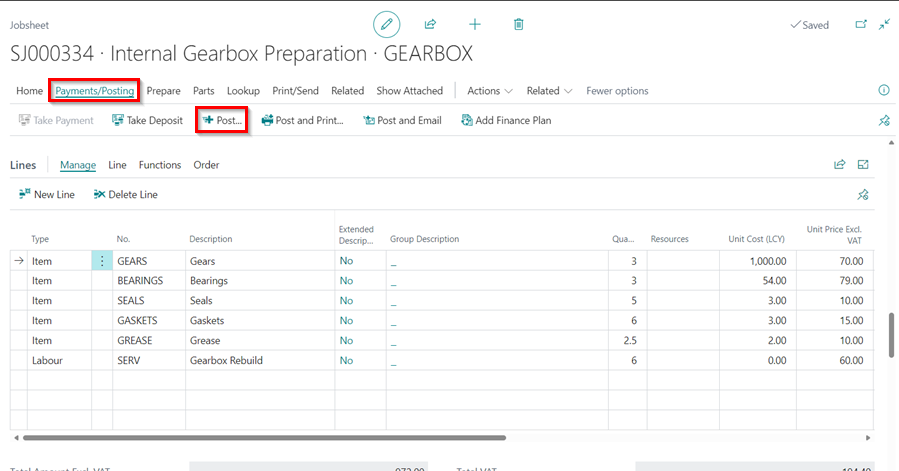
Then post the Jobsheet once all of the Items are added.
-
When you post the Jobsheet, the value of the Jobsheet is added to the Gearbox item to sell.