Using the Reminded Not Booked Tiles
The primary goal of sending reminders to customers is to prompt them to book the service they were notified about. However, in some cases, the customer may not book as expected and require further follow-up. This is where the Reminded Not Booked feature is useful. It creates a list within the system to help you keep track of which customers need follow-up action regarding their booking.
In this article
Reminded Not Booked Set Up
This setup can be only be done by a System Admin. To Setup the Reminded Not Booked Setup:
-
In the top right corner, choose the
 icon, enter Reminded Not Booked Setup, and select the related link.
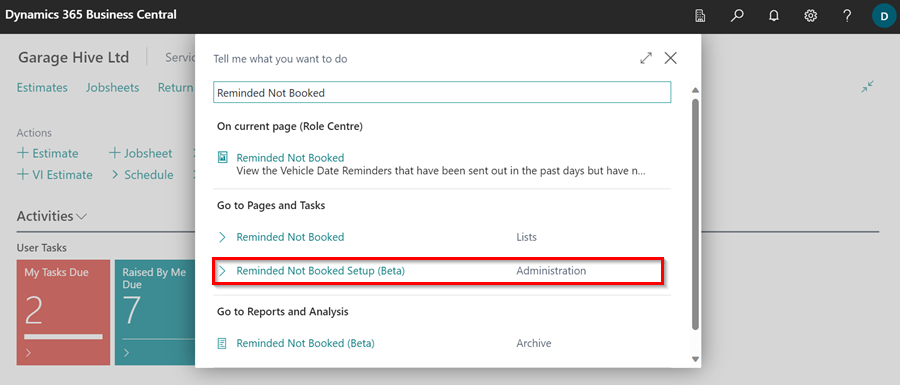
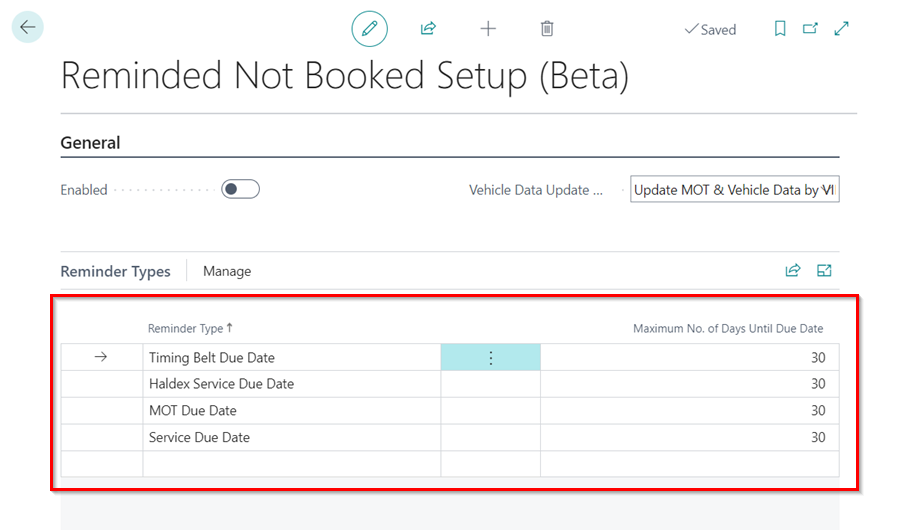
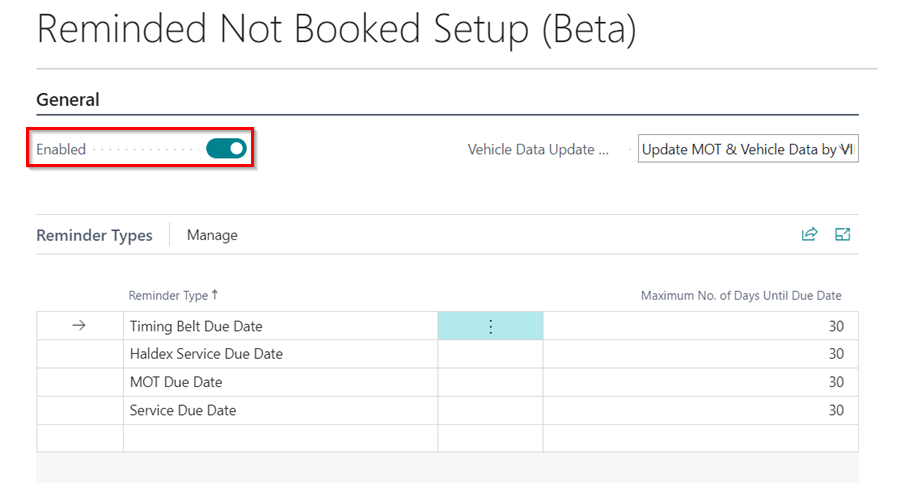
- On the Reminded Not Booked setup page, you’ll see various Reminder Types listed. These are available only if you have enabled notifications for Vehicle Reminder Dates in the system. To find out how to enable these reminders, click here.
-
By default, the system will set the maximum number of days until the due date to 30 days. You can change this duration if needed.
-
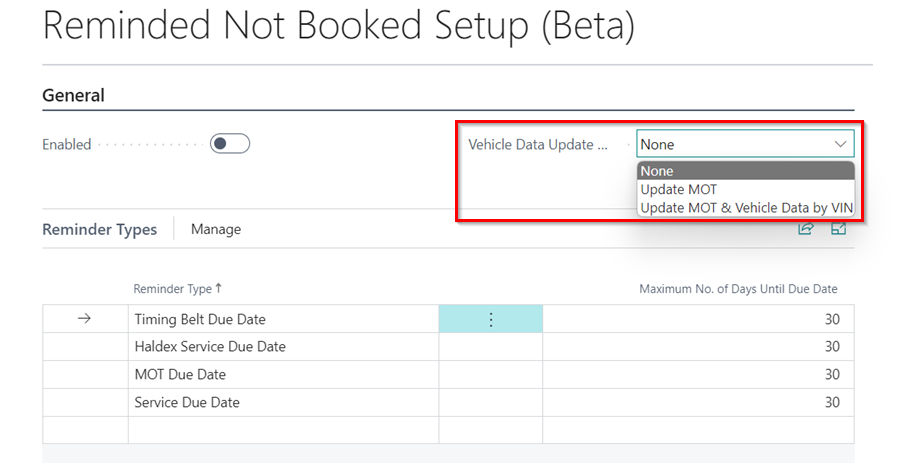
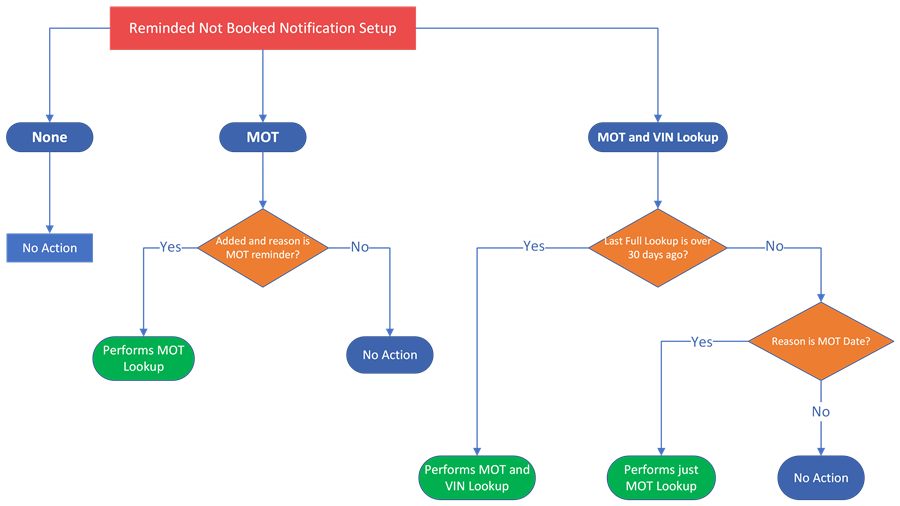
In the General FastTab, choose how you want the system to update vehicle data when the Reminded Not Booked notification is sent. You have three options:
NoteChanging the setup from None to any other option will result in more data lookups than usual, and this will be reflected in your subscription. Details outlined below. Should you need assistance or clarification, feel free to reach out to our support team.- None: No updates to vehicle data will be made.
- Update MOT: Updates the MOT data for applicable vehicles. Standard charges apply.
-
Update MOT & Vehicle Data by VIN: Updates all vehicle data using the vehicle’s VIN, but only if it wasn’t looked up in the last 30 days; if however the reason for needing a lookup is because of an MOT an MOT lookup will be done instead of a VIN lookup. Standard charges apply.
-
To understand better how the logic for the setup works, please refer to this flowchart.
-
Once you’ve completed the setup, click the Enabled slider to enable the setup in the system.
Reviewing Reminded Not Booked Tiles
-
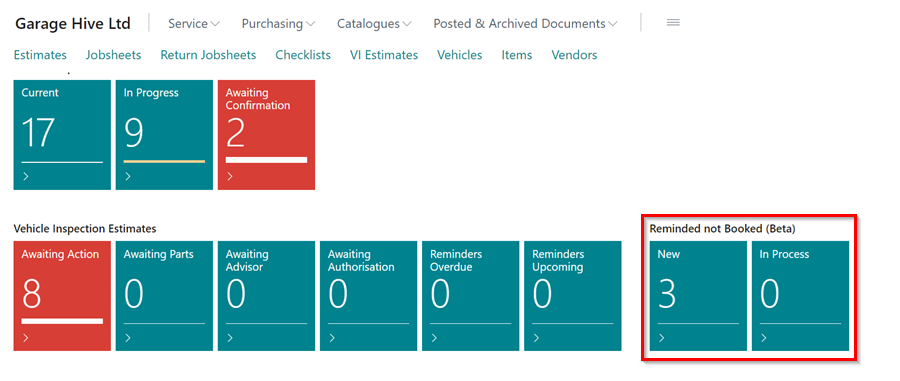
Once the Reminded Not Booked Setup is enabled, you’ll see the following tiles under the Reminded Not Booked heading in your Role Centre.
 NoteYou can customise your Role Centre to hide these tiles if needed. Read more about personalisation in our documentation.
 - In the New tile, you’ll find the list of vehicles which match the Reminded Not Booked Setup. This list will be regenerated once per day (overnight).
- Click on the New tile to view the list.
-
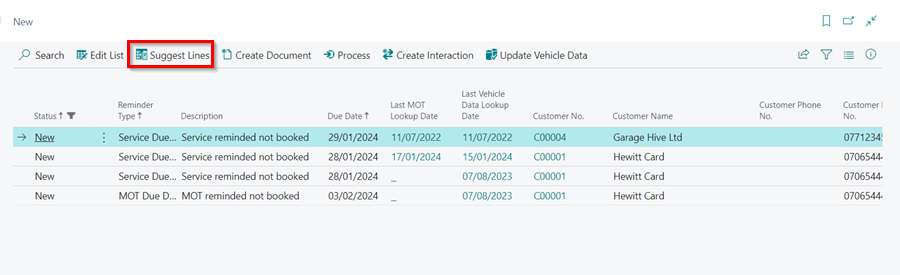
In the menu bar, you can use the various actions available. Selecting Suggest Lines will refresh and regenerate the list.
-
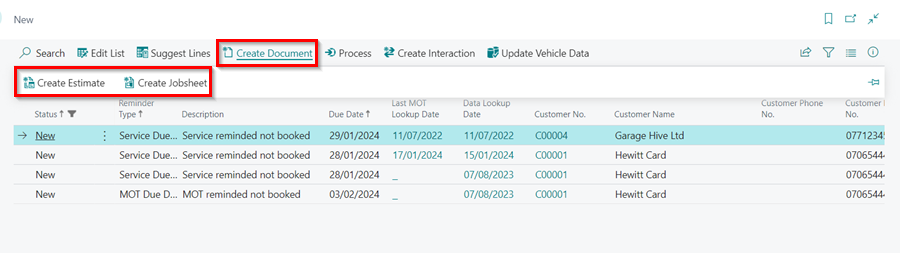
Use the Create Document action to make an Estimate or a Jobsheet for the customer.
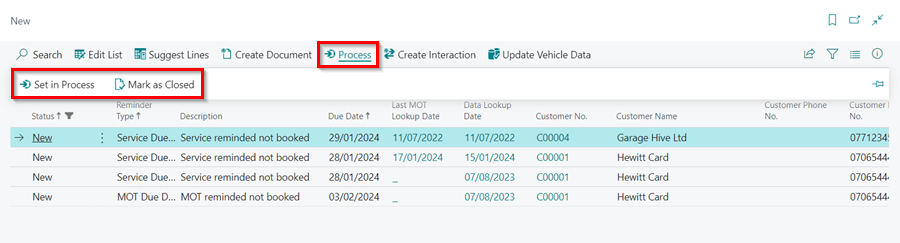
- To move a line to the In Process tile or mark it as closed, click Process and choose either Set In Process or Mark as Closed.
-
If a reminder remains in the New state and passes its due date, it will automatically be set to Closed.
-
To send an Email or SMS to the customer, select Create Interaction and then choose Send Email or Send SMS. For detailed instructions on using the emailing feature, click here.

-
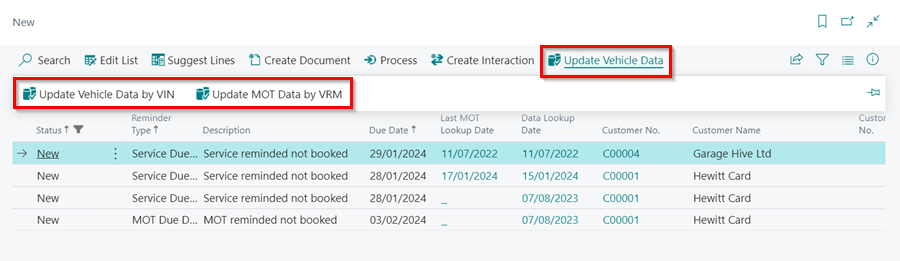
To update the vehicle data select Update Vehicle Data and use either Update Vehicle Data by VIN or Update MOT Data by VRM.
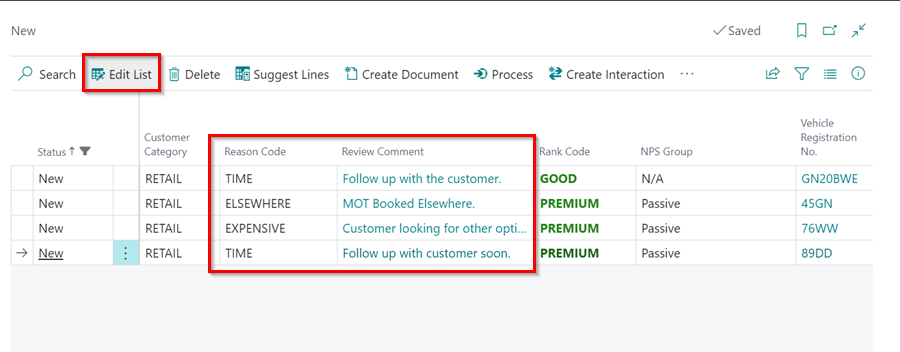
- To add a specific Reason Code or a Comment to a reminder, click Edit List. Then select the appropriate reason in the Reason Code column and enter your comment in the Review Comment column. To learn more on how to set up the Reason Codes, click here.