Module 2 - Purchasing
Module 2 looks at purchasing in Garage Hive. In this module you will learn how to raise a purchase order from a Jobsheet and how to process the purchase order once the invoice has arrived. You will also learn how to view your items to return report and how to raise a purchase return order.
In the training Modules we’ll cover the following topics:
How to Create a Purchase Order
Here’s how to order items through the schedule:
| Step 1 | Open the schedule, right-click on the allocation with the items to order, and select Lookup. |
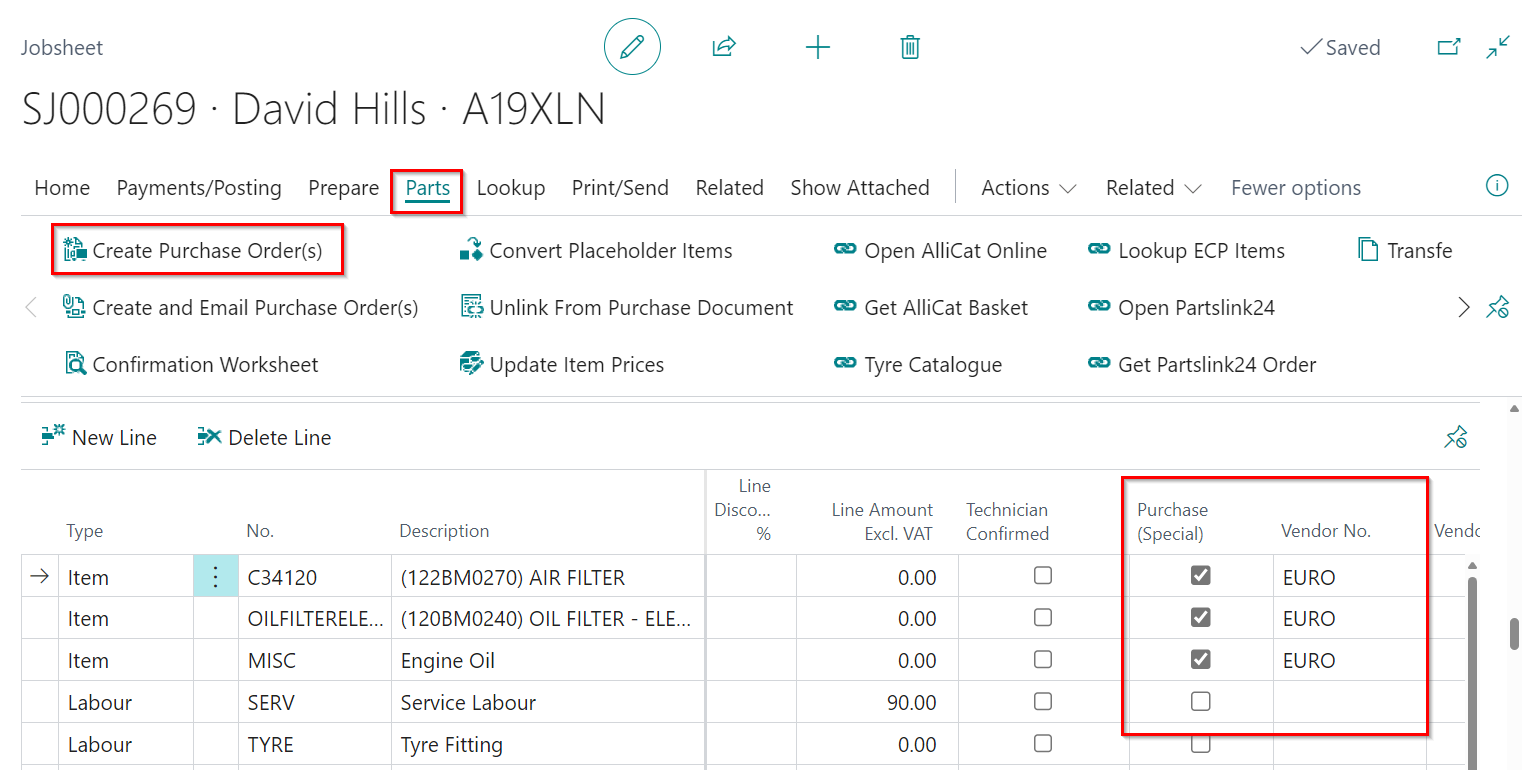
| Step 2 | Navigate to the Lines FastTab, and tick the Purchase (Special) box for the relevant items. |
| Step 3 | Choose the vendor to order from in the Vendor No. column. |
| Step 4 | In the Menu Bar, go to Parts and select Create Purchase Order(s). This will generate the Purchase Order(s). |
| Step 5 | In the Lines FastTab, locate the Special Order Purchase No. column on the right, and click on the purchase order link that was created. |
Learn more: Video: How to create a purchase order
How to Process a Purchase Order/Invoice
Follow these steps to process a Purchase Order after items have been received:
| Step 1 | From the Role Centre, select Purchasing followed by Purchase Orders. |
| Step 2 | From the list of Purchase Orders, click on the Purchase Order you want to process so as to open it. |
| Step 3 | For the items that you used the Placeholder number, enter the actual part number in the No. column. |
| Step 4 | If the item was available in the system, select it from the drop-down list, if not available press the tab key, and you’ll get the option to create a new item. |
| Step 5 | Create a new Item, with the correct Item Template, and click Close. The part number will also be updated in the linked Jobsheet. Repeat the process for all Items with the placeholder number. |
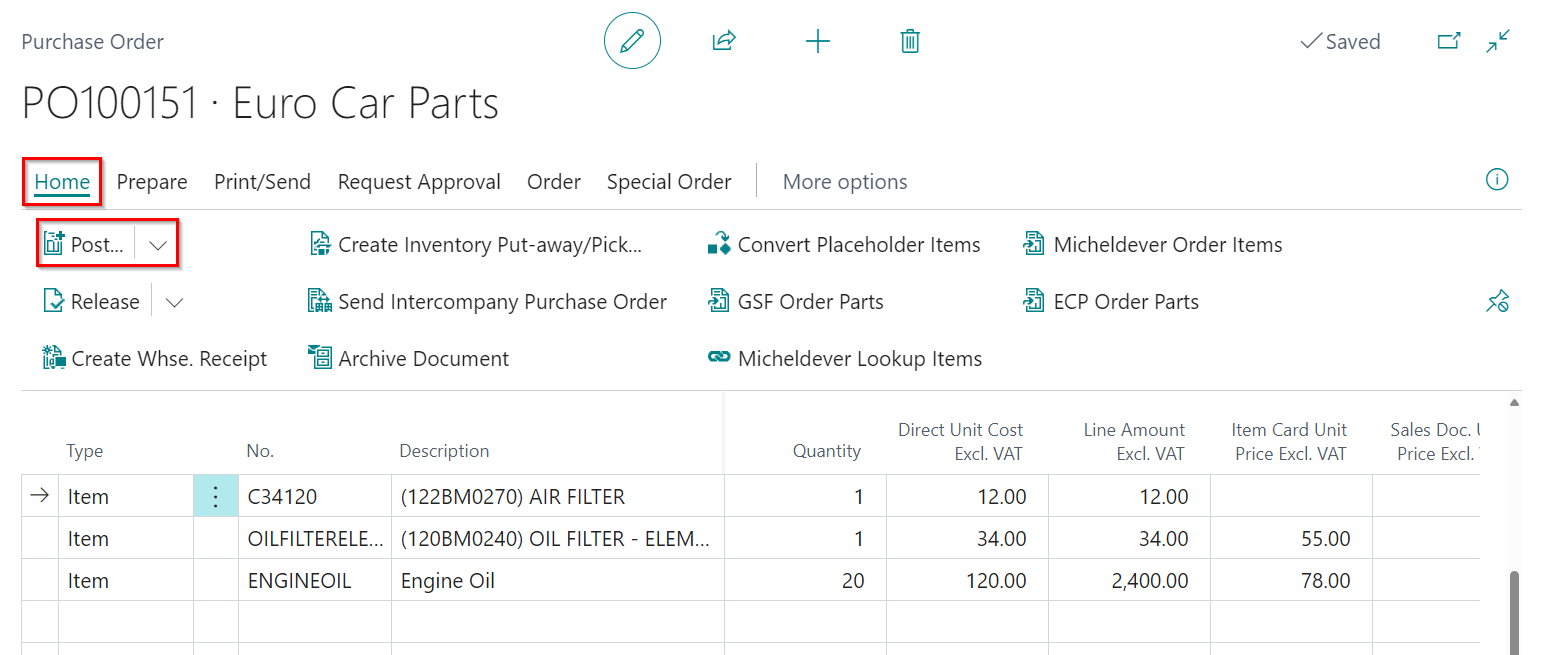
| Step 6 | Add the prices of the items, enter the Vendor Invoice No. to match the invoice you’ve received from the vendor, enter the Posting Date to be today’s date, and the Document Date to match the Vendor’s Invoice No. |
| Step 7 | In the Menu Bar, go to Home and select Post. |
| Step 8 | Click OK, to Receive and Invoice the parts. |
Learn more: Video: How to process a purchase order/invoice
How to View Items to Return
The Items to Return Report allows you to keep track of which parts are in stock and need to be returned based on the criteria listed below:
- The item is not in a Jobsheet.
- The item is not on a Purchase Return Order.
- The item doesn’t have any reorder policy.
Here is how to view the report:
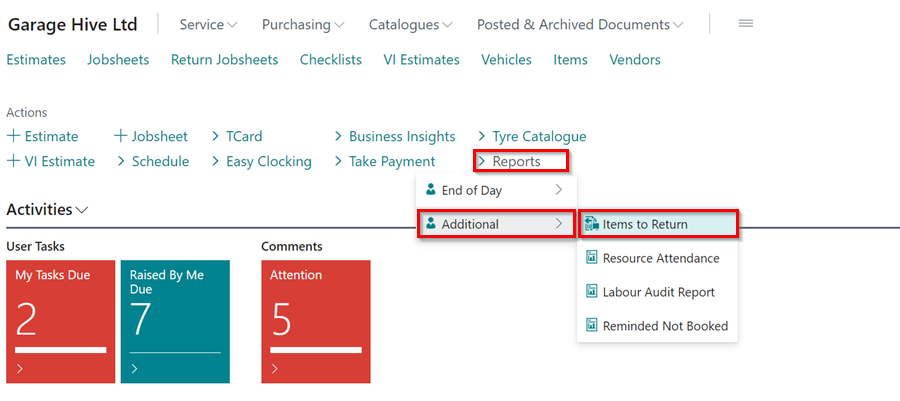
| Step 1 | Go to the Role Centre and click on Reports from the Actions Menu. Then, select Additional and click on Items to Return. |
| Step 2 | This will open the Items to Return Report. To review an item’s history, choose the item and select History Overview from the Menu Bar. |
Learn more: Video: How to process a purchase order/invoice
How to Create a Purchase Return Order
| Step 1 | Go to the Role Centre and select Purchasing, followed by Purchase Return Order. |
| Step 2 | Click New to create a new Purchase Return Order. |
| Step 3 | Fill in the Vendor Name field with the name of the vendor you wish to return items to. |
| Step 4 | On the Lines FastTab, add the items that you want to return. |
| Step 5 | Notify the vendor/supplier of your intention to return the items. |
| Step 6 | In the pop-up notification, choose Ship and click OK. This will update the Return Qty. Shipped column in the Lines FastTab. |
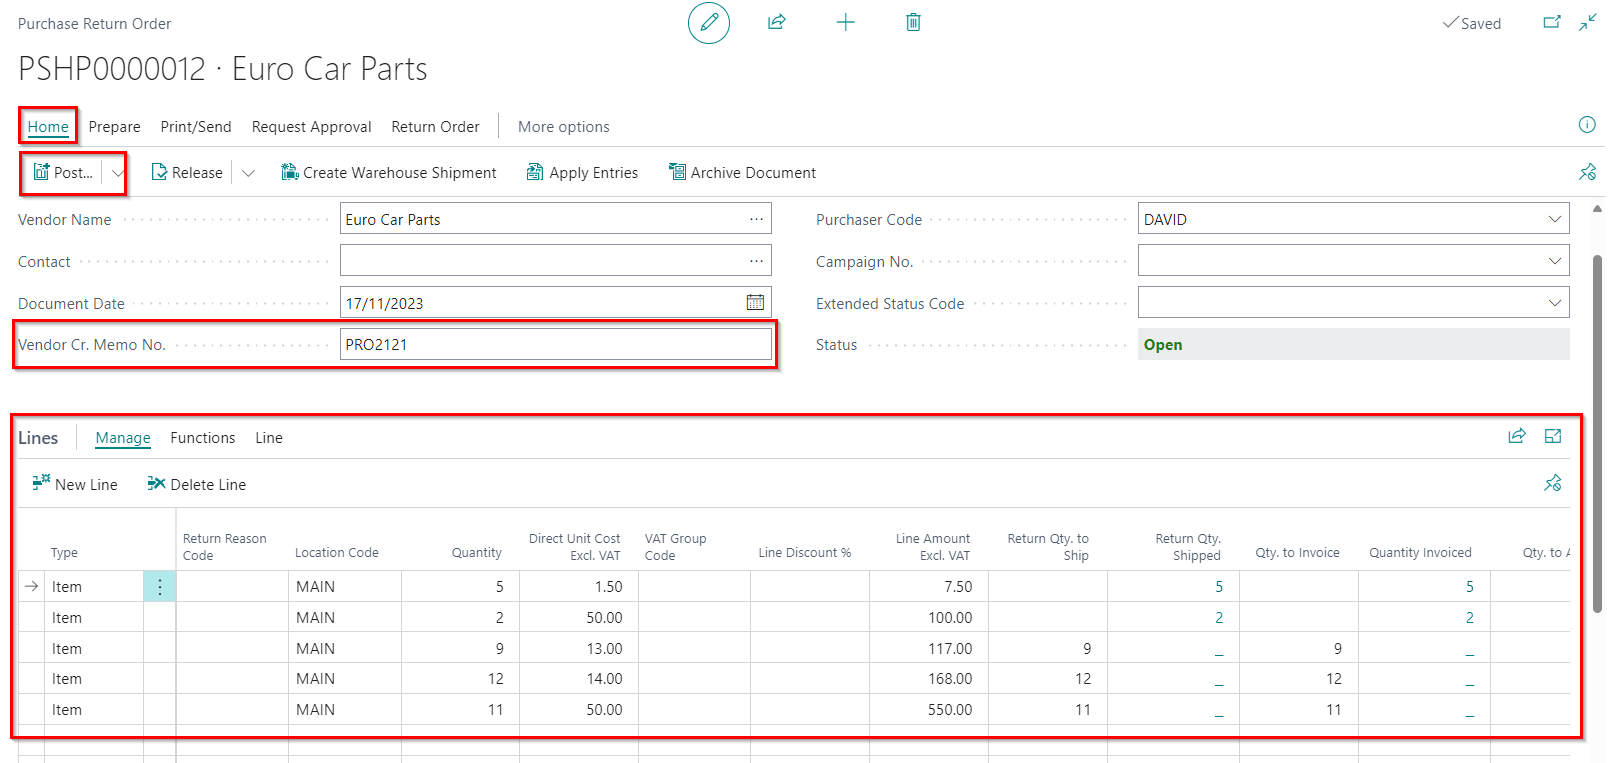
| Step 7 | When you receive the Credit Note from the supplier, ensure that it matches the Purchase Return Order details. Then, enter the Vendor Cr. Memo No. as the one on the Credit Note from the supplier. |
| Step 8 | Set the Posting Date as today and the Document Date as the date on the Credit Note. |
| Step 9 | Click Home and select Post. In the pop-up notification, choose Invoice and click OK. |
Learn more: Video: How to create a Purchase Return Order
Links for Further Learning in Module 2
- How to create and use Purchase Orders
- Creating an item card
- Viewing your items to return report
- Creating a Purchase Return Order and Purchase Credit Memo