In this article
- What you can export via the Xero API
- Initial Setup
- Integrate Chart of Accounts
- Integrate Payment Methods
- Integrate VAT Posting
- How to run the export
- Initializing External Accountancy Numbers for Customers and Vendors
- Adding Tracking Categories in Xero
What you can export via the Xero API
Garage Hive allows you to export your data to Xero via an API. You can export the following:
- Customer Invoices
- Customer Credit Memos
- Customer Payments
- Customer Refunds
- Vendor Invoices
- Vendor Credit memos
Initial Setup
-
In the top right corner, choose the
 icon, enter Accountancy Integration Setup, and select the related link.
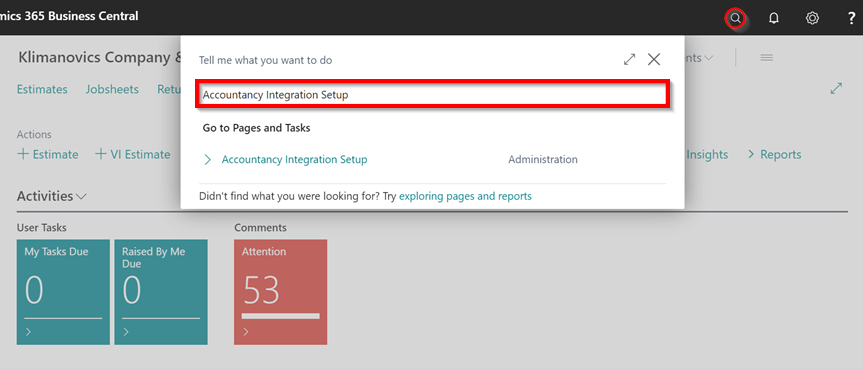
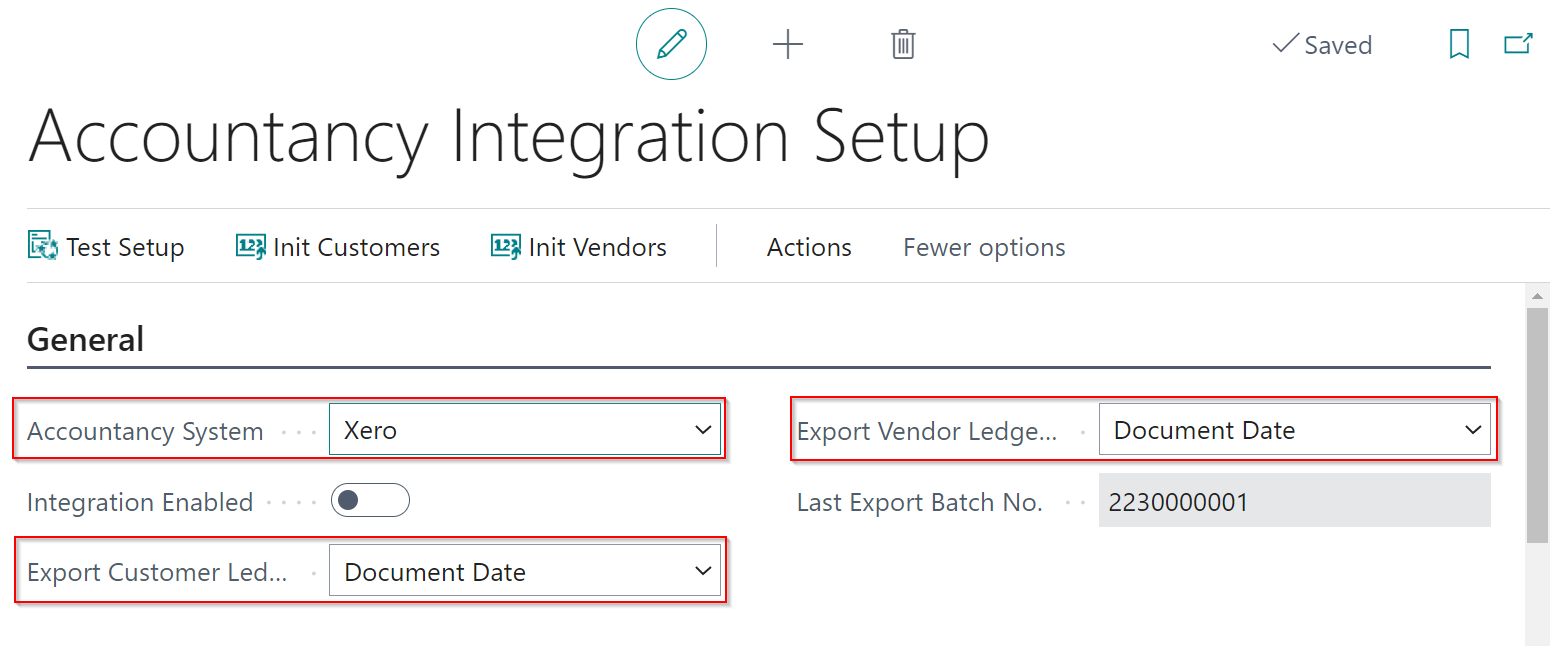
- Select Xero as the Accountancy System in the General FastTab.
-
Specify whether the data should be exported using the posting date or the document date in the Export Customer Ledger by and Export Vendor Ledger by fields. The most commonly used approach is by Document Date. Garage Hive users are often limited to only posting within the current date, therefore the posting date may differ from the date on the invoice from the supplier, whereas the document date would match.
-
Scroll down to the Xero FastTab. In the Xero Sales Document Status and Xero Purchase Document Status fields, specify the status of the documents when they are exported to Xero. The options are Draft, Submitted, or Authorised. You can select a different option for Sales and Purchase documents.
NoteIf you plan to export sales receipts/payments the sales documents must be approved.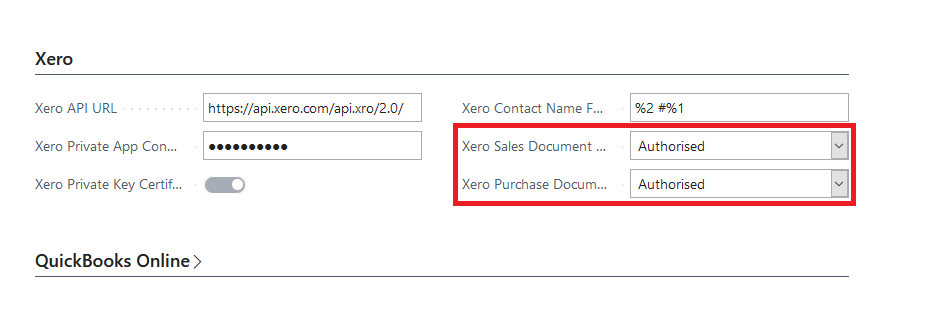
-
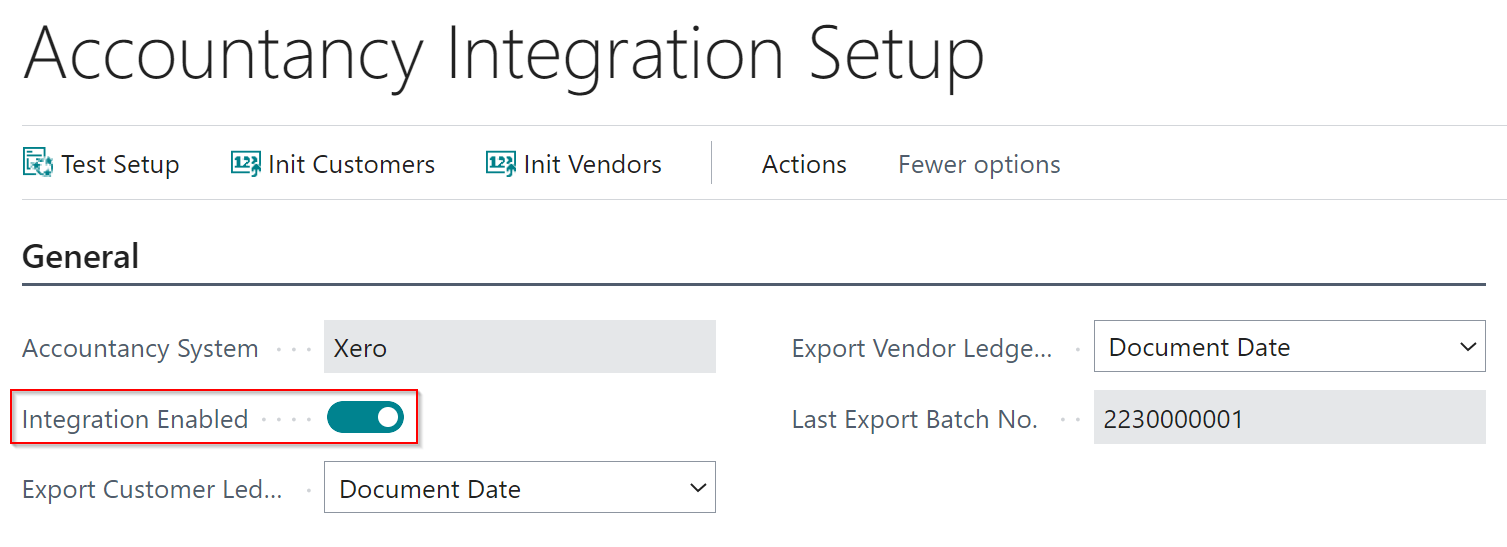
Select the Integration Enabled slider to enable the integration.
- To get started with the integration, you’ll need to create an “App” in Xero. Sign in with your Xero credentials at this link. Now, in the middle or top right of the screen, choose New App.
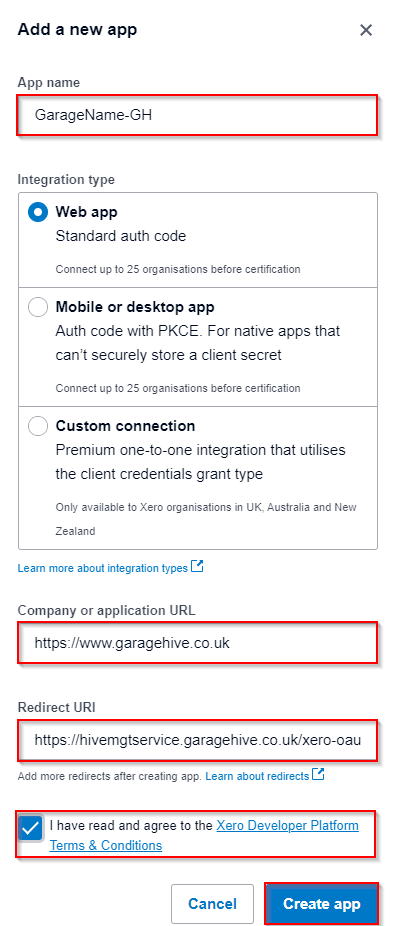
- Name the App; It should be unique, thus we recommend using GarageName-GH, but it may be any other name that you choose. Fill up the details shown below.
- Company or Application URL - https://www.garagehive.co.uk
- Redirect URL - https://hivemgtservice.garagehive.co.uk/xero-oauth2/callback
-
Select the Terms & Conditions checkbox and then click Create App.
-
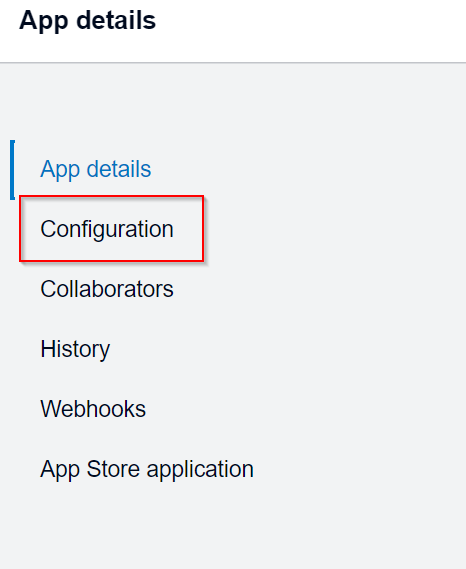
In the next page, select Configuration on the left hand side.
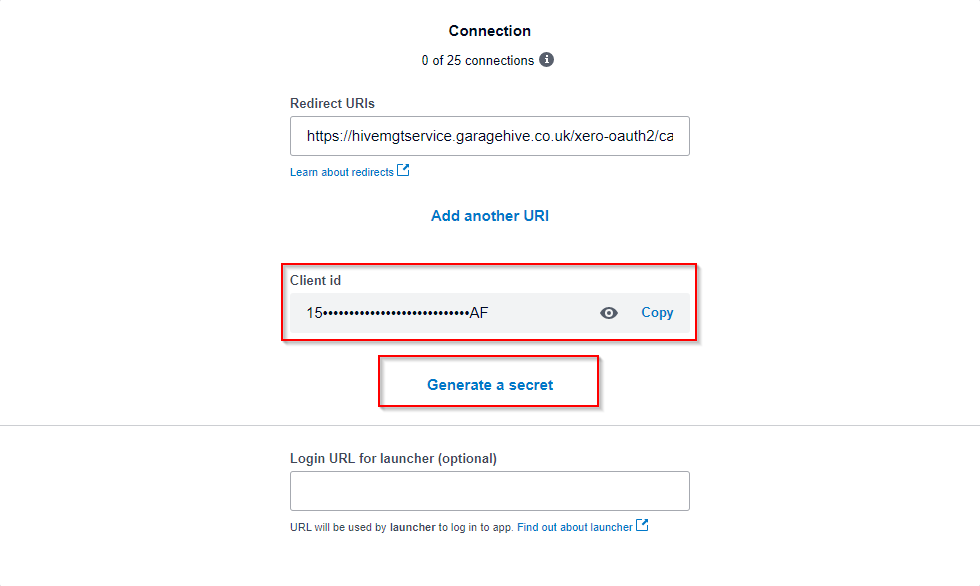
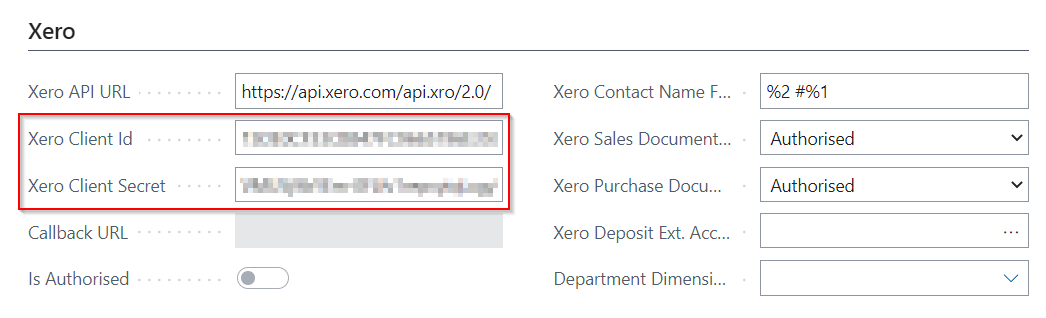
- Copy the client id and paste it into Garage Hive in the Xero Client Id field under Xero FastTab.
-
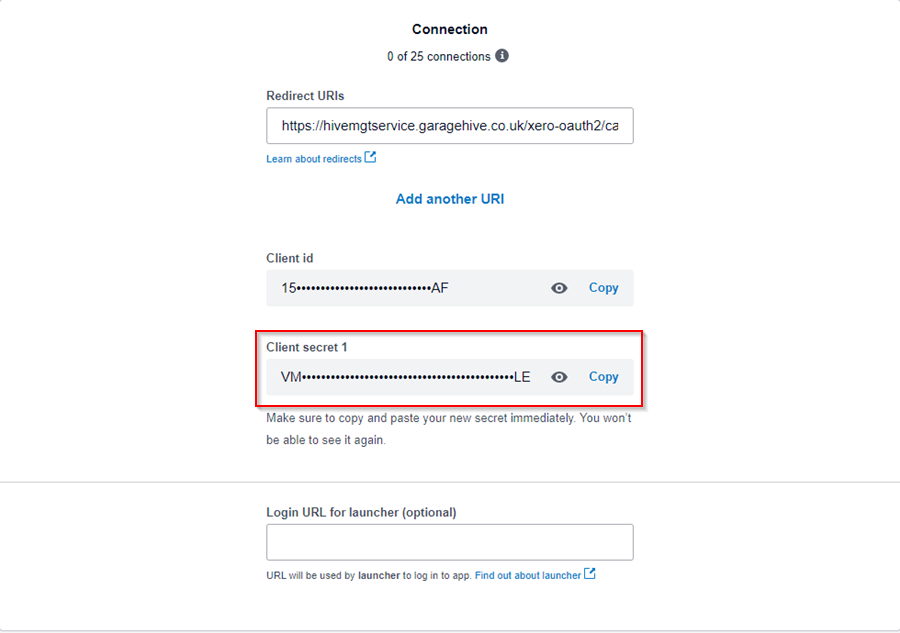
Then choose Generate a Secret, copy it, and enter it into Garage Hive in the Xero Client Secret field.
Xero App
Garage Hive
-
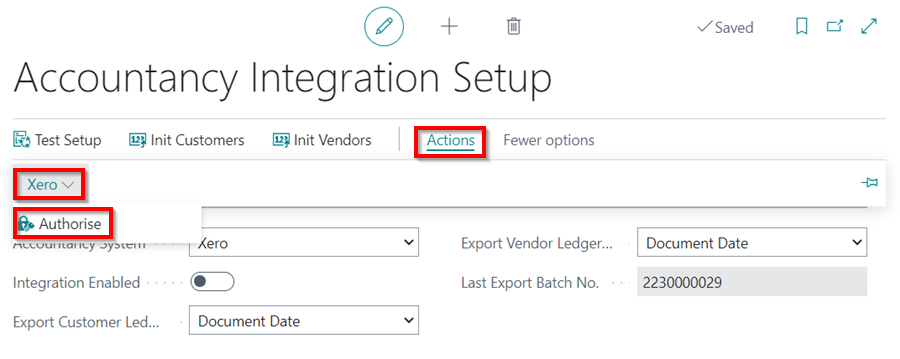
Now, under Garage Hive’s Accountancy Integration Setup, from the menu bar, choose Actions, followed by Xero, and then Authorise.
-
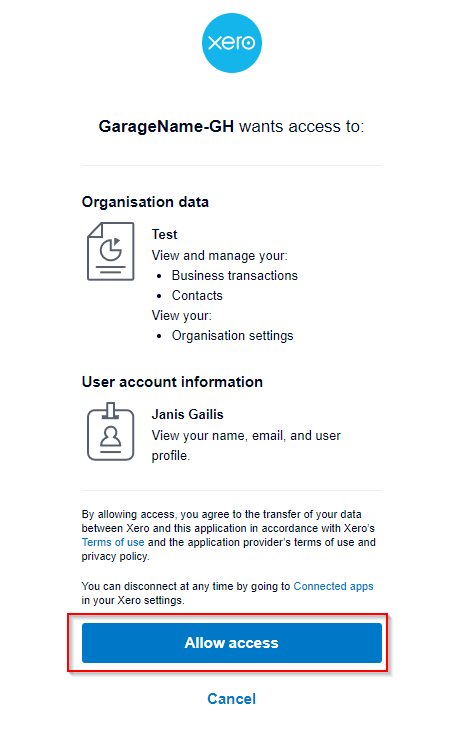
You will be redirected to the Xero Website and prompted to select Allow Access before a successful integration is confirmed.
Allow Access
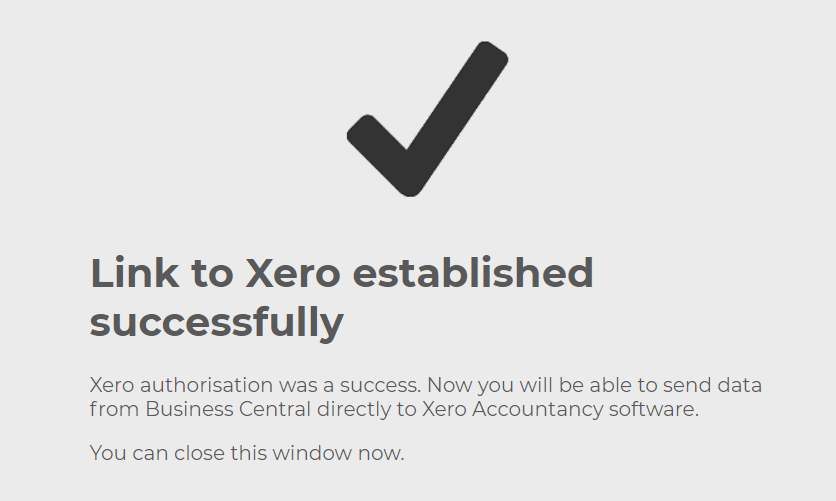
Integration Successful
Integrate Chart of Accounts
To integrate the Chart of Accounts to Xero Accounting accounting system:
-
In the top-right corner, choose the
icon, enter Chart of Accounts and select the related link.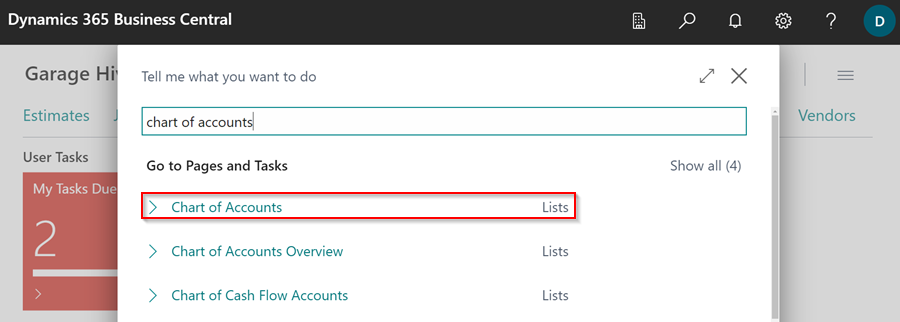
- In the Chart of Accounts page, select Edit List from the menu bar.
-
In the External System No. column, enter the account number for the accounts you want to integrate with the external system. In this case, we’ll integrate all of the 4000s accounts.
NoteTypically only the 4000's and 5000's accounts are needed.
Integrate Payment Methods
To add the External System No. to the Payments Methods:
-
In the top-right corner, choose the
icon, enter Payment Methods and select the related link.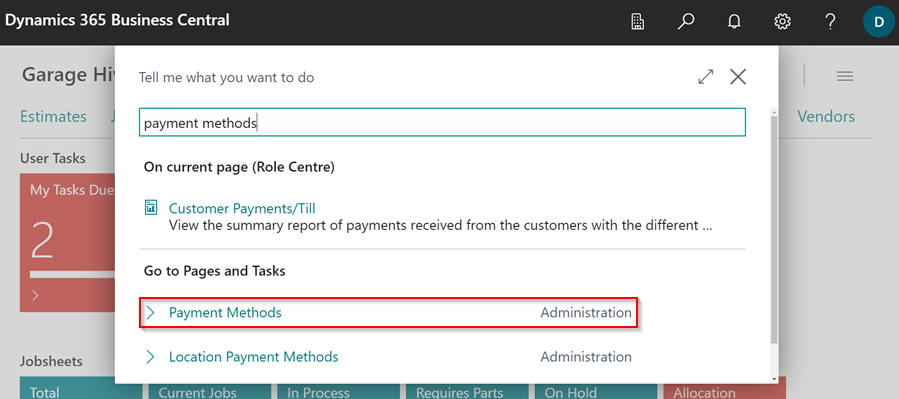
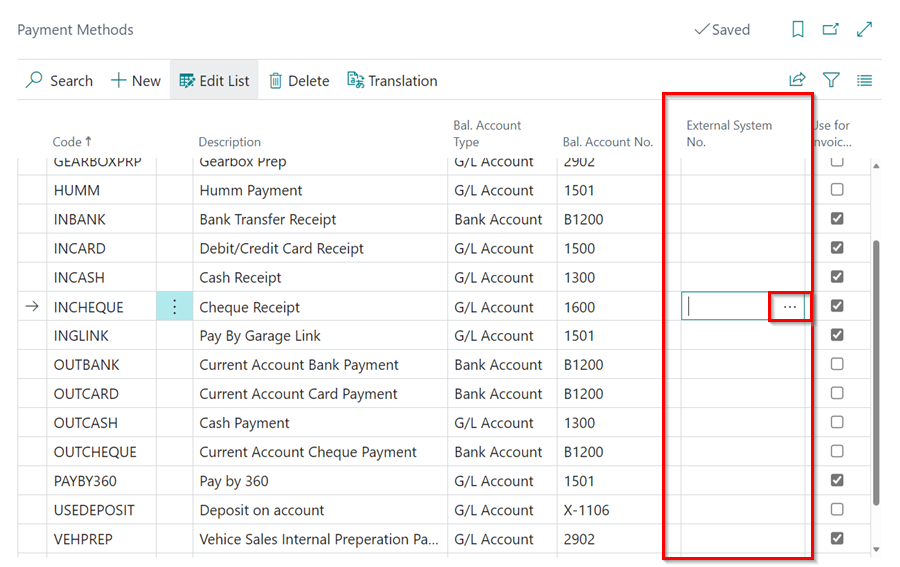
-
In the External System No. column, click on the three dots to select the corresponding code for the Payment Methods that you use in your external system.
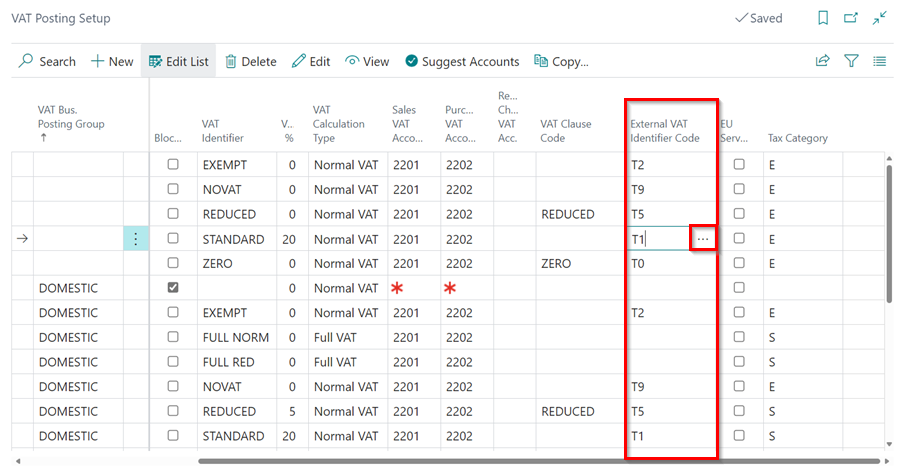
Integrate VAT Posting
To integrate the VAT posting in your system:
-
In the top-right corner, choose the
icon, enter VAT Posting Setup and select the related link.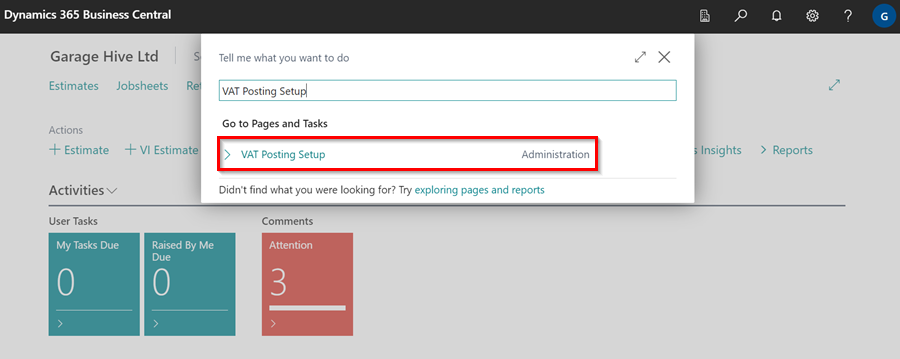
-
In the Xero Input Tax Type and Xero Output Tax Type columns, fill in the setup according to your Xero configuration.
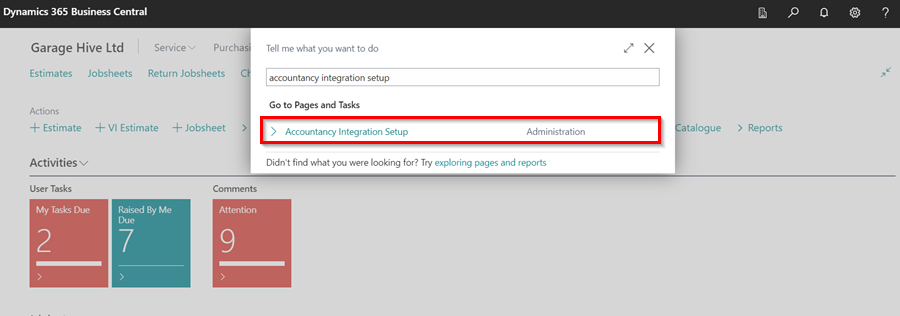
Initializing External Accountancy Numbers for Customers and Vendors
-
To set up the external accountancy numbers for customers and vendors, return to the Accountancy Integration Setup page in Garage Hive.
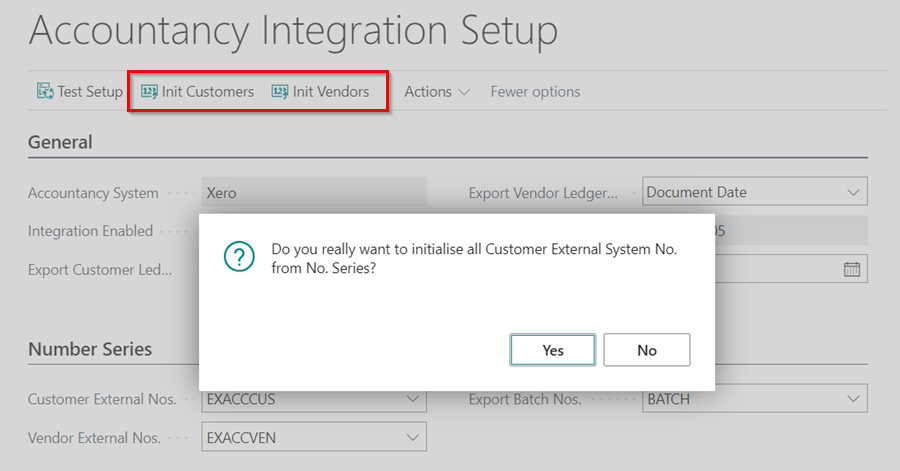
-
Click on Init Customers action to initiate the setup of customer external accountancy numbers, and Init Vendors to initiate the setup of vendor external accountancy numbers. Then, click Yes when prompted.
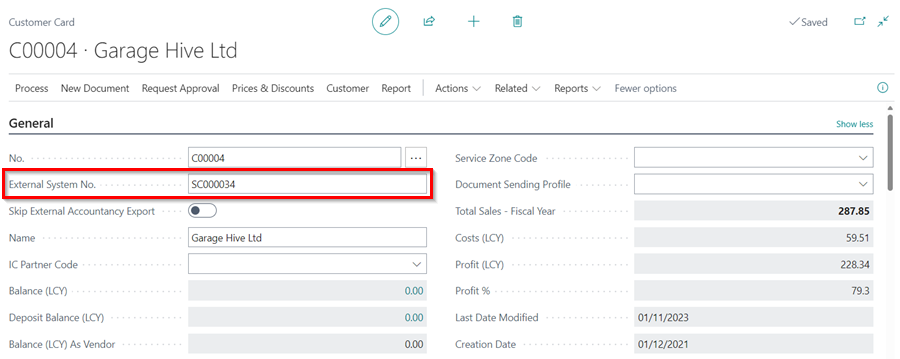
-
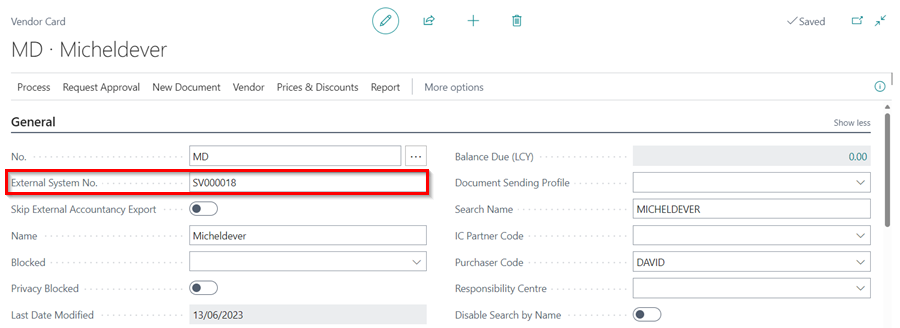
The External System No. field in all the customer and vendor cards will be filled with the generated numbers.
Customer
Vendor
How to run the export
-
In the top right corner, choose the
icon, enter Export to Accountancy System, and select the related link.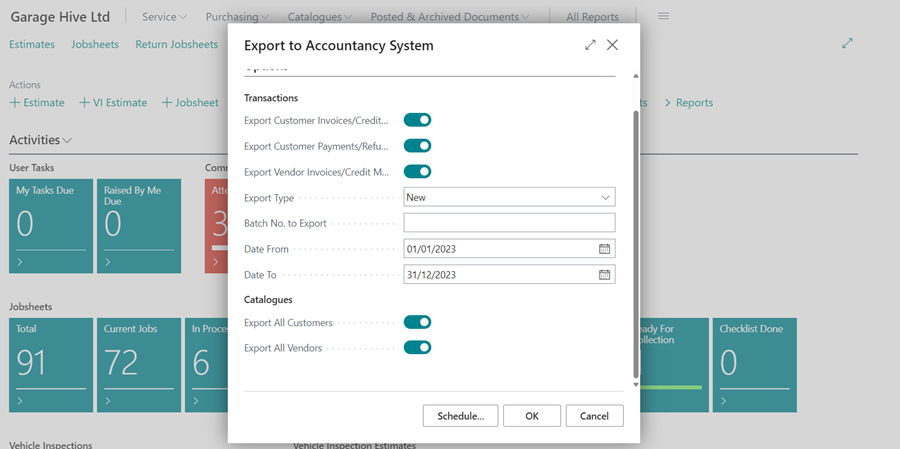
- Select the following options:
- Export Customer Invoices/Credit Memos - This will export all Customer invoices/credit memos for the given date range.
- Export Customer Payments/Refunds - This will export Invoice payments/refunds as well as payments to accounts within the specified date range.
- Export Vendor Invoices/Credit Memos - This will export all posted purchase orders/purchase invoices as well as posted purchase return orders/purchase credit memos within the given date range.
- Export Type - All or New. Select New. Selecting New will exclude any previously exported documents. When using New, a transaction that has already been exported, will not be exported again.
- Date From and Date To - Choose your date range.
- Under Catalogs:
- Export All Customers - This will generate an export of all customers in the system.
- Export All Vendors - This will generate an export of all vendors in the system.
Adding Tracking Categories in Xero
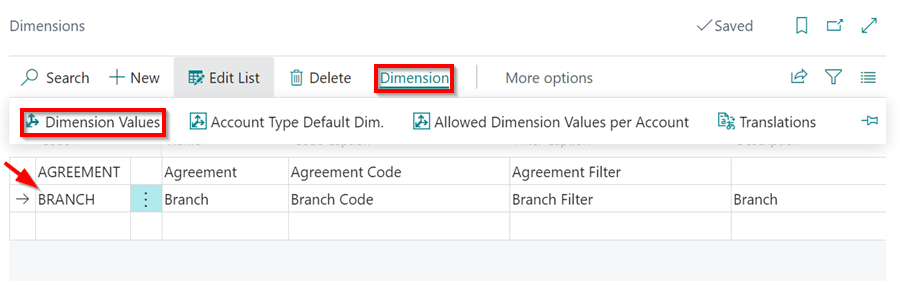
- To add Tracking Category such as Branch in Xero, choose the icon, enter Dimensions, and select the related link.
-
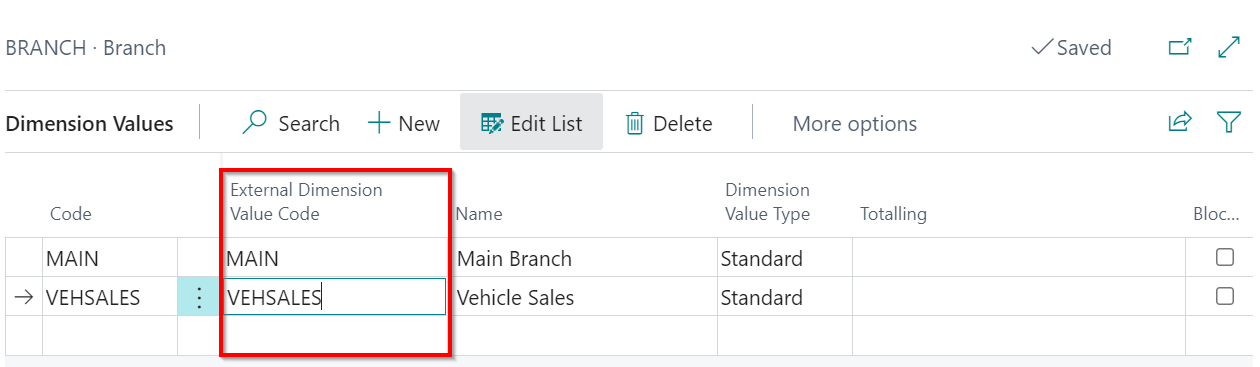
Select the row with the Branch dimension and then select Dimension from the menu bar, followed by Dimension Values.
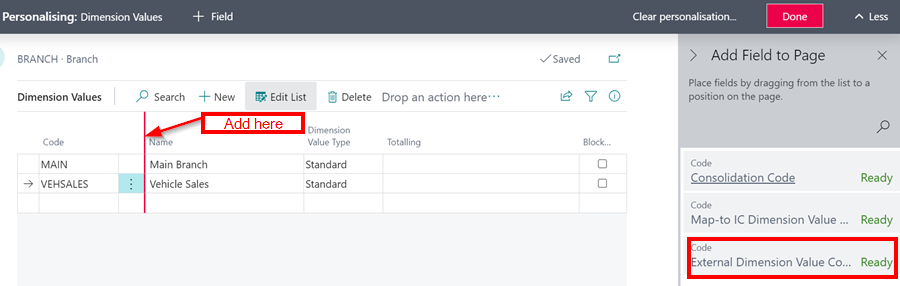
- Add the column External Dimension Value Code to the page that appears by using Garage Hive’s personalising feature.
-
Enter the values in this column to match the Code for the branch, then exit the page.
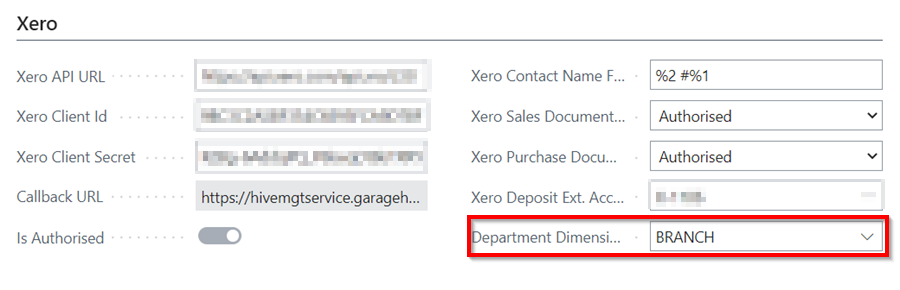
- Choose the icon, enter Accountancy Integration Setup, and select the related link.
-
Scroll down to Xero FastTab, and in the Department Dimension Code field, enter Branch.
-
Now, log in to your Xero account and select Accounting from the top menu, followed by Advanced.
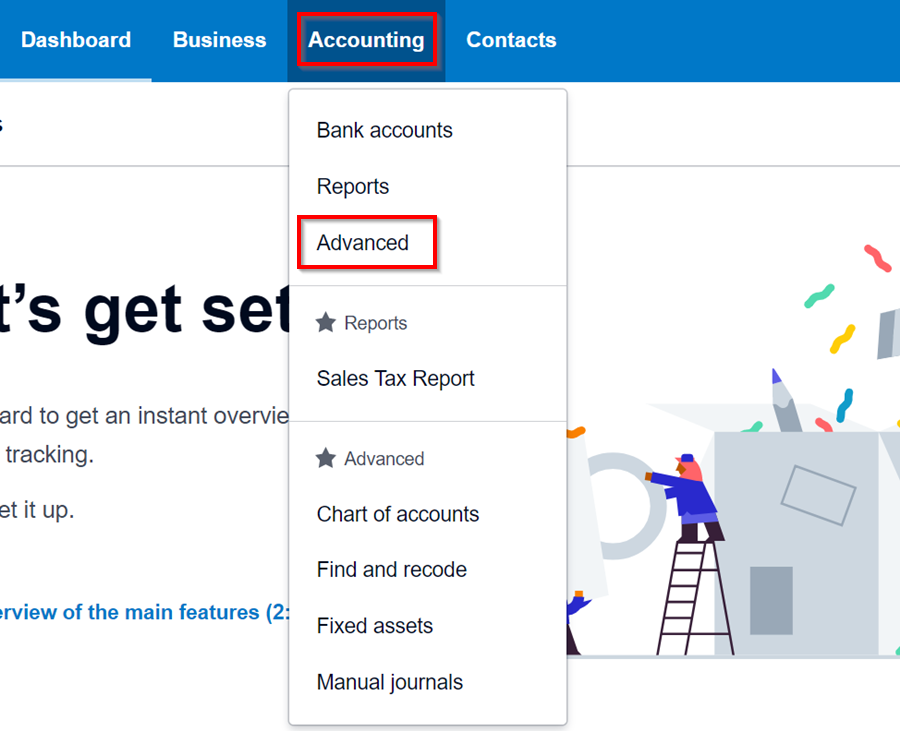
-
Select Tracking Categories from the page that appears, then bookmark it by selecting the star on the left. By bookmarking it, it will appear under Advanced in the Accounting main menu.
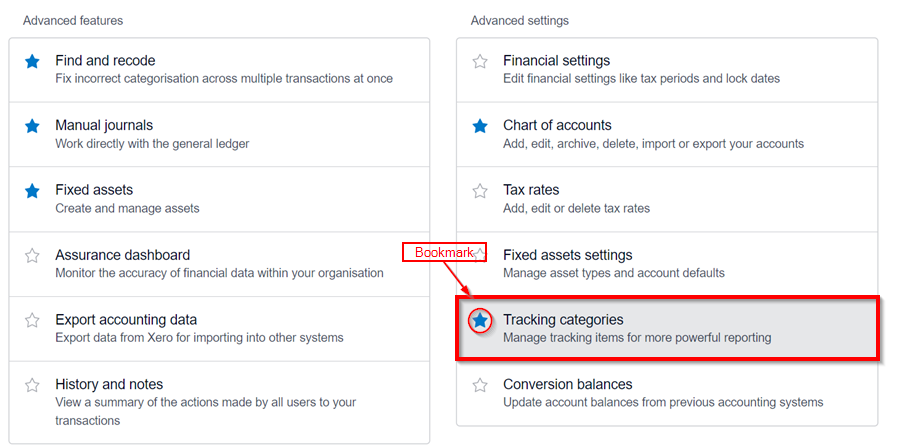
-
Select Add Tracking Category on the Tracking Categories page and name it the same as the Department Dimension Code (case sensitive) as in Garage Hive. Then, add the Category Options, same as the various branches of your business (case sensitive).
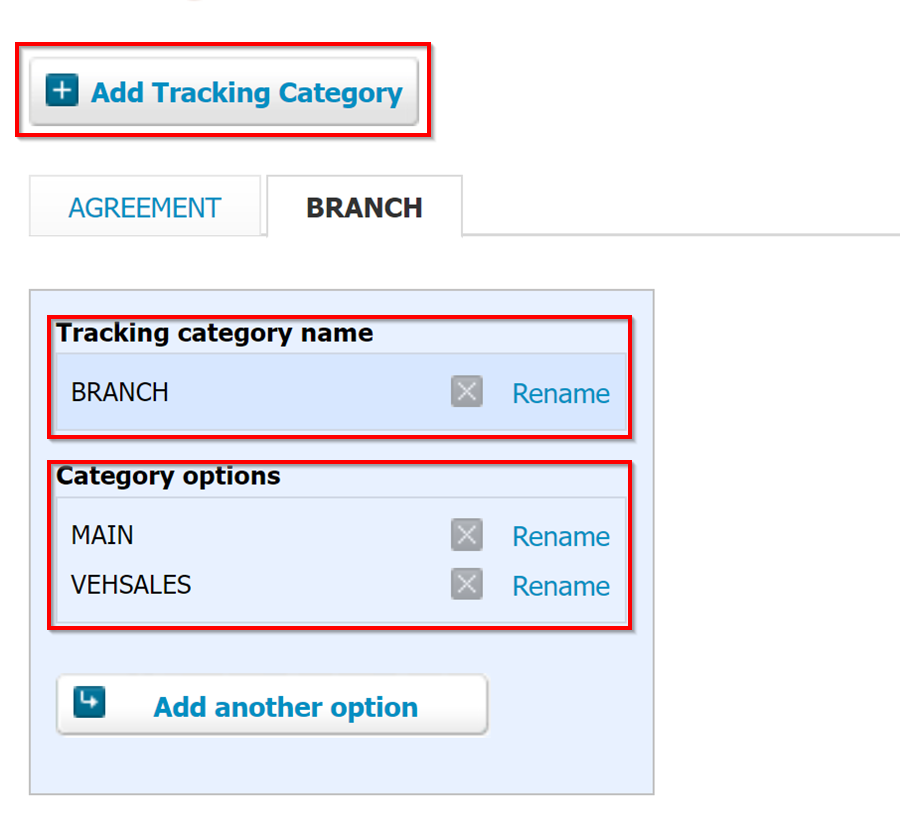
- The Tracking Categories will be added successfully, and you may now run the export as described above.
See Also
Accounting System Integrations
Video: Xero Integration in Garage Hive
How to Export to Your External Accountancy System
How to Import Your Exported Data Into Sage 50 Accounts