Branches
Branches are the locations where customers can book their vehicles online. The customer will have to select which branch they are booking into, before they can proceed to book. Here is how to setup the branches:
In the Online Booking Setup page:
-
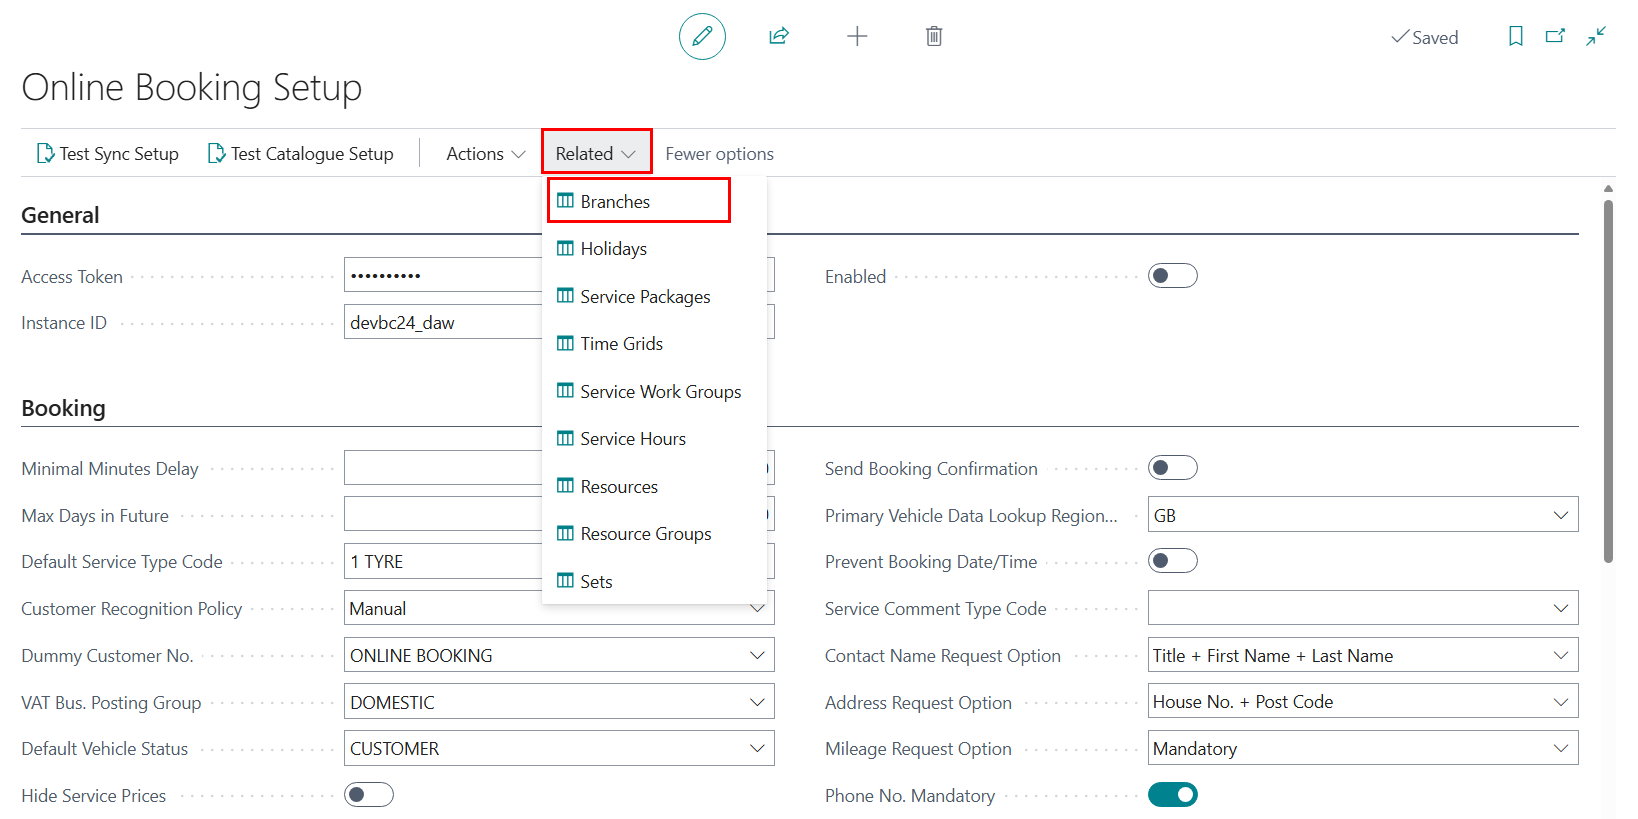
From the menu bar, choose More Options, then Related, and finally Branches. If More Options was previously selected, select Related right away; otherwise, Fewer Options will be available.
-
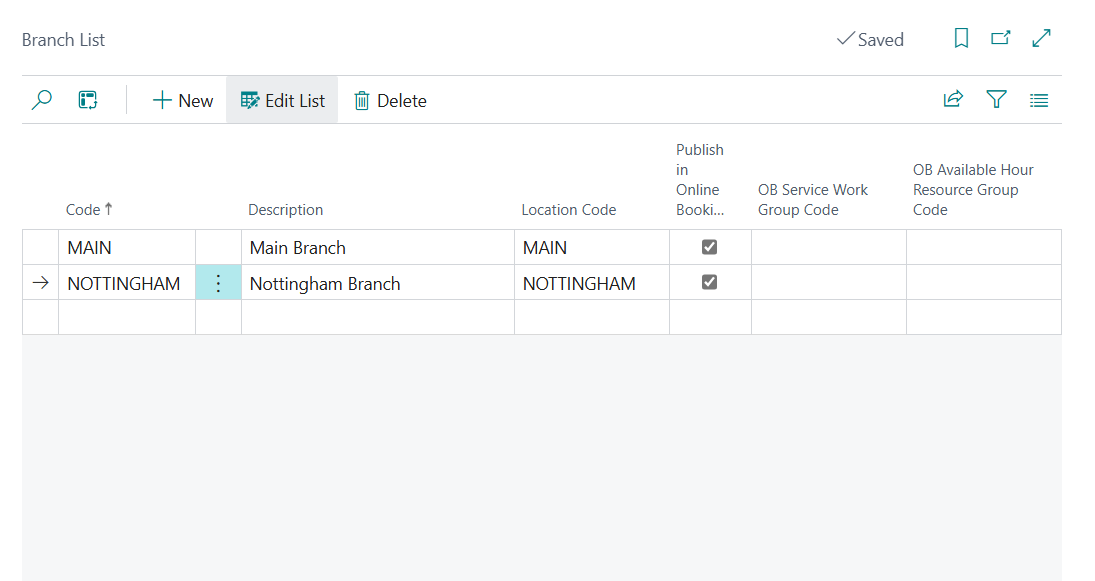
Rename the branch descriptions here the way you want them to appear in the online booking widget, and then enable the Publish Online Booking checkbox.
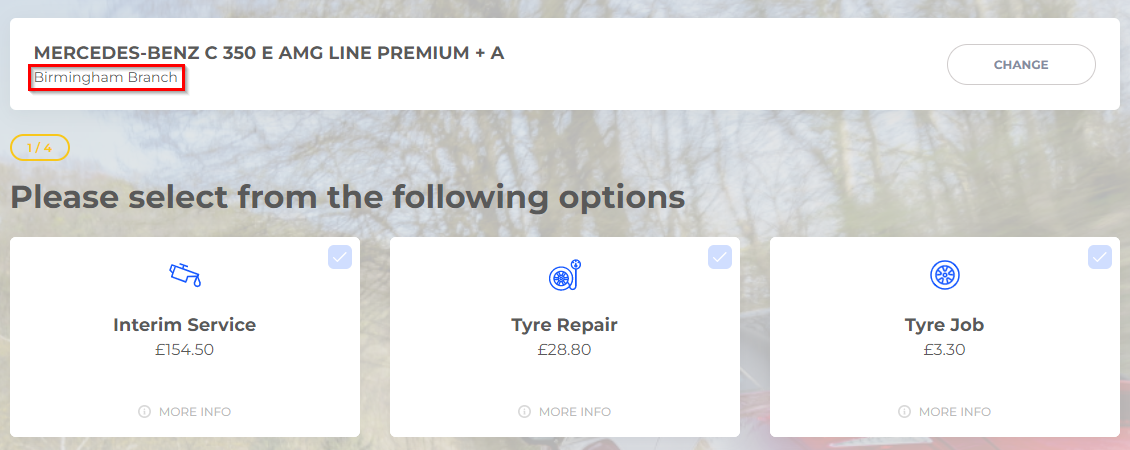
Appearance in the online booking page:
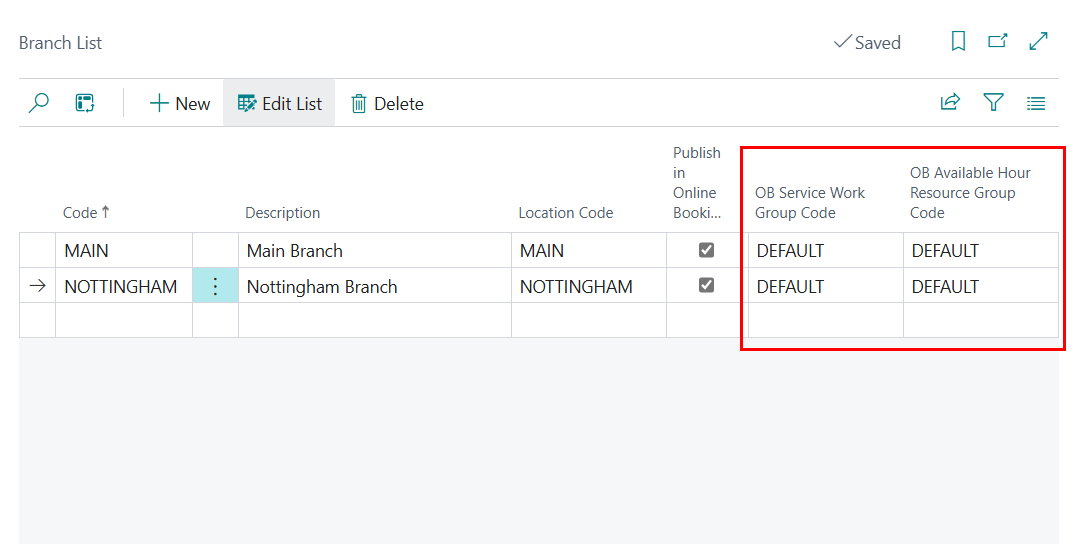
- Add the Online Booking (OB) Service Work Group Code field for each branch.
-
Add the Online Booking (OB) Available Hours Resource Group Code field. This setting ensures that online bookings adhere to the service schedule available hours. When the available hours for a given day at a branch are used up, no further bookings will be allowed for that day.
-
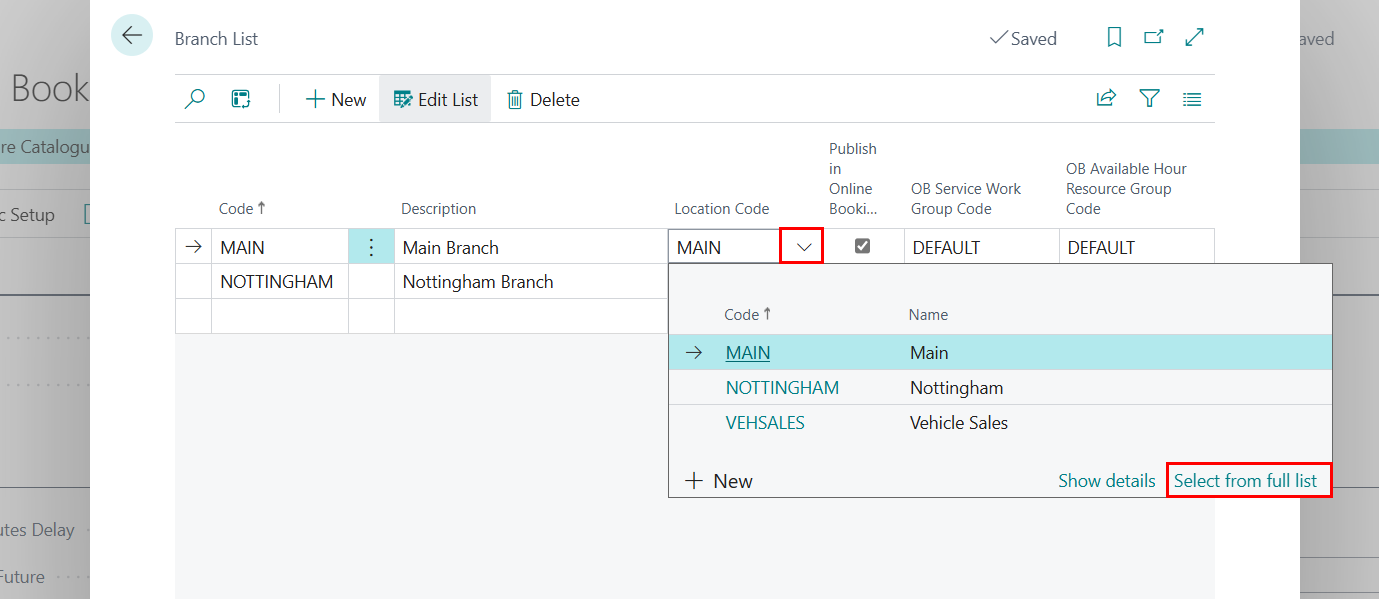
Then, click the down arrow to the right of the Location Code and click select from full list.
-
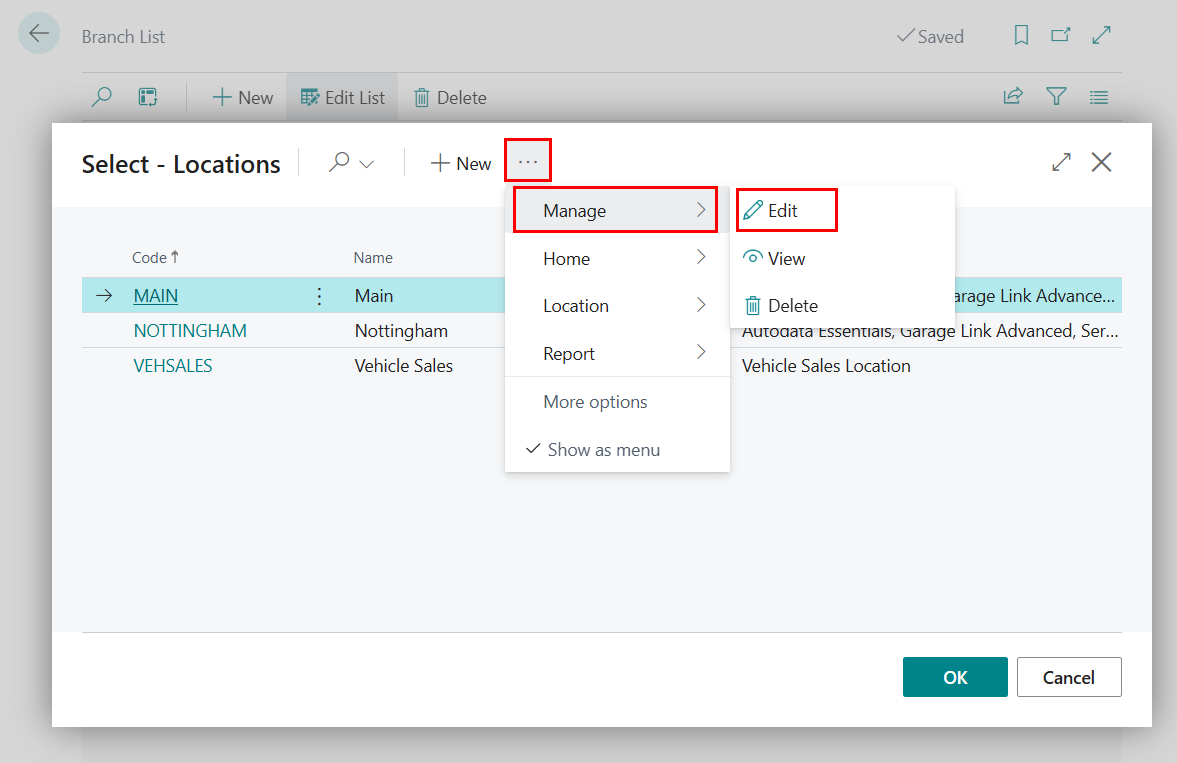
Click the ellipsis (…) in the menu bar, then select Manage, followed by Edit.
-
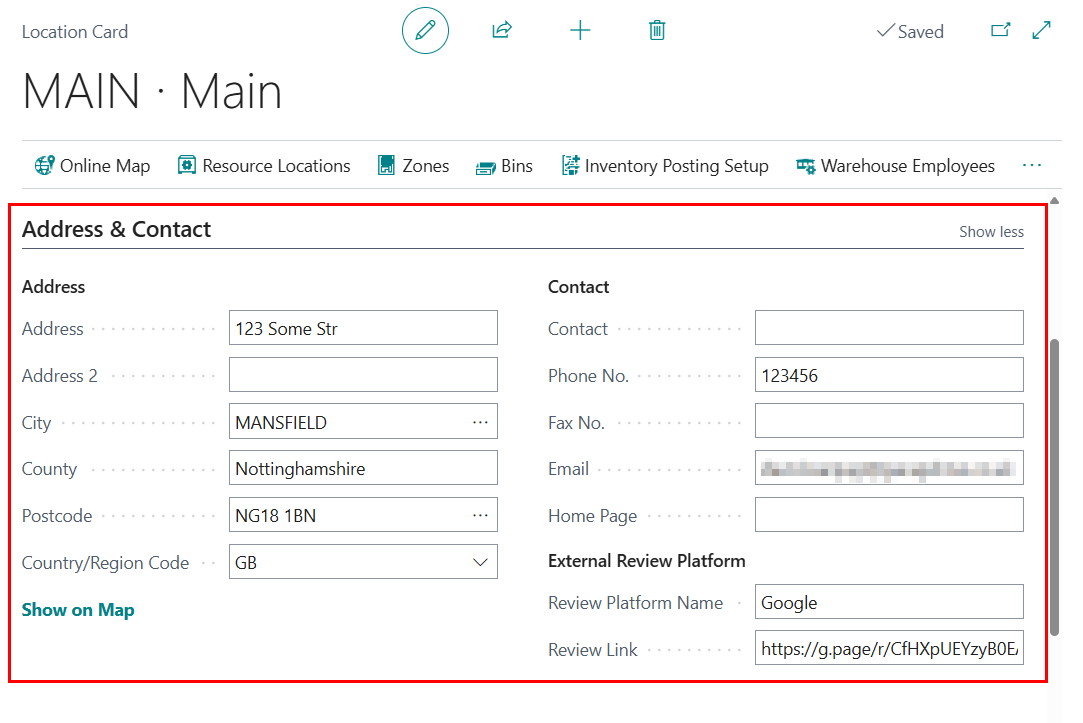
In the page that appears, ensure that the Address, Phone Number, and Email Address of that location is added. Repeat the process for each location you’ve added.
| Previous | Next Step |