Setting Up and Sending Internal Surveys
To enable the internal surveys, you need to call the Garage Hive Support Team, to help you in setting up the internal surveys. Here are contact details: Phone: - 02031461164, or Email: - help@garagehive.co.uk.
To Create a new internal survey:
- In the top-right corner, choose the
 icon, enter Surveys, and choose the related link.
 -
From the Surveys List page, choose the New action.
- You can manually enter the survey No. on the Survey Card page, or you can press the Tab or Enter key and the system will assign the survey No. from the number series.
-
Fill in the Description of the survey and select Internal as the Type of the survey.
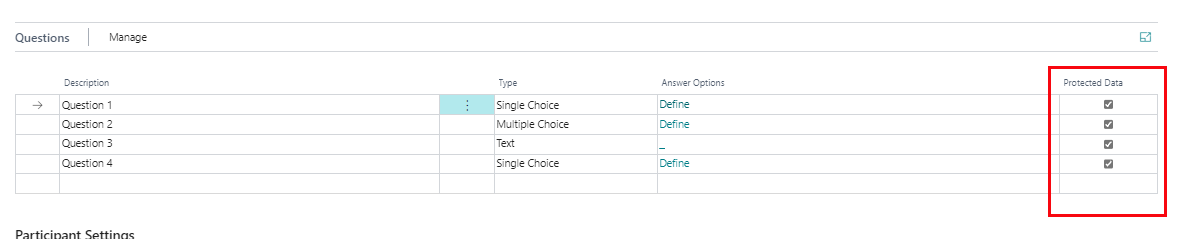
- Under the Questions sub-page, fill in the Description column with the survey questions, choose the response Type for the questions, and define the Answer Options.
- Single Choice refers to a scenario in which the respondent selects the answer from the available options but can only select answer.
- Multiple Choice refers to a scenario in which the respondent can select several answers from the available options.
- Text is where the respondent writes down the answer in free text.
- Gradient is where the respondent selects between 0 to 10 the likelihood of the answer, with 0 being not at all likely and 10 being extremely likely (it is an NPS style).
-
It is recommend using the Protected Data column on all internal surveys questions, as this will ensure that only the Owner User (the user who has created the survey) has access to the data collected.
- In the Participants Settings FastTab, choose whether the Owner User should receive the survey responses by selecting the Email Owner Results slider.
-
Select the Participant User Count number to choose which users will receive the survey, and specify the Internal Notification Method as SMS, email or both.
TipConsider using the **Anonymous** slider to increase the survey response rate, as respondents generally feel safer sharing more information anonymously.
- Select the Preview action to preview the survey and the Enable action to enable the survey.
-
If you are completely satisfied with the survey, select the Send Now action to send it to the participants.
- You can see previous surveys and their statuses by selecting Related and then Entries from the menu bar.
-
The survey statistics are provided in the FactBox on the right side. By selecting the icon in the upper-right corner, you can expand or collapse the Factbox pane.
See Also
Scheduling recurring internal surveys
Reviewing internal surveys
How to get started with external consultant survey
Exporting an internal survey
Importing an internal survey