In this article
Setting Up Payment by Garage Link for Dojo in Garage Hive
Garage Link for Dojo is a payment gateway that is used for online payments. To setup payment by Garage Link:
- In the top-right corner, choose the
 icon, enter Payment Gateways, and select the related link.
 -
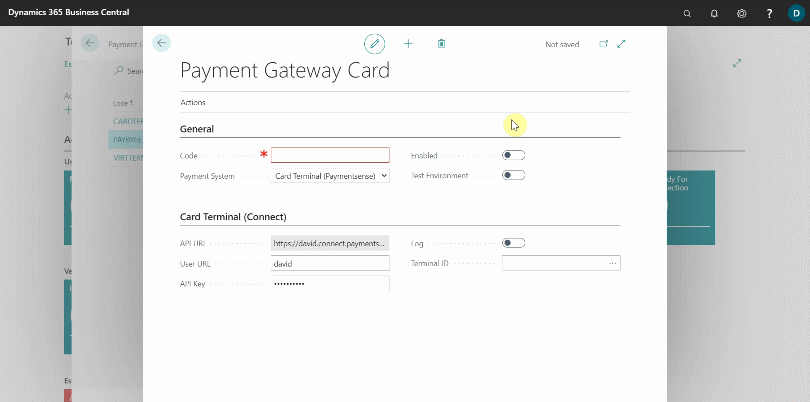
Select New from the Payment Gateways page to add a new payment method.
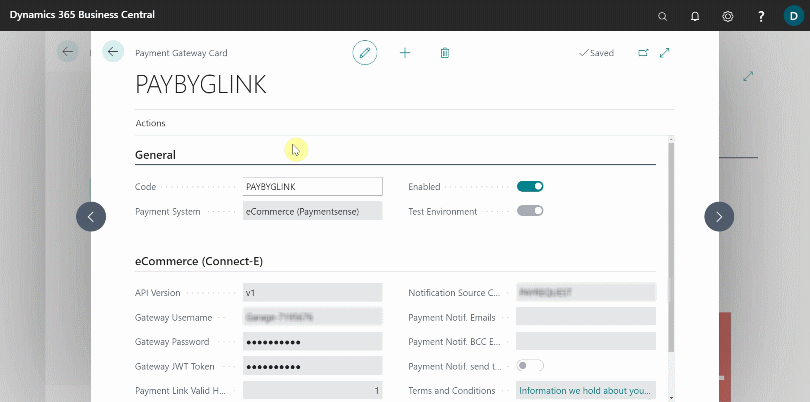
- In the General FastTab of the Payment Gateway Card, enter the payment method code; in this case, we’ll add PAYBYGLINK.
-
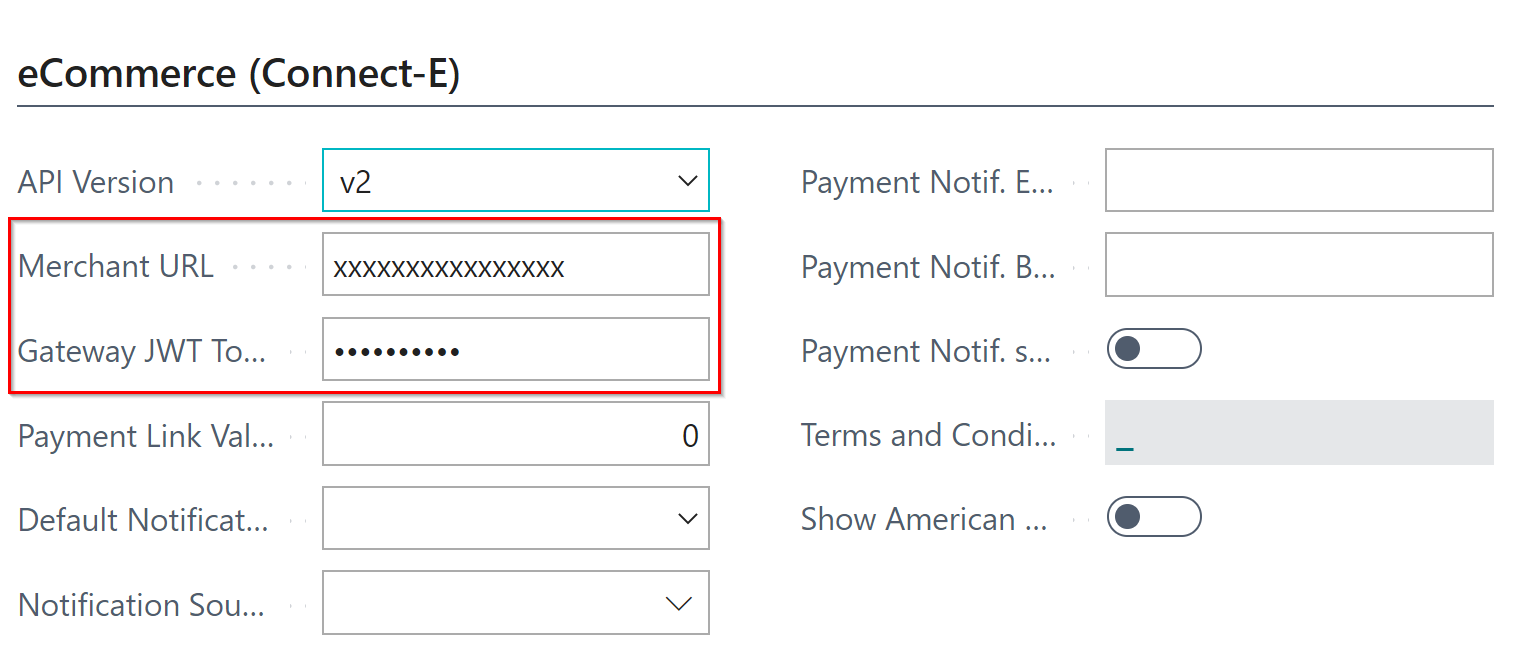
Select eCommerce (Paymentsense) in the Payment System field, and in the eCommerce (Connect-E) FastTab, select v2 in the API Version field.
-
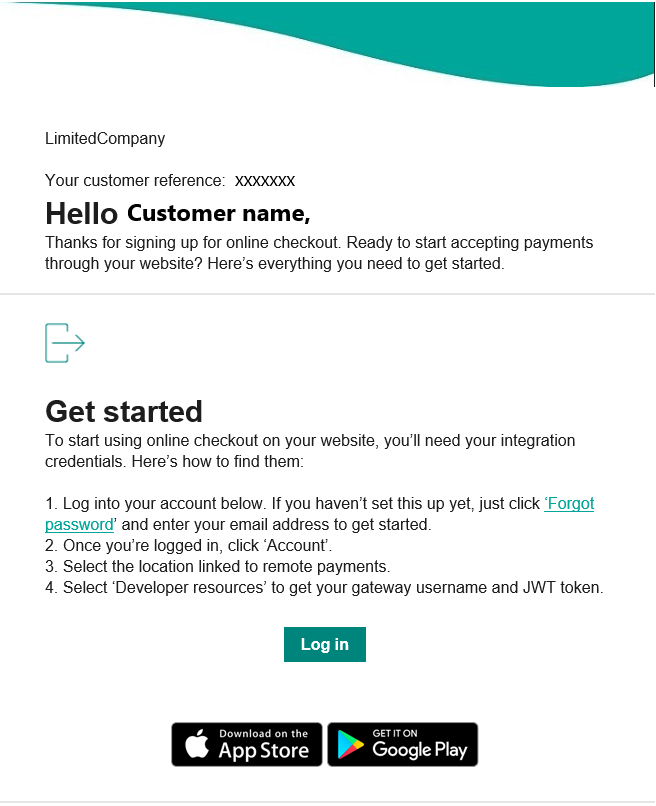
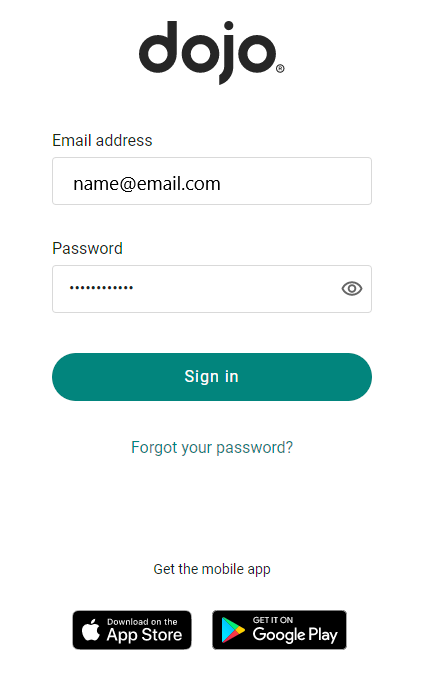
Open the email with the subject Set Up Online Checkout that was sent to you as a Dojo customer, and then Login to your account.
-
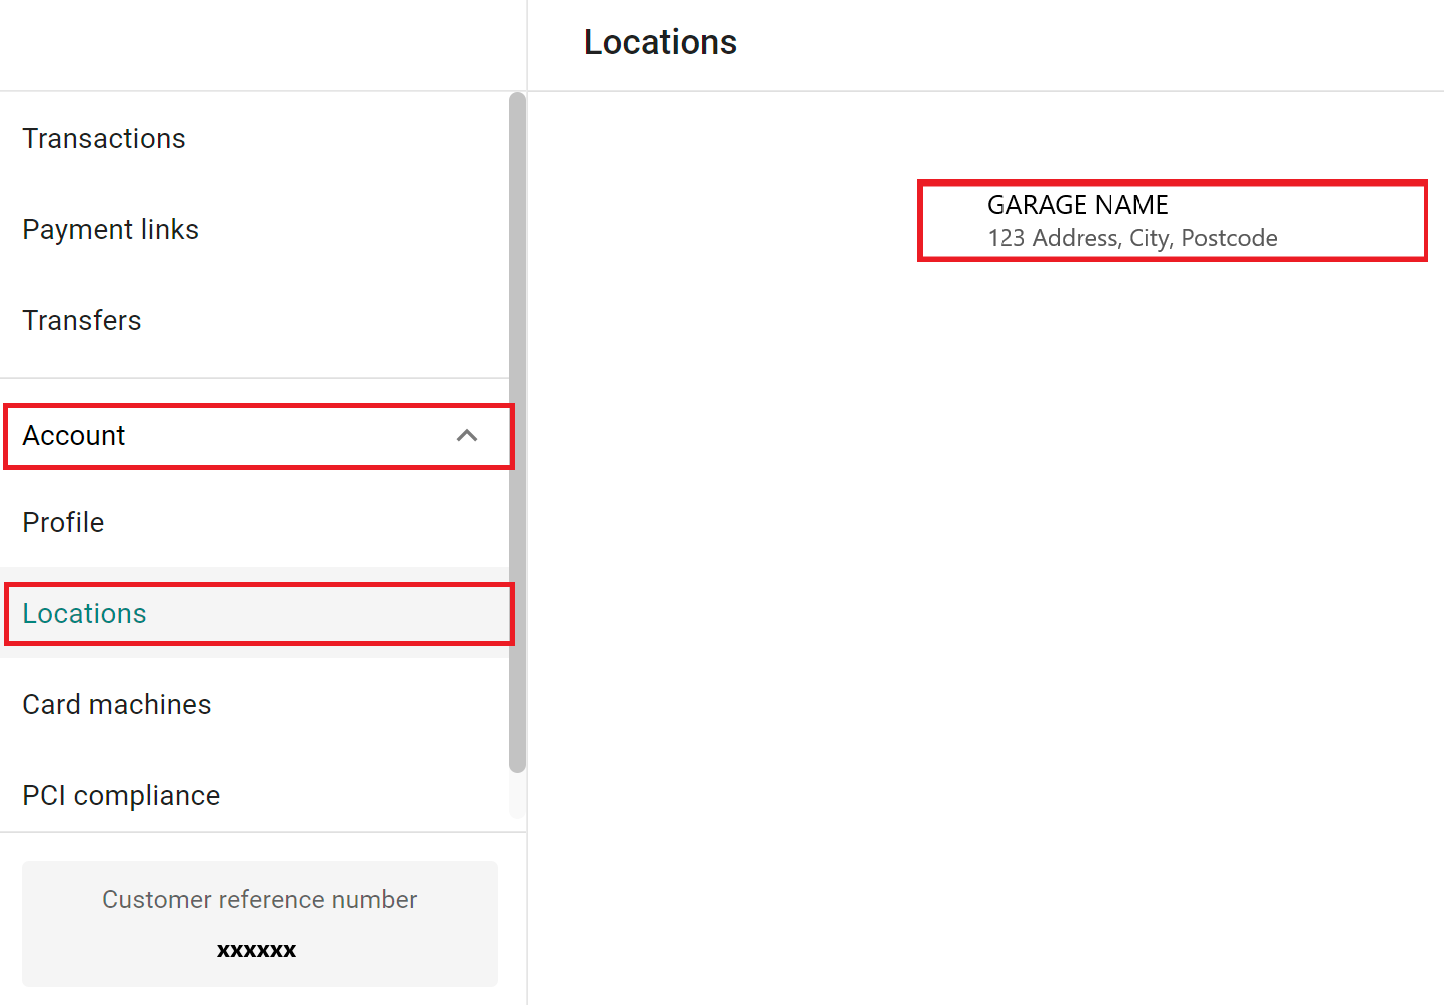
Select Account on the left-hand side of your account, followed by Locations. If you only have one location, select it in the main window; if you have multiple locations, scroll through them and select the location where you want to add the payment method. The location information will appear on the right-hand side.
-
Scroll down to Remote Payments in the Location Details section and click on the Website field.
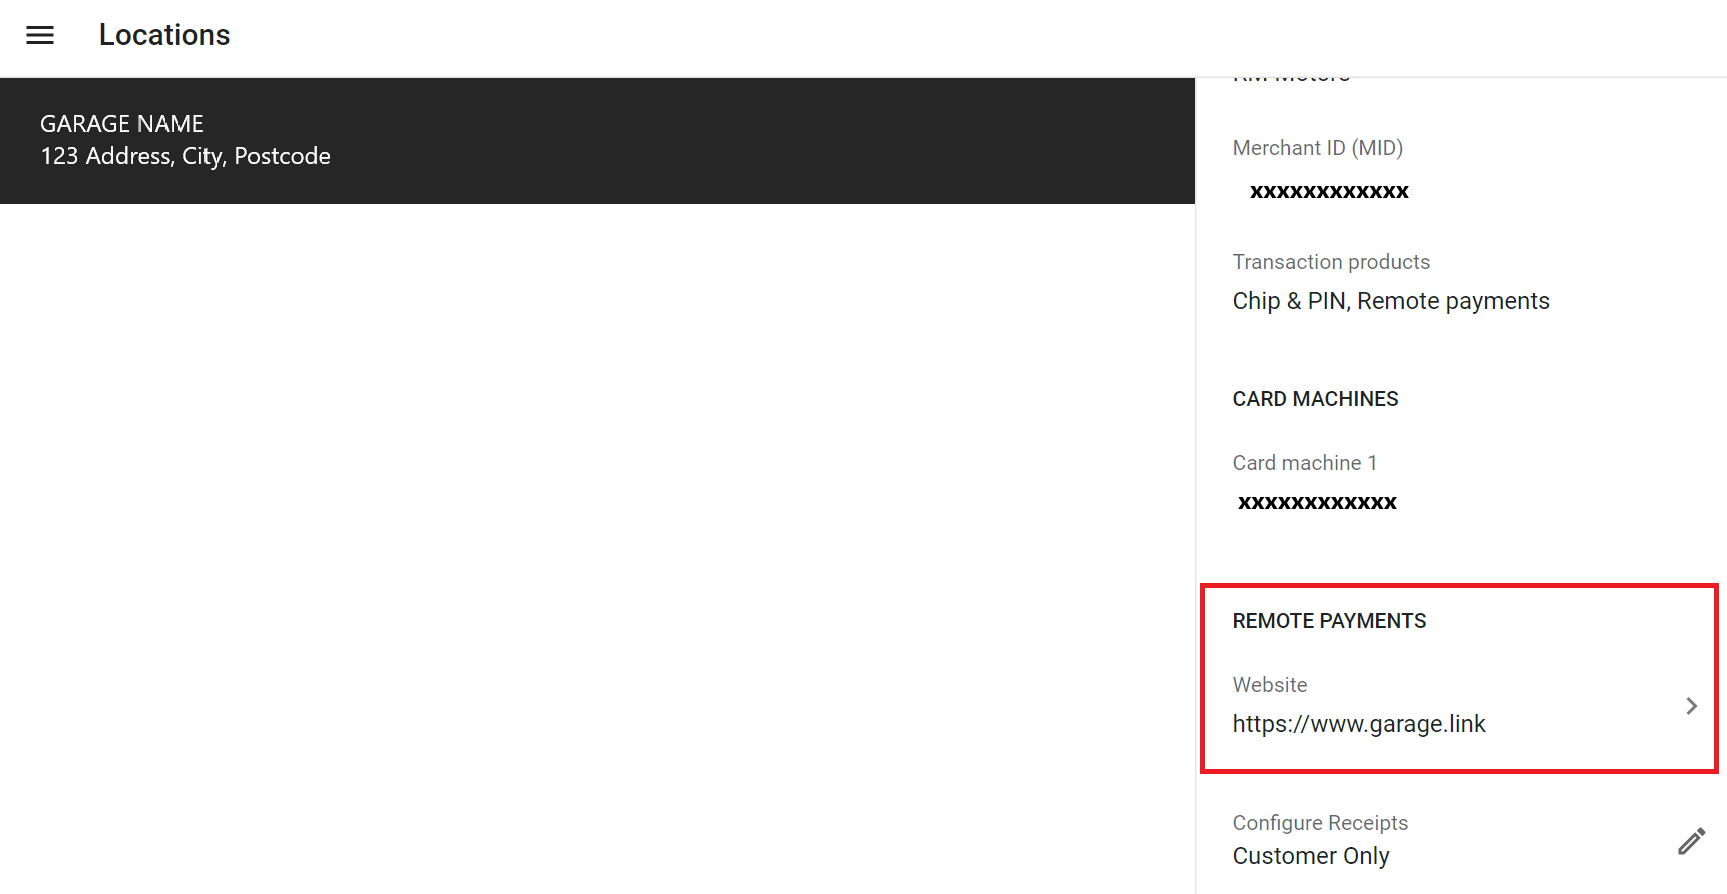
- Copy the Website Address from the page that appears and paste it into the Merchant URL in the Garage Hive’s Payment Gateway Card.
-
Then, copy the JWT Token and paste it in the Gateway JWT Token field of the Garage Hive’s Payment Gateway Card.

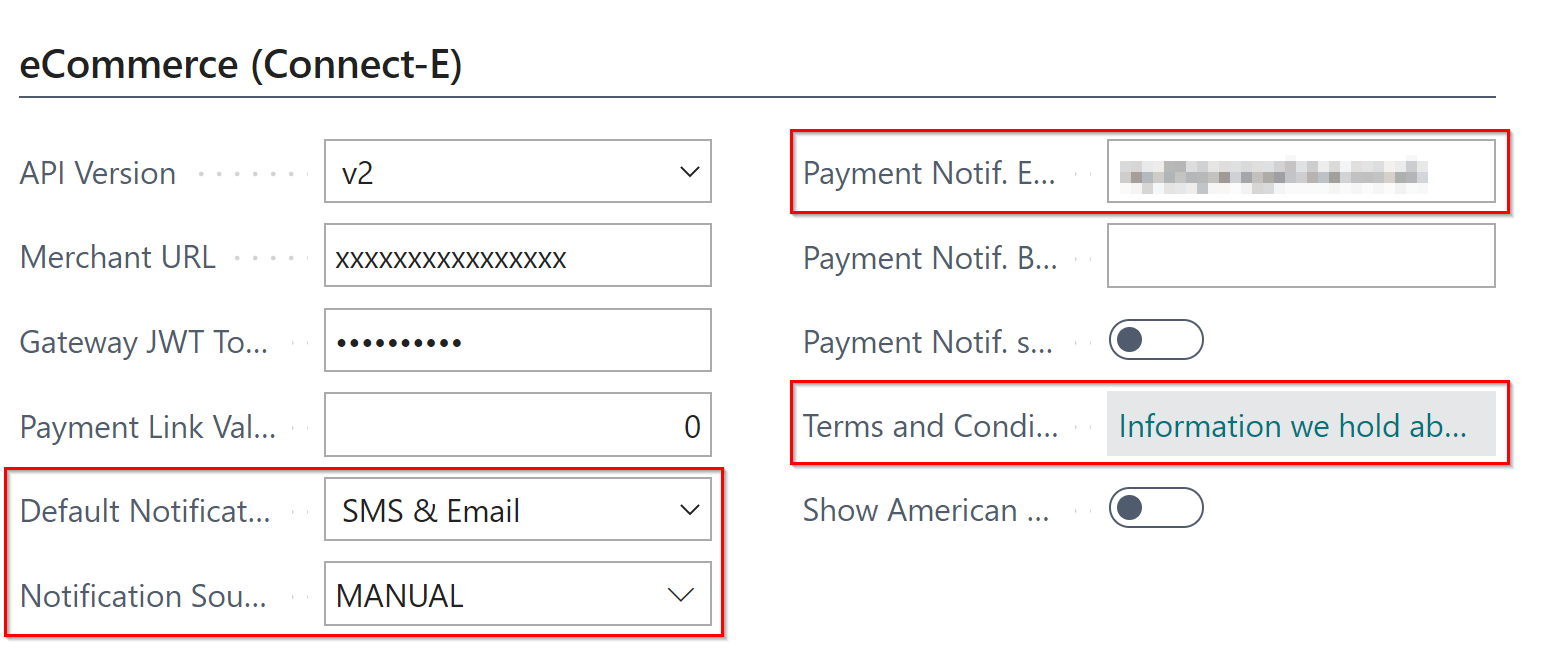
- Choose SMS and Email as the Default Notification Type and Manual as the Notification Source Code from the Payment Gateway Card.
- You can add internal user email address(es) in the Payment Notification Emails that the system will use to notify the user(s) when the customer makes a payment.
-
Add the company’s terms and conditions for the online payments in the Terms and Conditions field; Privacy and Refund policies must be included.
-
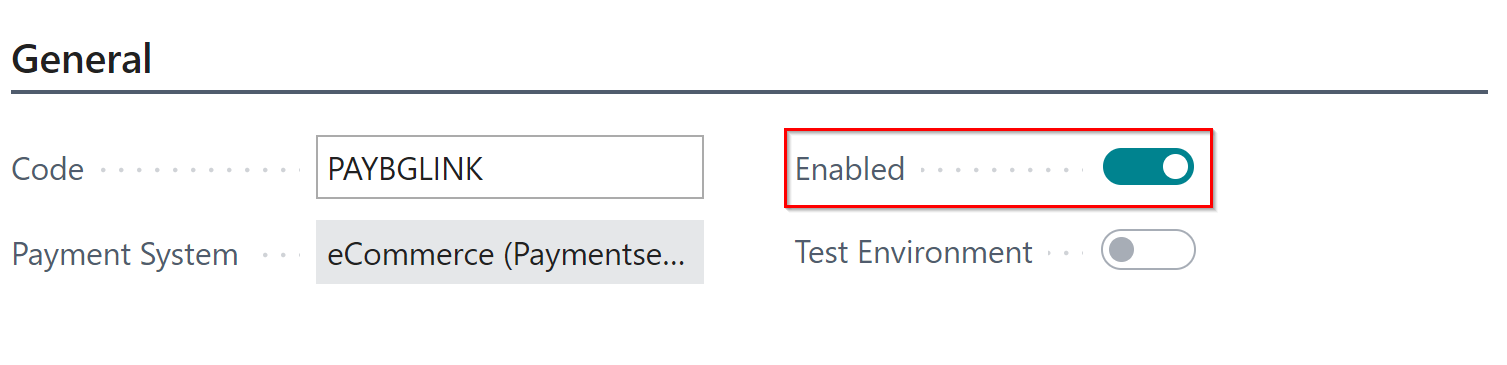
To enable the payment method, select the Enabled slider.
-
You can preview the payment link by selecting Open Preview Link from the menu bar, in the Payment Gateway Card.
- Click the Back arrow to exit the Payment Gateway Card and save your changes. Your new payment method is now active.
Testing the Garage Link setup
Once configured, it is recommended that you run a £0.01 transaction as a test. Create a new Jobsheet with your personal information, add a or consumable or a non-inventory item, and then proceed to the Take Payment screen.
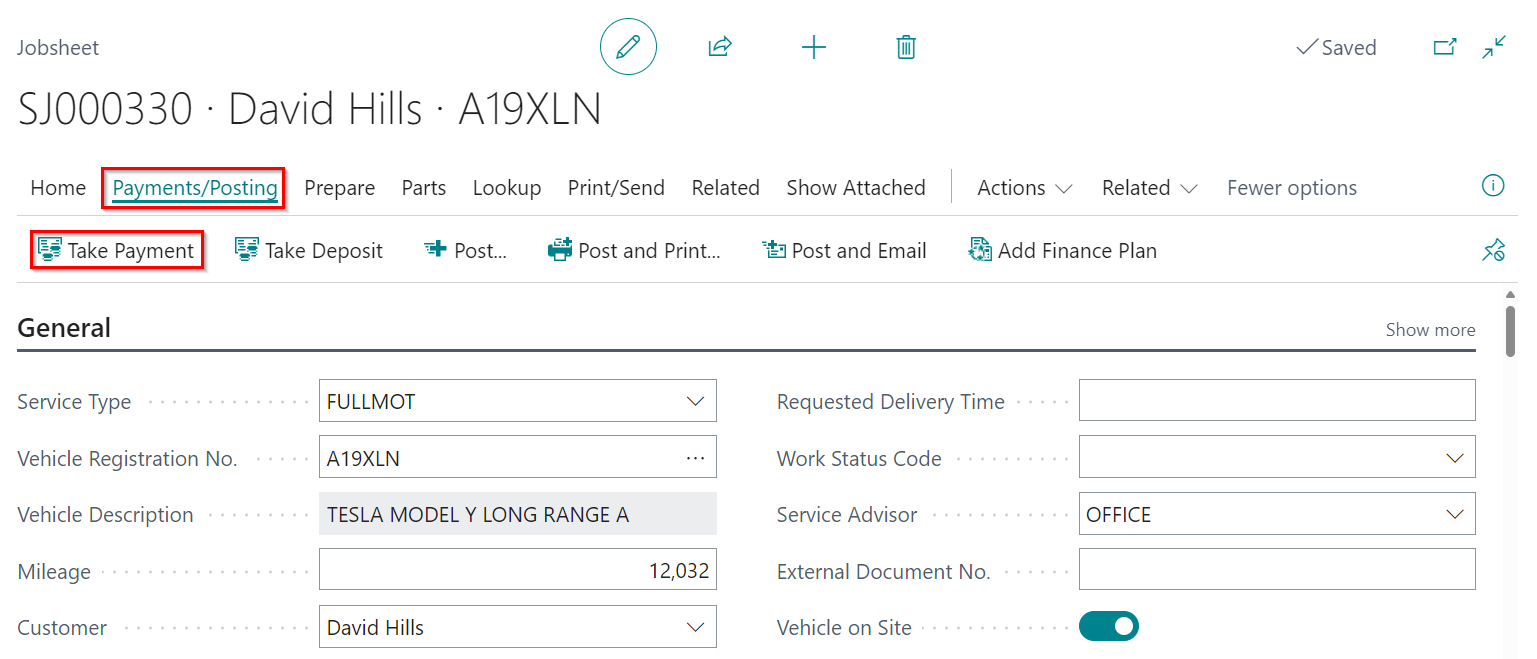
Once on the Take Payment screen, enter the amount in the Pay By Garage Link line, and select Pay By Garage Link from the menu bar.

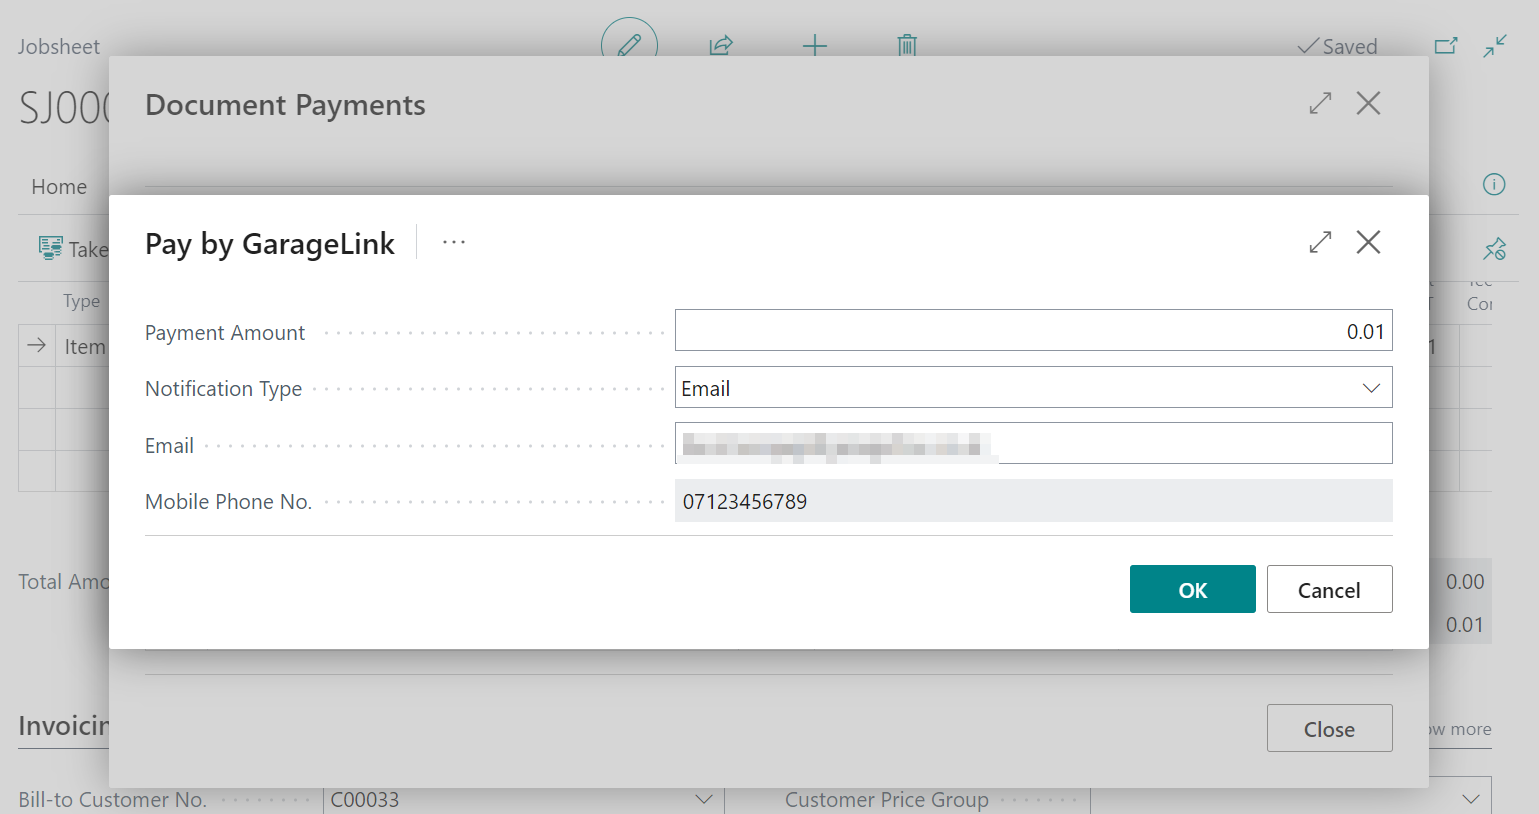
Make sure the Payment Amount value is set to £0.01, select the notification type and enter your details. Once you receive the test SMS/Email please follow the link and complete the test payment.
You can check the status of the payment in Garage Hive by selecting the Payment Gateway Entries from the action bar.
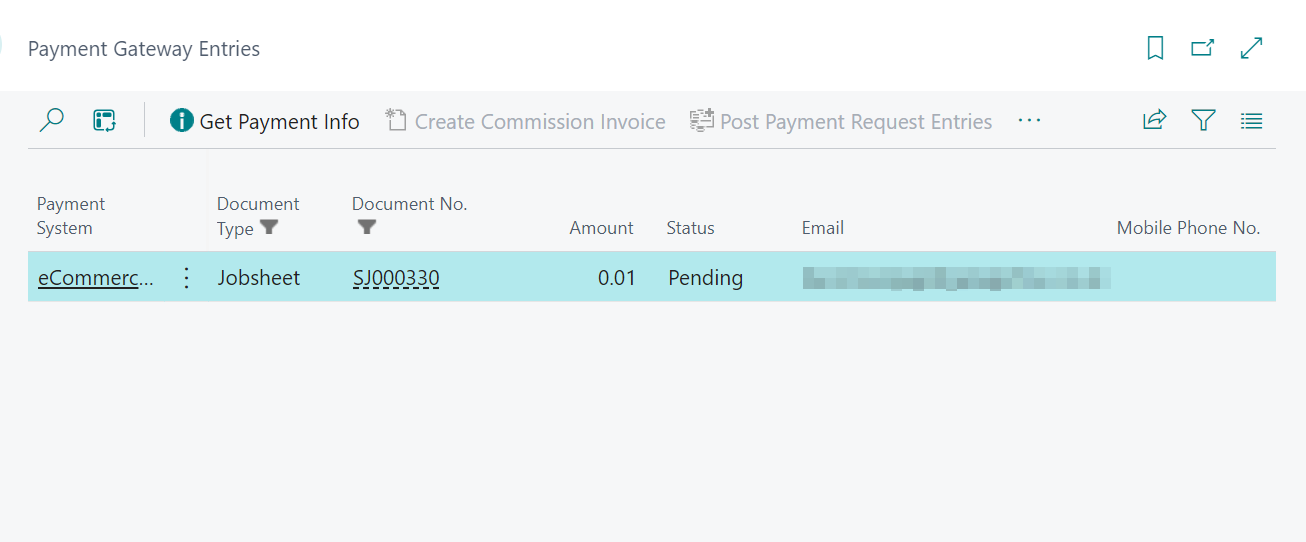
You should also receive an email confirming the payment has been received. Once you’ve received payment for this job, post it with the penny on it.
See Also
Taking a Payment and Posting a Jobsheet
How to Use Humm Financing
Setting Up Payment by Card Terminal
How to Set Card Terminals Into Integration Mode
Generating Paymentsense Card Machine End of Day, X Balance and Z Balance Report