Viewing and Adding Servicing Intervals Data
Servicing intervals are the recommended number of months or miles between vehicle services, whichever comes first. Autodata integration provides necessary data for vehicle servicing.
In this article
Auto Selection of the Vehicle
Auto selection from Autodata, is available for the Great Britain, Northern Ireland and Ireland Markets. To view and add the data:
-
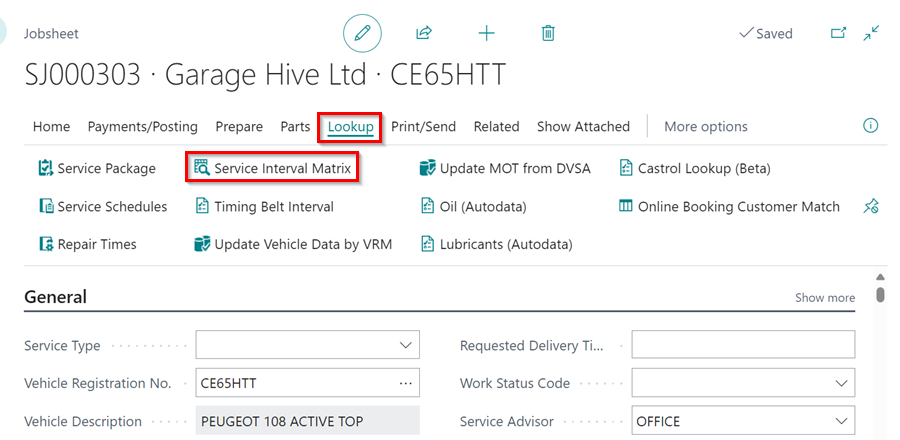
Open the document (can be a Jobsheet, Estimate, or Vehicle Inspection Estimate) for the vehicle and click on Lookup followed by Service Interval Matrix in the menu bar.
-
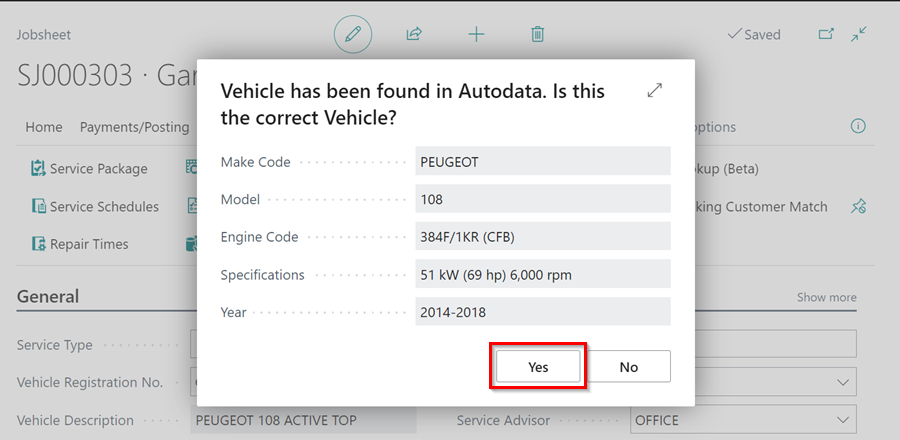
When the pop-up window opens, confirm the vehicle details by clicking Yes. If the details don’t match, click No and select the correct vehicle.
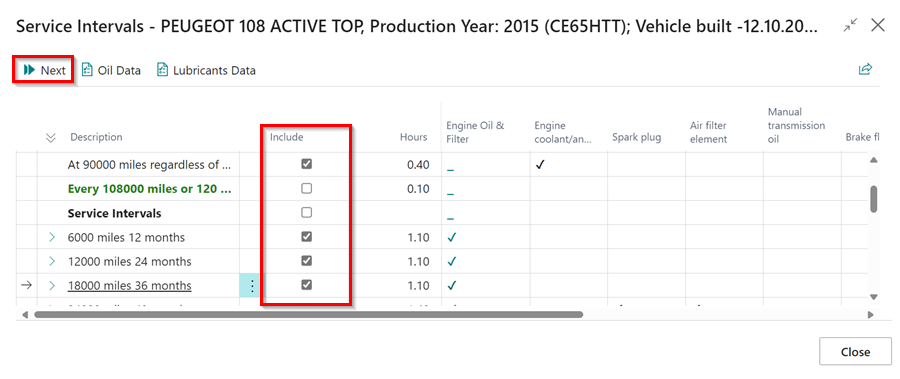
- The service intervals are presented in a grid format with miles and months on the left and items to be changed at the top. A tick at the intersection indicates what needs to be changed and when it needs to be changed.
-
Click the tick box in the Include column to select the items that need to be added to the document. Then, click Next from the menu bar.
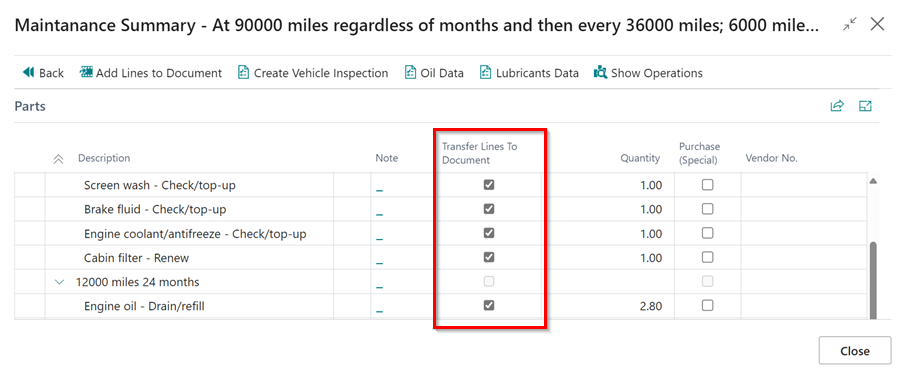
- In the next window, you can deselect the Transfer Lines to Document checkbox to exclude some lines from the transfer (if you don’t want to include everything).
-
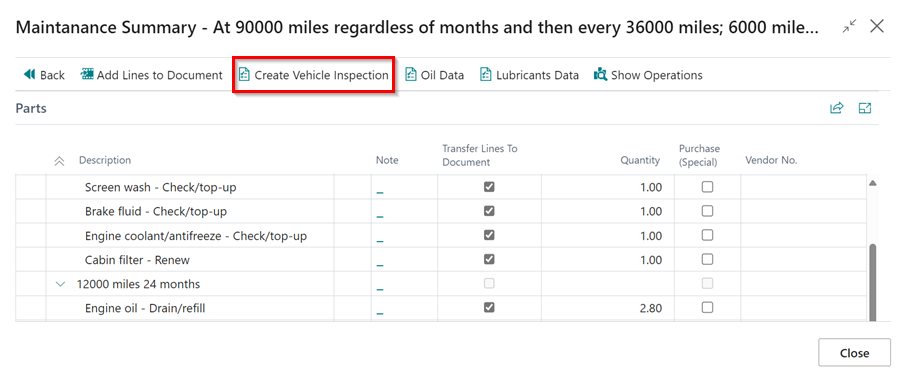
The Create Vehicle Inspection option is available only when accessed through a Jobsheet; it is not available when working from an estimate.
-
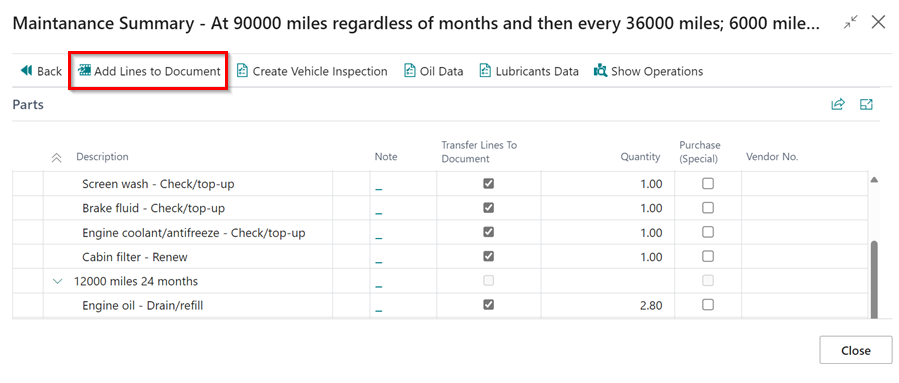
Click Add Lines to Document in the menu bar to add lines to the document. The lines will be grouped under the Interval Change heading.
-
Another option is to create a vehicle inspection by clicking on Create Vehicle Inspection from the menu bar. This initiates the process of confirming everything and creating a quotation for the customer.
Manual Selection of the Vehicle
Manual selection can be used to get data from Autodata for any vehicle and is not specific to any market. To view and add the data using manual selection:
-
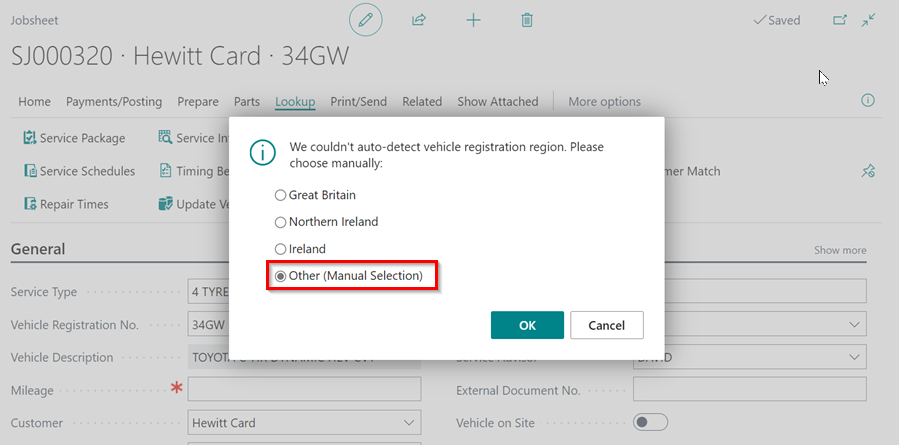
If the vehicle registration is not automatically detected, a pop-up window will appear. Select Other and then click OK to choose the vehicle make and model from Autodata.
-
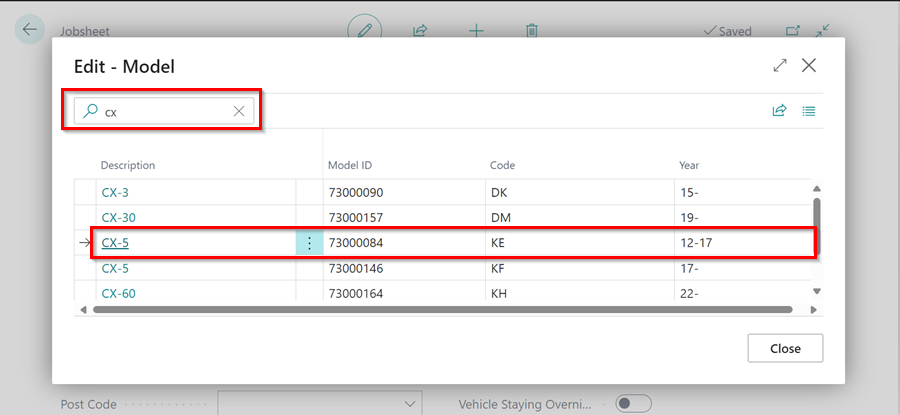
In the window that opens, search for the Model of the vehicle and click on the Description to select it.
-
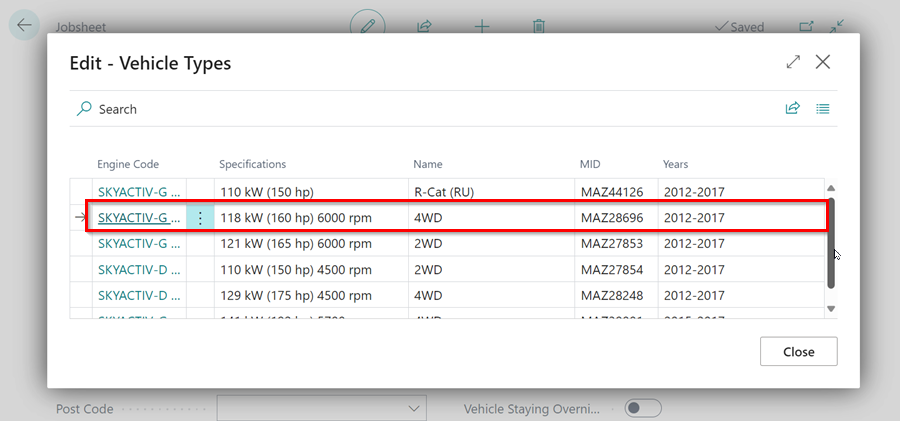
After that, you should select the Vehicle Type based on the Engine Code of the vehicle in the next window that opens.
-
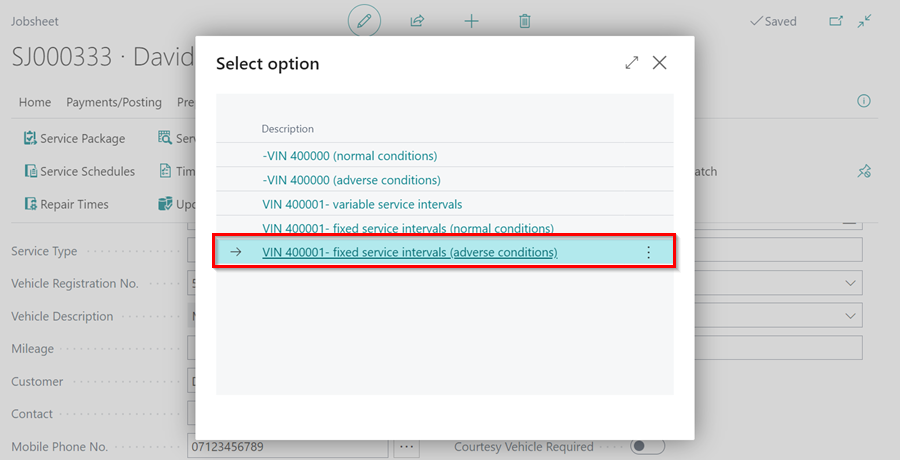
Then, select the appropriate option for the vehicle.
-
Finally, follow the steps from step number 3 in the auto selection part to complete the process.
See Also
Adding repair times
Checking vehicle lubricant’s data
Checking vehicle engine oil data
Checking and adding servicing intervals and repair times using engine code
How to use timing belt intervals
Autodata labour time adjustments
Autodata Seamless Integration
Viewing the Tyre Pressure Monitoring System (TPMS) Test