In this article
- Creating a Vehicle Inspection Checklist from Autodata through Auto Selection of Vehicle
- Creating a Vehicle Inspection Checklist from Autodata through Manual Selection of Vehicle
- Add Custom Checklist Templates at the bottom of Autodata Checklists
Creating a Vehicle Inspection Checklist from Autodata through Auto Selection of Vehicle
When using the Autodata Service Interval Matrix, you may create a Vehicle Inspection Checklist with the data from Autodata, allowing you to generate a quotation for the customer.
-
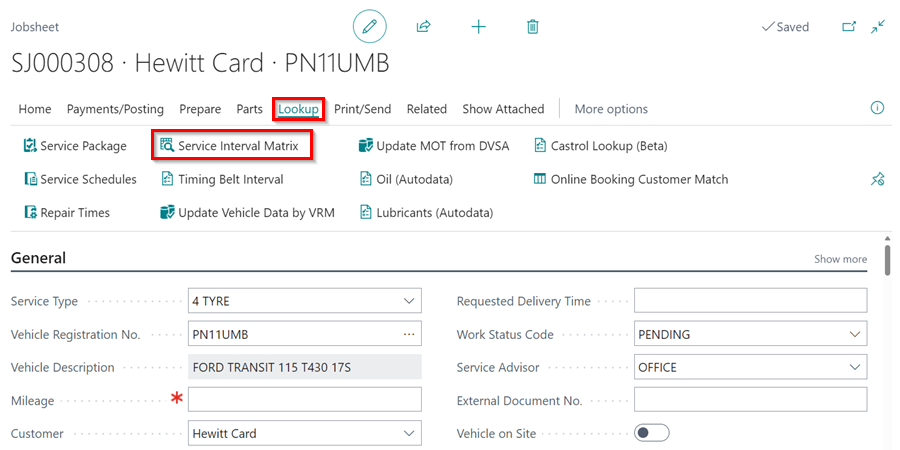
Select Lookup from the menu bar of the document you’re working on, then Service Interval Matrix. In the pop-up notification, click Yes.
-
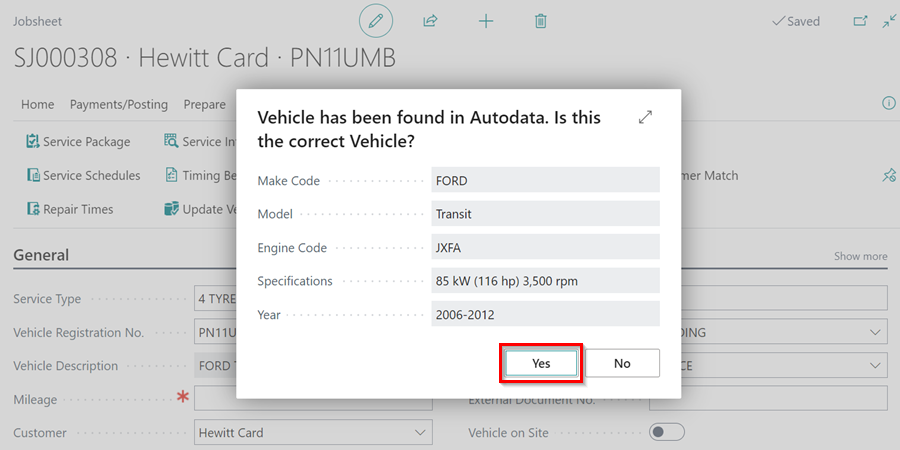
When the pop-up window opens, confirm the vehicle details by clicking Yes. If the details don’t match, click No and select the correct vehicle.
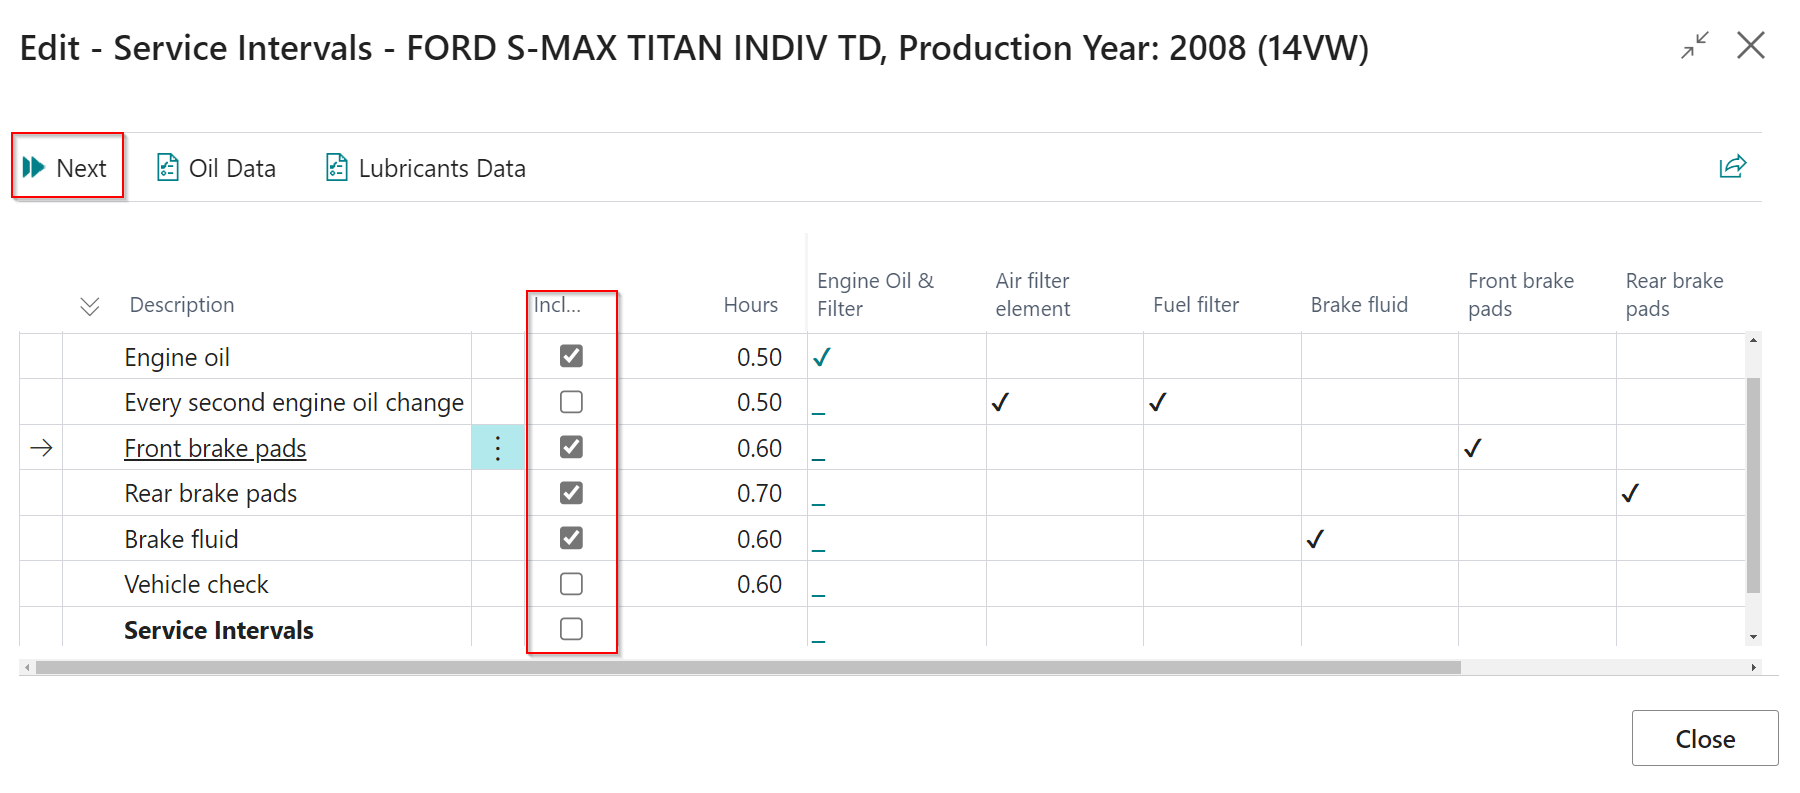
- In the Service Intervals page, check the Include checkbox next to the Service Times and Service Intervals you want to include.
-
From the menu bar, select Next.
-
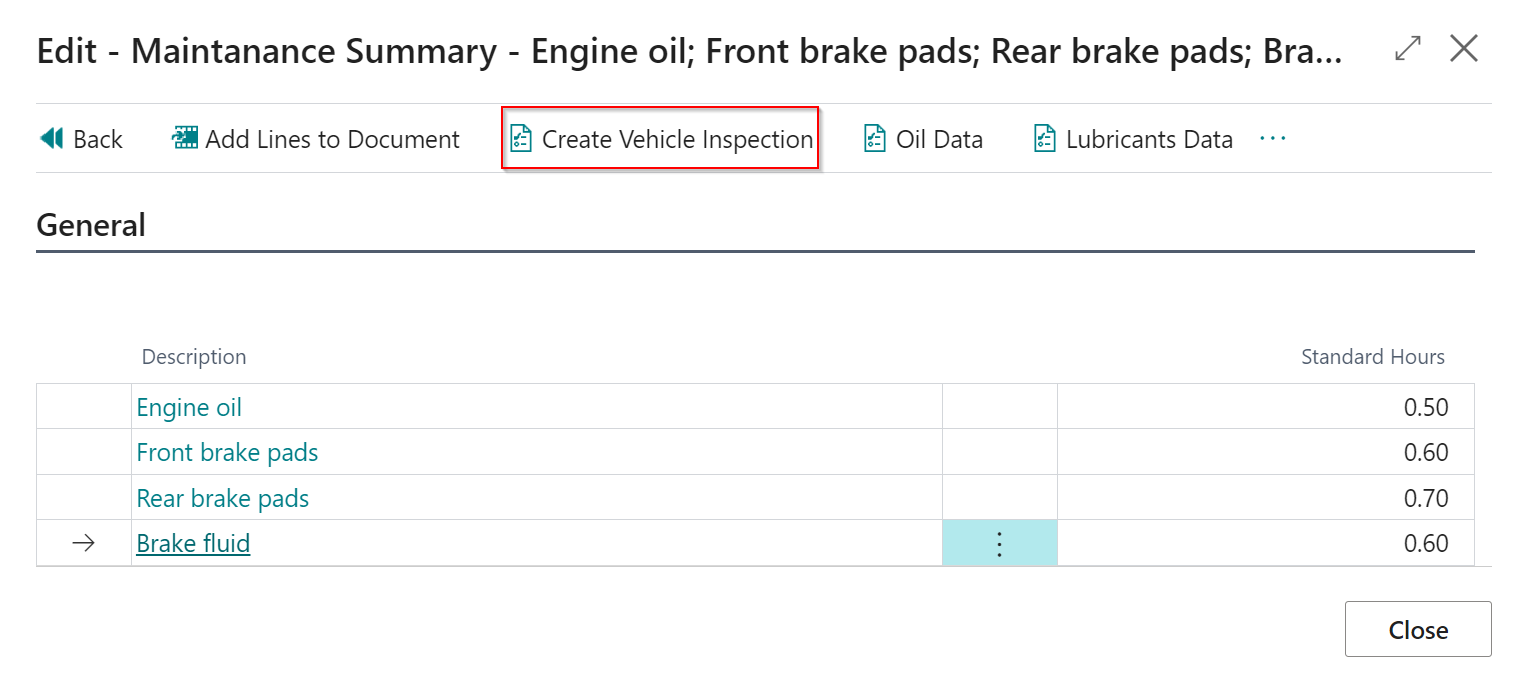
Select Create Vehicle Inspection from the menu bar on the page that opens.
-
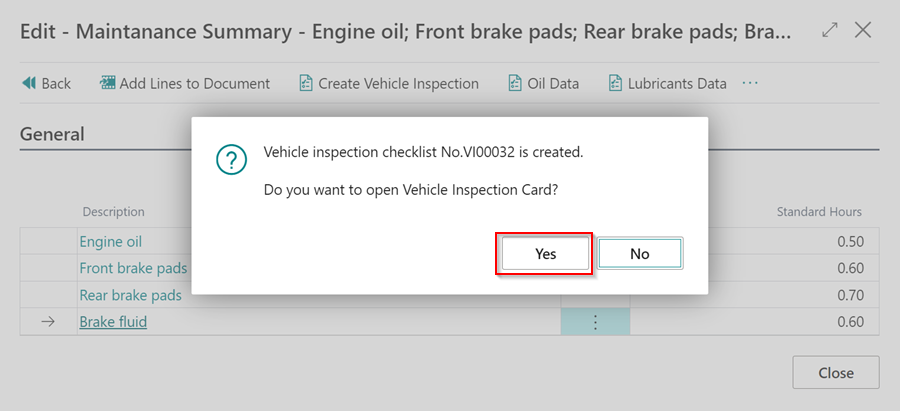
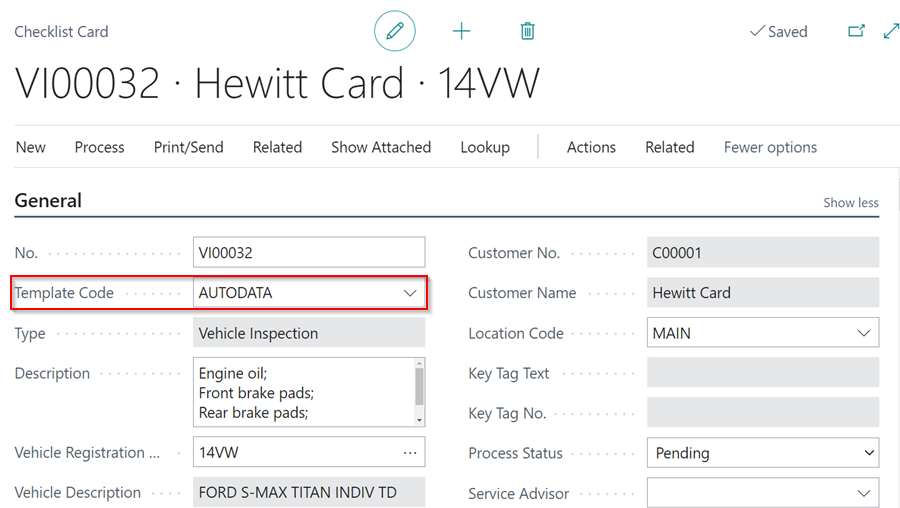
There will be a Vehicle Inspection Checklist created, with the template AutoData.
-
To open it, click Yes on the pop-up notification.
Creating a Vehicle Inspection Checklist from Autodata through Manual Selection of Vehicle
Manual selection can be used to get data from Autodata for any vehicle and is not specific to any market. To view and add the data using manual selection:
-
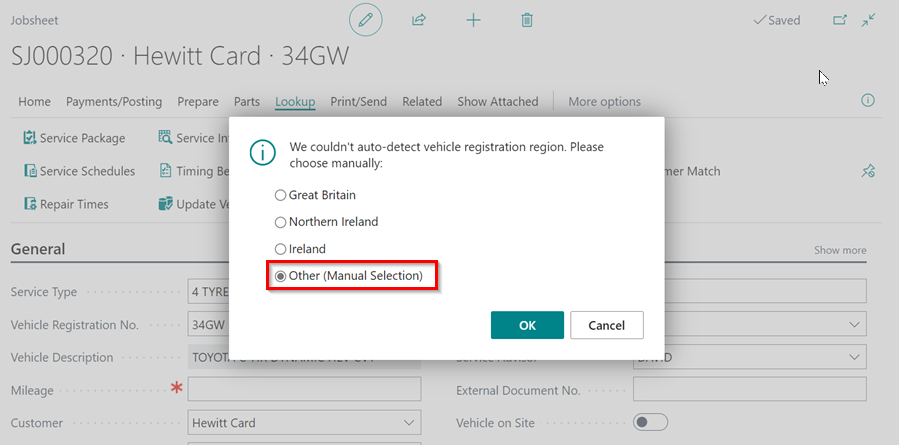
If the vehicle registration is not automatically detected, a pop-up window will appear. Select Other and then click OK to choose the vehicle make and model from Autodata.
-
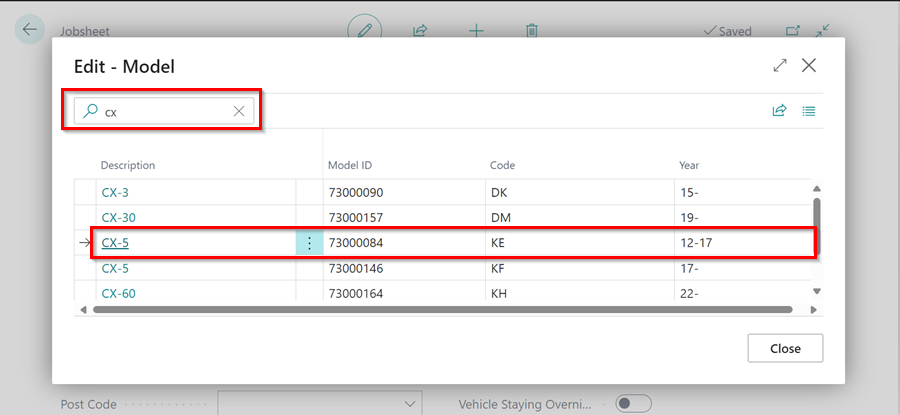
In the window that opens, search for the Model of the vehicle and click on the Description to select it.
-
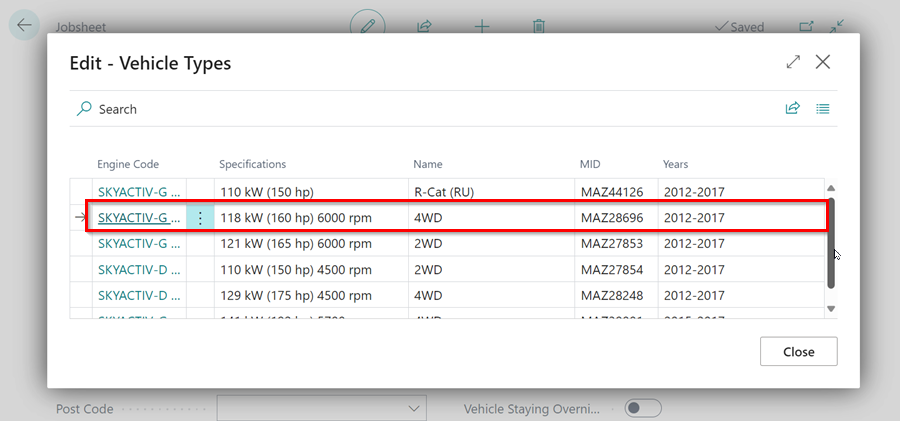
After that, you should select the Vehicle Type based on the Engine Code of the vehicle in the next window that opens.
-
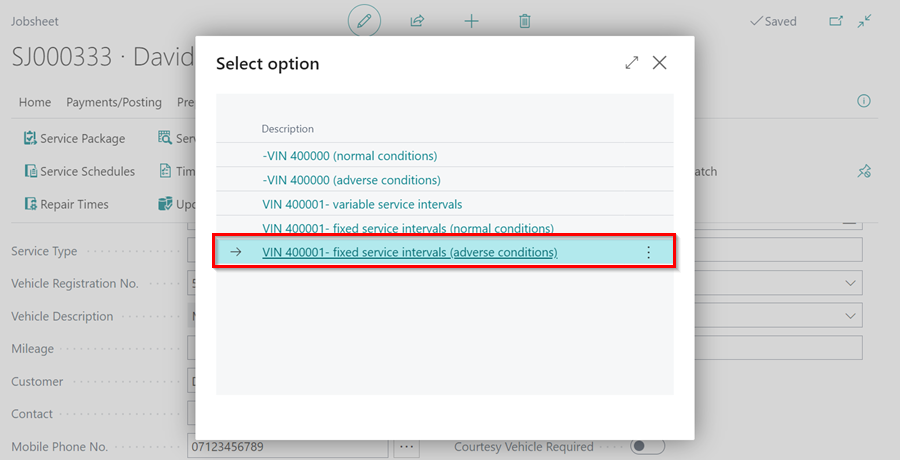
Then, select the appropriate option for the vehicle.
-
Finally, follow the steps from step number 3 in the auto selection part to complete the process.
Add Custom Checklist Templates at the bottom of Autodata Checklists.
-
When you want to add an additional Checklist template for each Checklist you create, in the top right corner, choose the
 icon, enter Autodata Setup and select the related link.
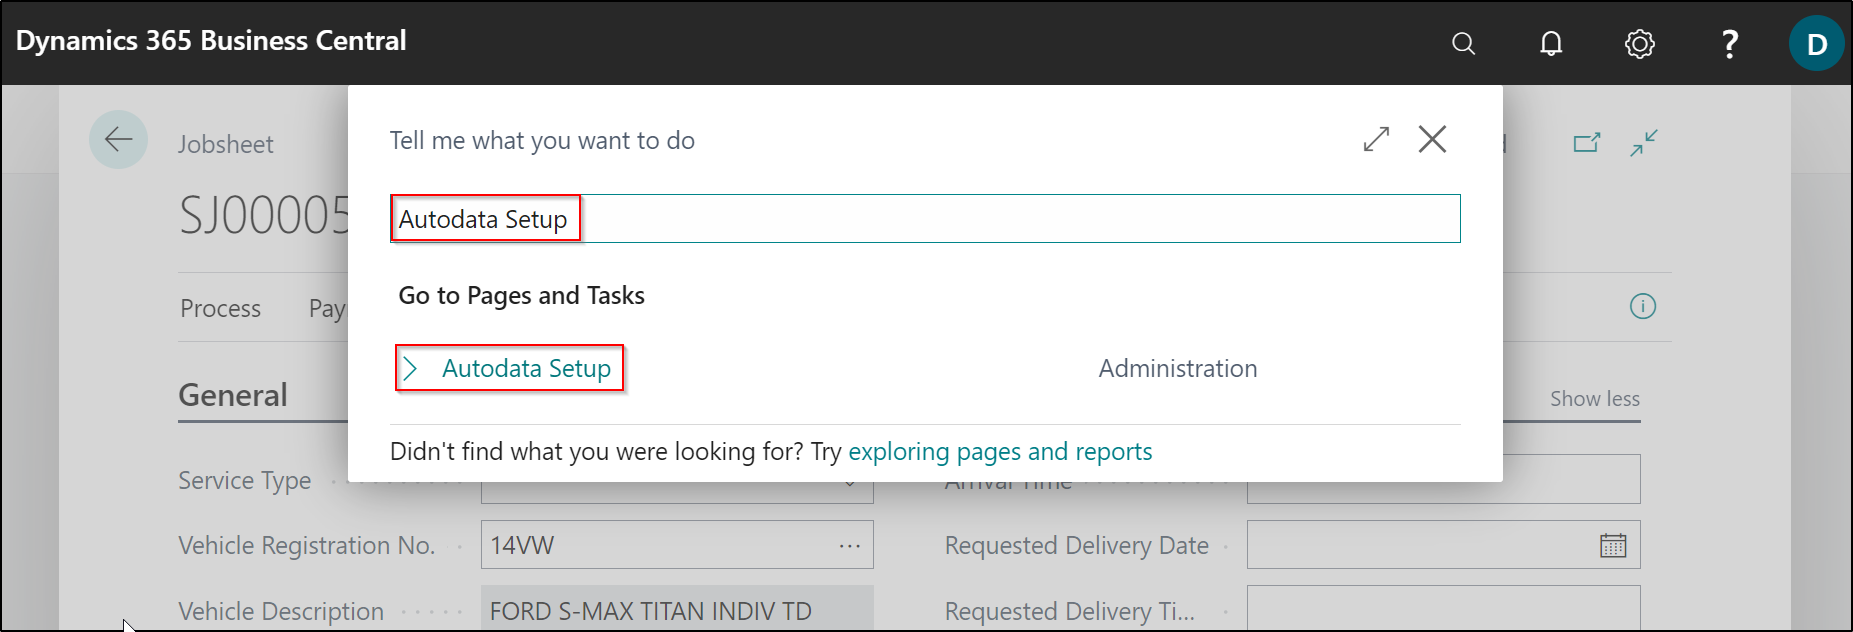
-
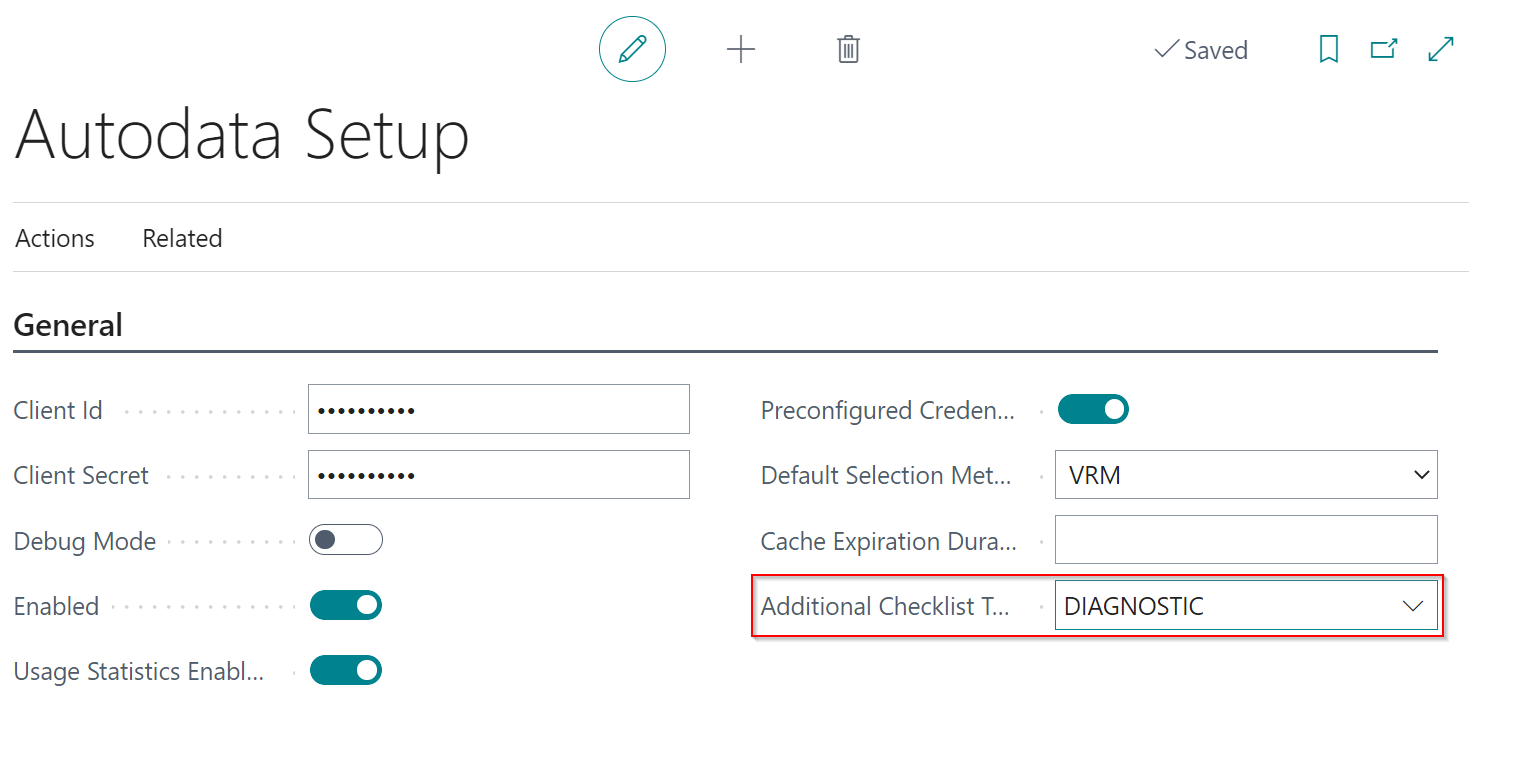
Go to the Additional Checklist Templ. Code field and choose the template to use for all Autodata checklists. Close the Autodata Setup page.
-
If you now create a Checklist from Autodata, it will include the additional template checklist alongside the one from Autodata.